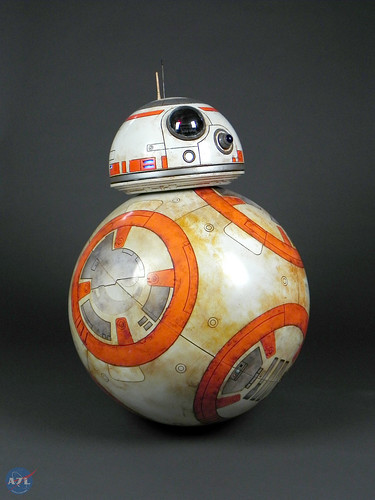
BB-8 was a bit of a reluctant project for me. During the lead up to The Force Awakens I was busy finishing up my R2-D2 and by October I was already starting to work on Mark Watney from The Martian. However, a few components were undergoing runs when the movie came out, and seeing how the project would be a fun engineering challenge I started to work on my own BB-8.
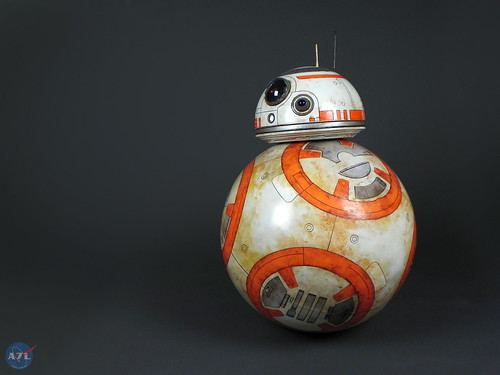
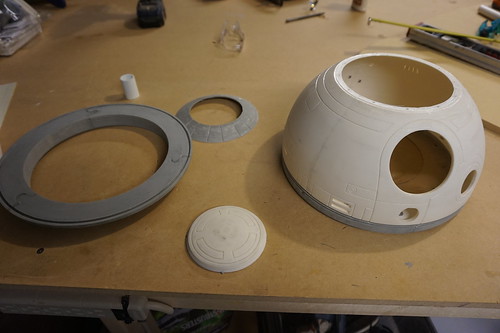
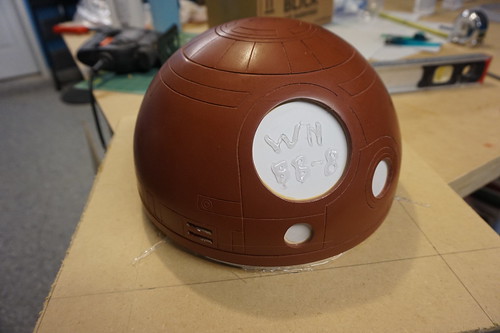
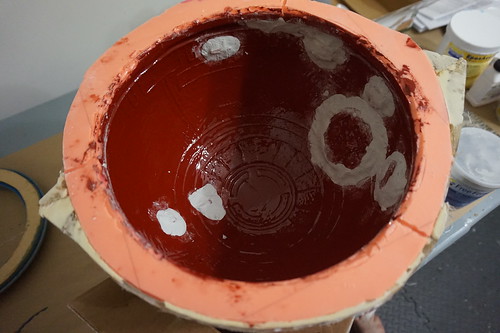
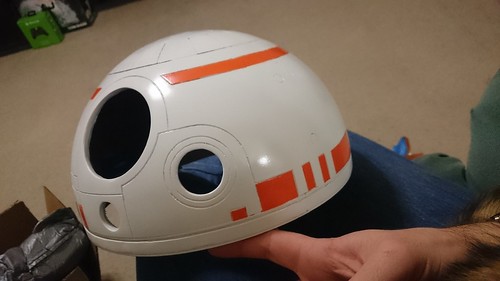
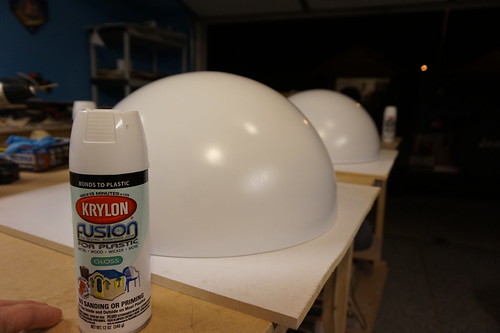
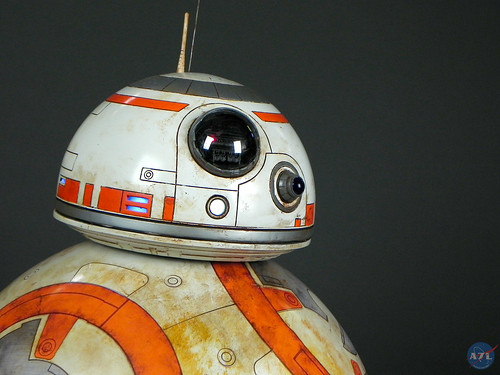
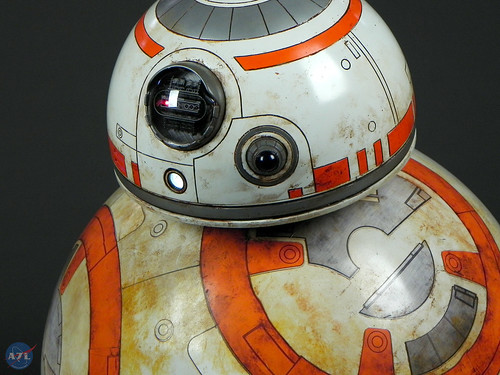
Much like the R2 Builders Club, a BB-8 builders club started up pretty much right after the first trailer. There was a lot of discussion about the design, and most importantly the development of 3D models of BB-8’s head and side panels. My friend Daniel printed one of the heads and gave it to me as a birthday present. While most builders have been finishing the 3D prints, I found the print to be heavy and prone to pealing, so I decided to mold it and cast a copy in fiberglass. The result is much stronger and less than half the weight of the printed model! The remaining parts were molded and cast in SmoothCast 300. Everything was painted with Krylon paints.
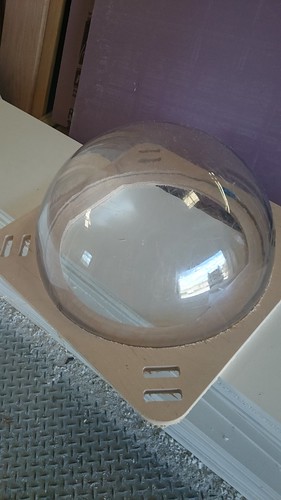
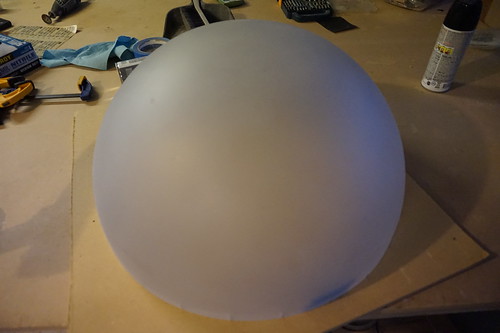
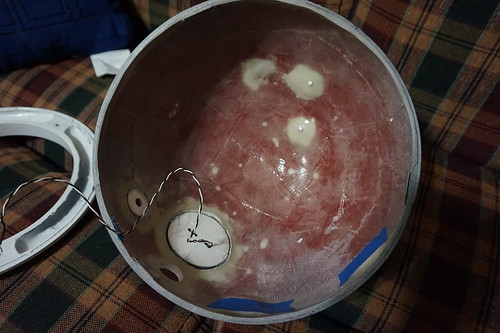
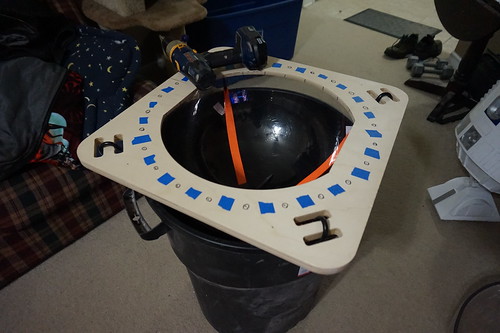
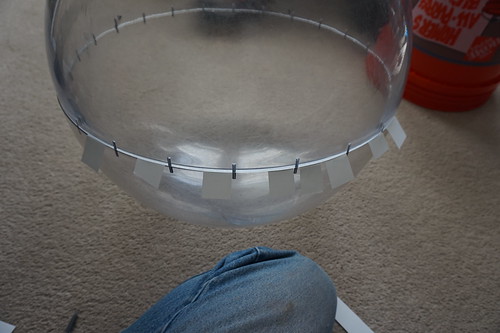
The ball is two 20 inch diameter, 0.5 inch thick polycarbonate hemispheres purchased from California Quality Plastics. Using a file from the builders club, a drill jig was made using a CNC, allowing pins to be added to the hemispheres so they remain fixed in relation to each other while the droid rolls. Even with the jig, there were a few spots where there was a noticeable edge where the two hemispheres met. While this was easy enough to sand off on the outside, I used strips of cardstock taped to the ball to determine the edge that had to be sanded down on the inside.
At the time of writing there are two schools of thought concerning how to make the droid move, which I refer to as the hamster and the pendulum or spindle. The hamster is basically a robot that moves around inside the ball causing it to move. This is the same way the Sphero BB-8 moves. The pendulum refers to a droid where the drive mechanism is fixed to one axis and turns by shifting or rotating its weight, which is how the xrobotsUK version 2 and 3 droids work. While the pendulum method provides the best options for assembly and control, it has one serious drawback in that only one ring around the ball ever touches the ground. Considering what the wheels look like on my other robots I opted to go with the hamster method so the ball would wear more evenly as all surfaces will eventually touch the ground.
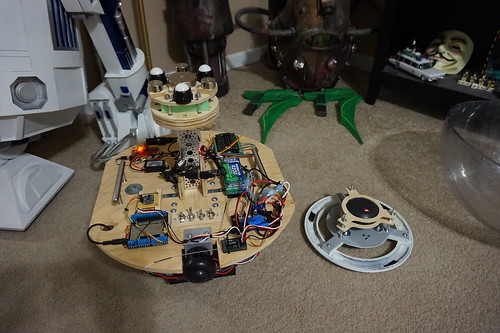
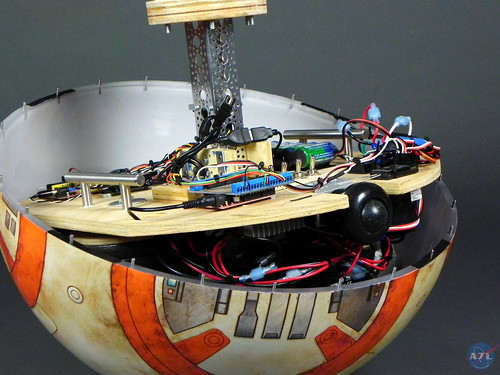
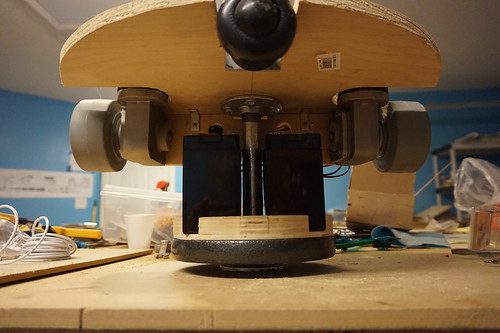
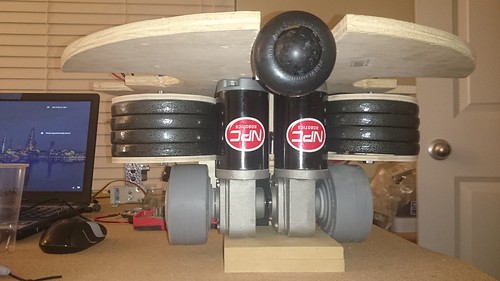
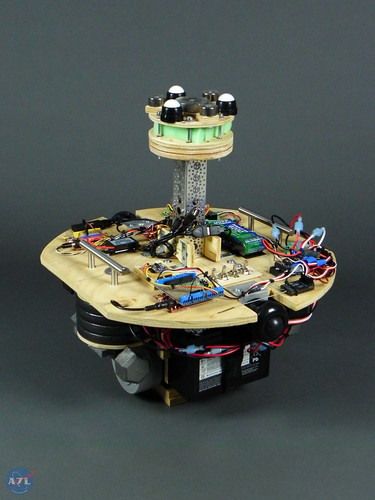
My CAD skills are a bit rusty and I wanted to minimize the amount of fine machining required, so I started off by locating two gear down motors that could be mounted directly to usable rubber wheels. After several days of looking for options I settled on two NPC 2212 motors with 4” soft rubber wheels. Then using a sketch pad and MDF, I laid out a skeleton for the drive system. This was an iterative process and three mockups were created before I cut the first functional prototype out of birch plywood. On prototype 1 I had the wheels mounted higher on the ball so the batteries and weigh could be suspended between them. While this did allow the ball to move on early test, the contact point of the wheels caused the hemispheres to push out and separate. This problem was eliminated on prototype 2 where I put the wheels as low as possible and the batteries and weight on the outside. Not only did this eliminate the splitting problem, the lower position provided a better “gear” ratio with the ball and helped refine handling.
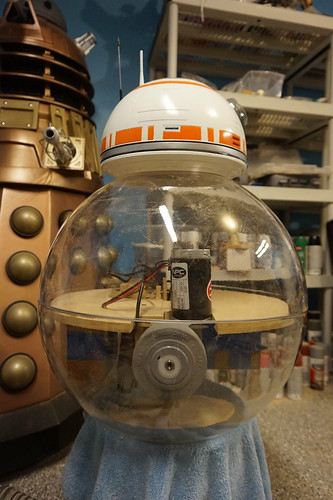 Prototype1
Prototype2
Prototype1
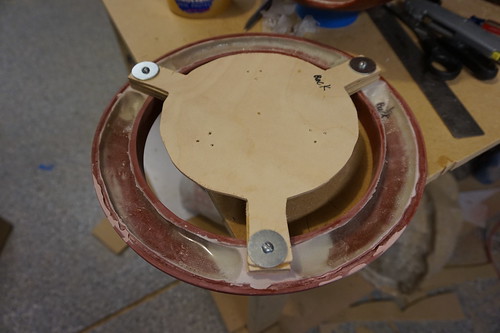
Prototype2Next was attaching the head. The question I get asked the most is, “How does the head stay on?” This is actually the simplest part of the build. 8 magnets, 4 in the head and 4 in the body, keep the head attached. Ball castors are used so the head and the mating plate can move around the ball. The polarities are matched such that the head will always fit on one way.
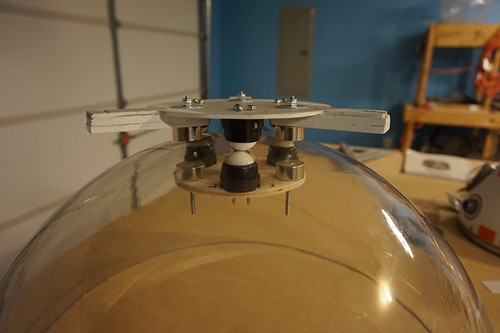
With this set up and all the programing I would have to do, I decided that the head would only turn. Leaning would have complicated the stability system and this layout did not allow me to incorporate a counterweight for the head. The mast is built from aluminum channel and components from ServoCity. The motion of the head is controlled with a high torque servo. Since the motion of the head is limited to looking between full left and full right, I can use the head as a reference point for what direction is forward on the droid.
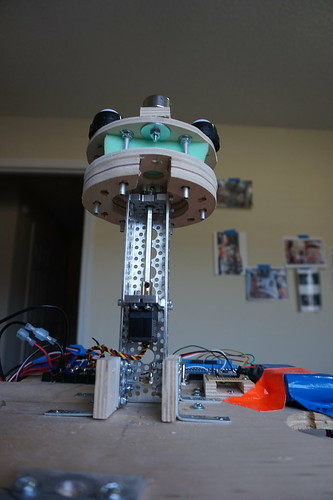
BB-8 is naturally unstable and wants to rock back and forth. This is bad for a lot of reasons, and difficult to eliminate with the transmitter alone. The solution was to incorporate an Internal Measurement Unit (IMU), an Arduino, and a Proportional, Integral, and Derivative (PID) loop. The IMU provides data about the droids orientation (how much he is leaning) and feeds that into the Arduino, which is basically a small computer. The Arduino takes that data along with the signal from the receiver, and computes how much power to send to the motors. The PID loop is a function that calculates how much power to provide based on position. Eventually I will explain in detail how this works on my A7L page, but most of the stability design was borrowed from xrobots UK. I am not great at programming or control theory, so it took about a week for me to make the droid stable on the drive axis.
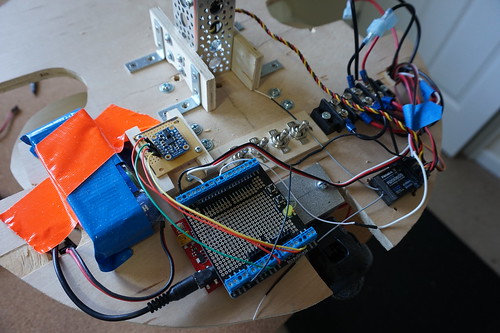
Speaker placement on BB-8 is tricky. The speaker can’t be in the ball because there are no holes in the ball and you would not be able to hear it. This means the speaker needs to be in the head, but the controls need to be in the body. Instead of plugging the WAV trigger directly to an amplifier and speaker like I do with the Dalek and R2, I purchased a Bluetooth transmitter so the sound can be sent to an off the self Bluetooth speaker in the dome. Right now the sounds are recorded from the Sphero BB-8, but as people pull the sounds from the film the files will be upgraded.
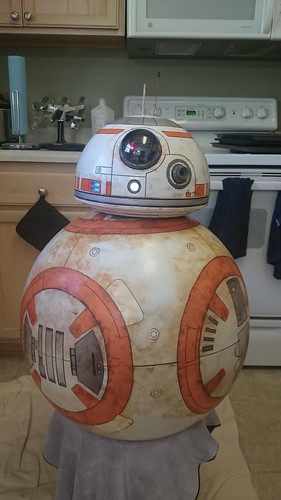
I had to be VERY careful about painting the ball as it will receive more abuse than any other prop I have ever painted. After running test with scrap polycarbonate, I decided to go with Krylon Fusion paint as it is designed to bond to plastic. The ball was sanded down, cleaned 3 times with isopropyl alcohol, then painted with 6 coats of paint and allowed to cure for two days. One of the club members designed graphics for the circles and the club now does runs of them in automotive grade vinyl. The decals were applied, lines drawn with Sharpie, then the entire ball received several layers of Krylon Crystal Clear.
After giving the clear coat a day to dry, the ball was weathered with acrylic paints from Michael’s. There are A LOT of videos on how to do this, but in a nut shell you paint a little on, wipe it off, and repeat until the droid looks worn.
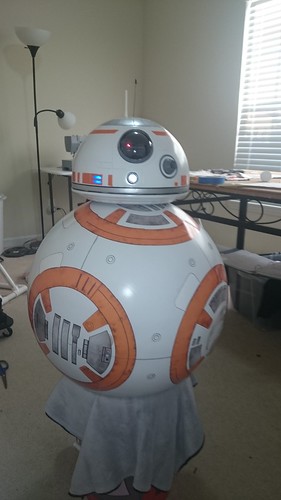
While I am happy with the result, the droid still has one issue in that he is not stabilized side to side. I had to finish him as is due to looming deadlines, but this fall I hope to revisit the drive system and add a swinging weight before celebration. Big thank you to Dan Valdez, Cory Pacione, James Bruton, and the BB-8 Builders club as this would not have happened without your help!
To stay up to date with our other projects, be sure to like out collaborative page 2StoryProps and my personal page A7L Props on Facebook!
For more build pictures, visit the flickr album click here.
Thanks for reading!
-Wayne

Thanks for sharing...
ReplyDeleteشكر علي خدماتك المميزة تابعنا للحفاظ على أنظمة الصرف الصحي خالية من الانسدادات يتطلب تشددًا وصيانة دورية من خلال التعاقد مع شركة تسليك مجاري ام القيوين باستخدام النصائح والوصفات الموضحة، يمكن للمرء تقليل احتمالات حدوث الانسداد والحفاظ على بيئة صحية ونظيفة شارك خدمة شفط البالوعة فى ابوظبي وستفيد من اعمالنا وفي حالات الطوارئ، لا بد من الاستعانة بالشركات المتخصصة مثل شركة تسليك مجارى، التي تقدم الحلول المناسبة بطريقة آمنة وفعالة .
ReplyDelete