
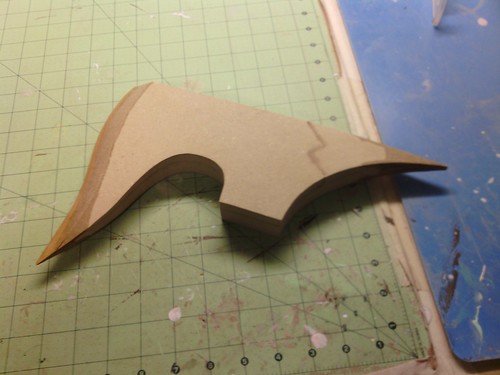
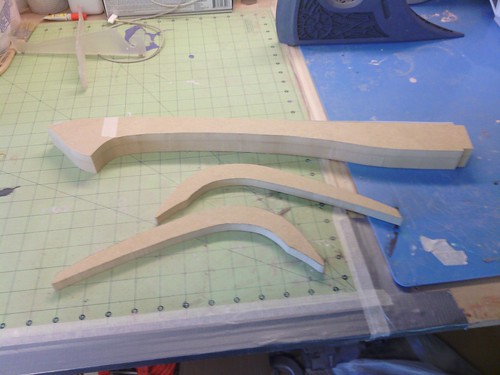
I began by sourcing my own reference material from the game. I created a set of blueprints in Adobe Illustrator, and determined a scale based on how big it was compared to the player model. I know the player model’s height is variable, but going with my own player’s model, I determined the axe’s length, and it just felt “right” when finally brought into the real world.

The Axe Head
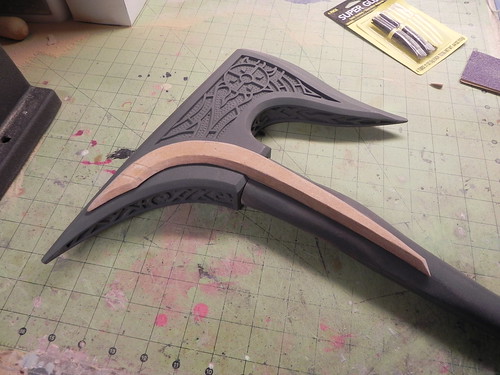
I knew the axe head was going to be where 90% of the extensive detailing was going to be, so I started on that first. I used a laser cutter to cut out several sintra panels that would later be assembled over an MDF core. Please note, laser cutting sintra produces toxic vapors and is not recommended. The laser cutter I use is very well-ventilated, and I let the sintra panels degass for several moments before removing them from the laser cutter. Still not great – don’t try it - but it’s probably the best practice I could have had when doing it. You may ask why I use sintra in the laser cutter anyways, and that’s fair! I use sintra for stuff like this is because it’s far easier to flex and work with using hand tools for certain applications. If the parts I needed were perfectly flat and I didn’t anticipate needing to tool them by hand, I would opt for the much safer acrylic. Regardless of the material I used, the laser cutter I have access to can only cut up to a certain size, so I needed to jigsaw the larger components together onto the MDF core.

The core MDF pieces were also run through the laser cutter to produce the same exact outlines. The only difference is that I did not cut all the way through – I only etched the outlines. The laser cutter isn’t powerful enough to cut through 3/4" MDF, of course, so the etched lines were used as guidelines for cutting on a scroll saw. After all the MDF pieces were cut out, they were assembled with some wood glue, and then the blade edge and rear taper were shaped with a dremel and belt sander.
Once the MDF core was done, I glued the inner filigree layer onto their appropriate sides. I then added the little pits inside the filigree by slightly pushing a drill into the MDF core. Had I used a softer material for the core, I could have possibly produced the correct square pits with a shaped nail or something, but I didn’t think to use any softer material at the time so I just went with it. If this were a stand-alone build, it would have seemed like a lazy alternative that would be hard to justify that to myself, but given the time crunch circumstances at the time, it was a minor detail I could bring myself to alter in order to speed up the production.
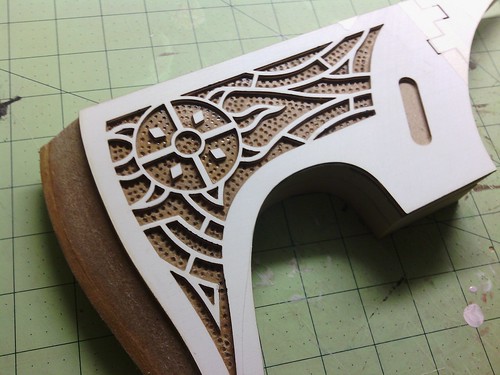
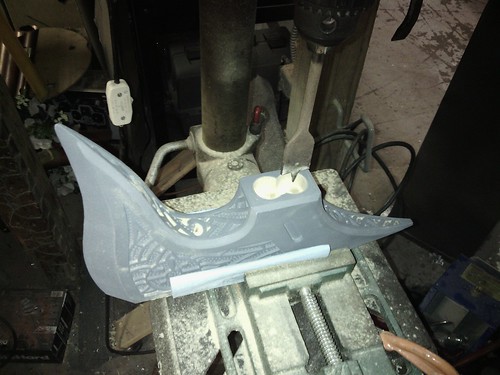
After all the filigree and inner pitting was complete, I added the outer raised rim layer of sintra and filled in the corner edge gaps with Bondo. You’ll also note that I have included a little slot on the sides of the axe head. This will come into play later when I would build the straps.
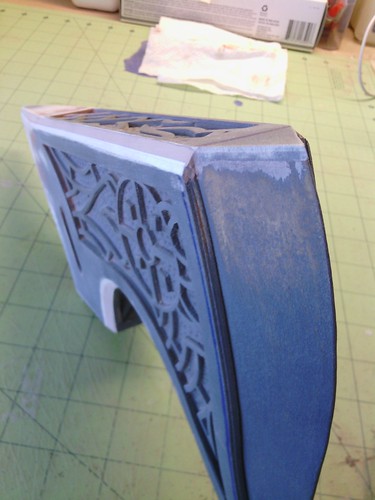
To finish off the main construction on the axe head, I hogged out a big hole in the bottom with a drill press, which would later become a socket for the grip shaft to plug in. Much later into the build, this socket would be lined in thin styrene to accommodate for a miscalculation on the grip shaft.
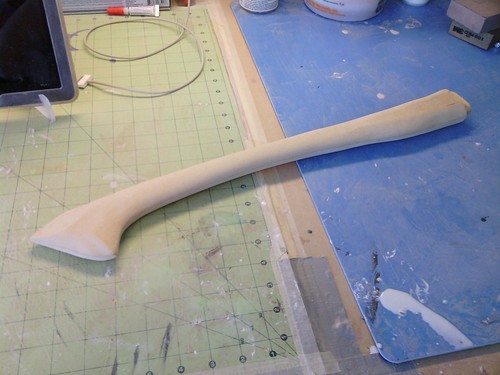
The Grip
On account of its lack of detail, the grip was perhaps the easiest component to sculpt. Made from MDF, the grip was carved with my dremel, and close attention was paid to the uneven, hand-hewn, rough-cut form of the in-game object. I do not have any photos showing this detail, but after the base form was sculpted, I carved in some wood grain. A tab was also sculpted into the top of it to fit into the socket on the axe head.
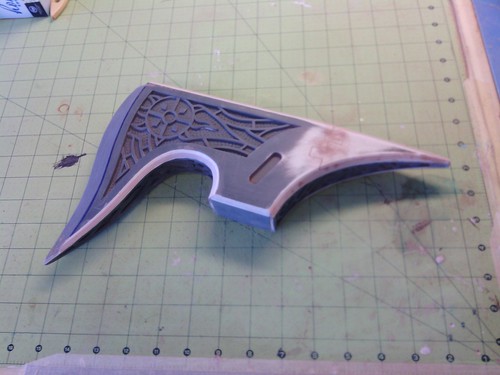
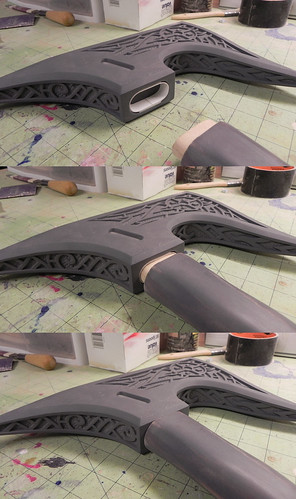
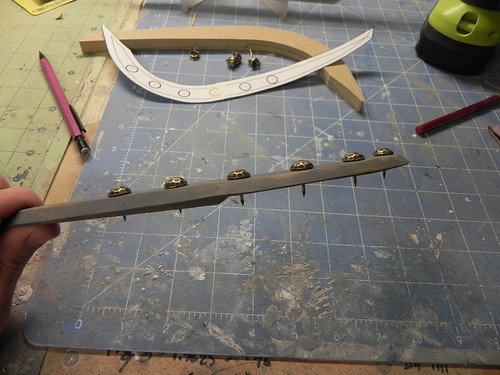
The Straps
Now I don’t know what these are called. I just call them “straps” because they hold the axe head to the shaft, but they are the metal bands running along the side of the axe head. Like the grip, the straps were made from MDF and were sculpted with my dremel and belt sander. Getting the geometry on these just right was incredible tricky as the bottom surface on one end needed to step down toward the grip’s diameter, and the other end needed to curl inward toward the rear taper on the axe head. Deriving that shape from a flat sheet of MDF proved to be an interesting exercise to say the least. For the first one I sculpted, I had to notch it, flex it apart, and install some tiny shims to adjust the curvature. The opposite side’s strap benefited from learning on the first one and was sculpted correctly.
The straps are moderately detailed with some rivets on them, and I used the same furniture tacks I used on the Dawnguard vest straps. This was partly so it would tie the axe to the costume in terms of shared details, but also because they ended up being the correct size according to my blueprints. To install them, I drilled out tiny holes and glued the tacks in place. Then I ground off the protruding pins with my dremel and smoothed out the transition from strap to rivet with a little bit of clay.

(No clay seam, left. Clay seam added, right.)
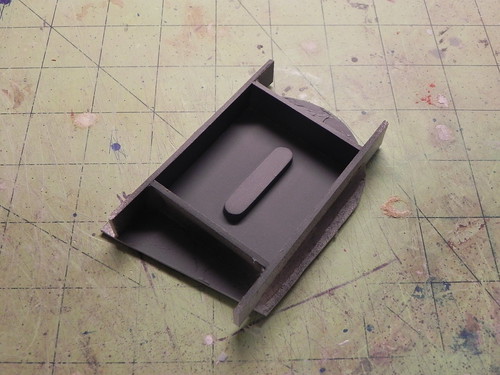
To finish off the straps, I made some little tabs that would match the little slots on the sides of the axe head (additionally, slots would later be carved into the grip as well). I could have very well laser cut more tabs from the schematic, but I was already molding something else, so I figured I’d just make a little mold of the tab to help use up the remaining rubber I had on hand. A little less straightforward, but it meant I wouldn’t have to make a special trip to the community shop to use the laser cutter. Castings of the tabs were glued in place on the undersides of the straps. These tabs and corresponding slots, while loose-fitting, are intended to allow for quick final assembly down the road.

After some minor cleanup on all the parts, some primer, and a little polishing, the parts are now ready to be molded. Part 2 will come after the axe is completed.
Check out the rest of the progress photos in the Flickr album!
Don’t forget to check us out on Facebook! Like our page to follow us weekly with project updates, How2 Tips, and convention appearances.
- David, 2StoryProps
No comments:
Post a Comment