
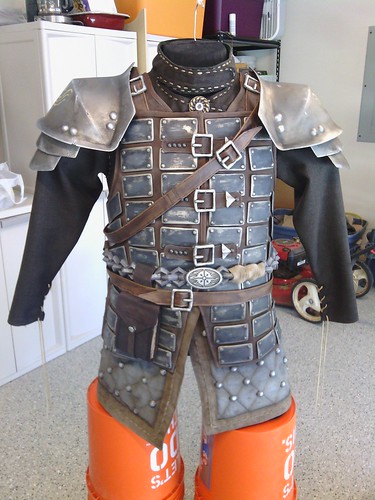
The Armor
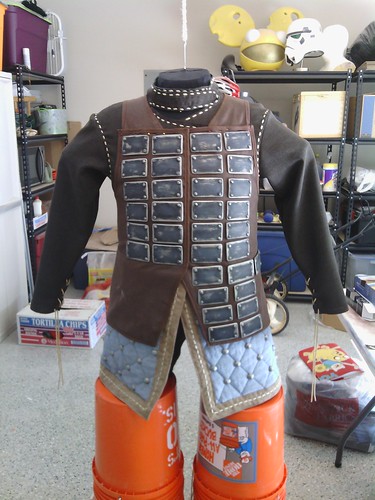
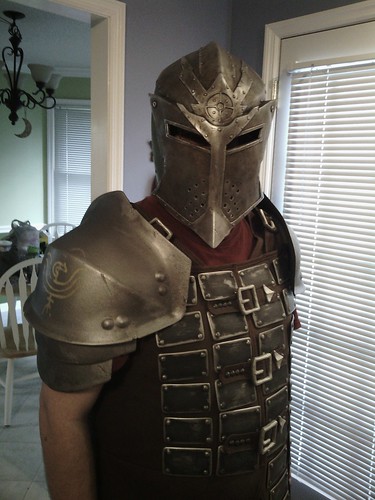
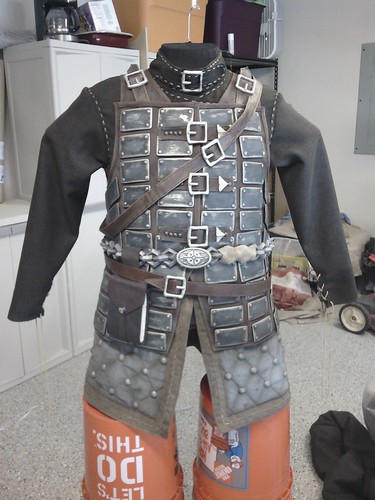
Most Skyrim costumes you see right now are foam builds. I’ve seen great work come from it, certainly, but my build style is geared more toward an older cinematic, special effects style of build sensibility. I knew that I needed my armor to be lightweight and strong, so that meant vacuum forming as much of it as I could. But I couldn’t just jump into sculpting stuff. For costume this full of detail, it all had to be proportioned right, which meant I had to finish the cloth components before I could make any sort of final measurements on the armor. Basically, I measured the armor plates out according to the final dimensions on the vest, so I knew they’d all fit correctly. Furthermore, since the vest has nearly 100 plates* on it, I didn’t want them all to be the same. I created measurements for a basic size and taller, shorter, thinner, and wider sizes. The varying sizes account for how the vest sits on my body, and that one size of plate would most certainly leave gaps in the plate spacing.

*Note, the in-game model has 104 plates on the vest, if I recall correctly (I may be wrong, but it was over 100 plates). I had earnestly attempted to fit all 104 plates on the vest, but due to introduced errors in the vacuum formed armor pulls, I had to eliminate one full row of armor all the way around, as well as an additional row around the back. Had I pulled a few more of the shorter plates, I could possibly have kept that one back row, but I figured it’d be best to truck on with what I had. Besides, at a difference of 10 plates over an excessively detailed costume, the difference would really only be known to myself, and never really identifiable anyways.
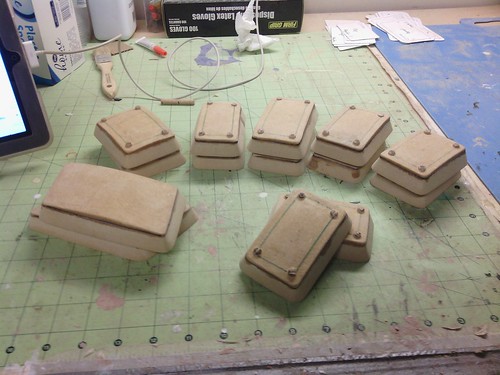
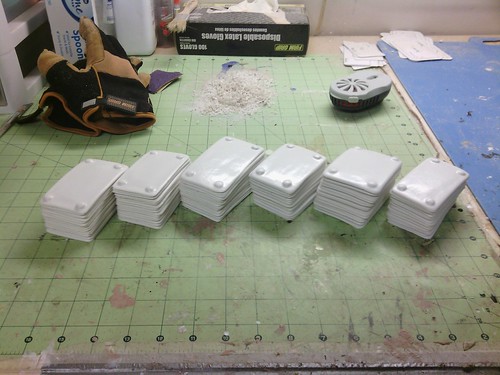
The armor bucks were sculpted out of MDF and some wooden dowels. I didn’t want to lock myself into riveting each and every armor plate 4 times, so I opted to include the rivets in the pulls by inserting little wooden dowels into the corners of every armor buck. A little tedium now meant considerably less tedium later. After the bucks were sculpted, I pulled the armor plates in styrene on our vacuum former. The plates were then cut out and individually sanded.
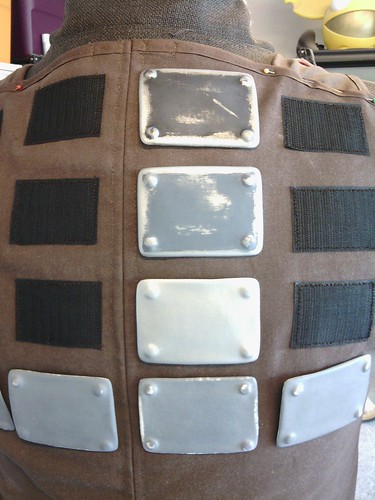
To affix the plates to the vest, I used industrial-strength, adhesive-backed Velcro on the armor itself, and sew-on Velcro on the vest. It took over 25 feet of Velcro to accomplish this, but that purchasing was made easier by using both the hook and loop sides across the costume. Doing so also made arranging the plates easier, as I could assign hook side armor to the front, loop side armor to the back (for example). Sewing the Velcro onto the vest actually went rather quickly, since I could pin the pieces on in groups and sew entire blocks of Velcro on in one sitting. I would sew across one full line (pulling the foot up and skipping over the gaps, of course) instead of stitching each piece of Velcro individually. I don’t have any photos of that process, but you can see the Velcro in the following paint photo.
Painting the armor plates took some time, however, since they all needed to be handled individually. Priming and base coating the armor was simple spray paint work I could do in my back yard on a huge sheet of cardboard. However, the Dawnguard seem to have custom paint work on their armor plates – some are blue (like mine), some are gray (over gray metal.. weird, I know), some are brown, and one is red. Ah, variants. But since this costume is a fantasy equivalent to, say, a medieval-era uniform, that meant I had to hand-paint the custom color onto each and every plate. So in the following photo, you can see how I went from a primed plate, to a base coated silver plate, to a blue hand-painted plate, and finally to a weathered, finished plate.
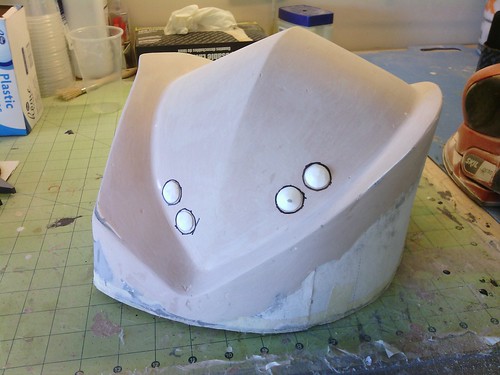
The shoulders and knees, while also vacuum formed ABS, were a slightly different process. I modeled in them in 3D using Rhino and processed them through Pepakura so I could produce a paper model of them. Using resin to harden the paper, I took to sculpting the final shoulder and knee components in Bondo to produce vacuum forming bucks.

The shoulder armor had to sit on my shoulder and arm in a particular manner, so I couldn’t just strap them up. I needed the scalloped plates to have some kind of gaps between them, so when strapping them up, I placed some foam ridges inside them to maintain an immovable buffer between the plates. Doing so enhances the scalloped look so that there’s no mistaking each set of shoulder armor for a single, large piece.
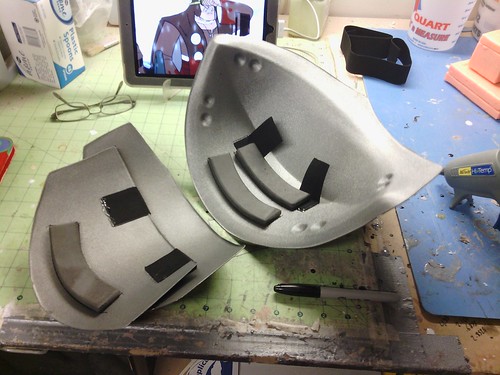
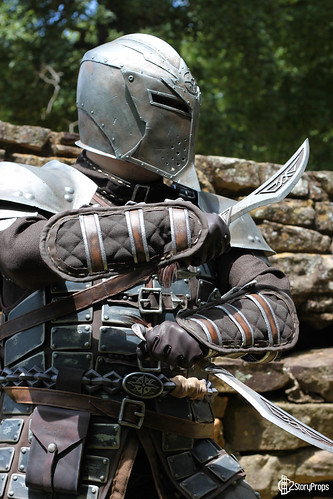
Bob Ross, famed painting TV show host and artist, often talked about and embraced his “happy accidents” – unintentional occurrences that he’d work into the final painting. He very much believed in the infinite variety and random arrangement of plants and land features found in nature, and worked his accidental brush strokes into his paintings under that belief, instead of discarding them or trying to hide them. I had a very similar experience in pulling my shoulder armor. The plastic cooked under the heating element a little too long and began to melt, which resulted in an ugly, pitted appearance. Ordinarily I’d have to attempt to fill it in with Bondo or otherwise discard the piece, but since this costume is supposed to be a mass-produced kind of uniform, I opted to keep the pitted plastic shoulders so that they’d look like pitted metal. When weathering them, the pitting really jumped out and looked phenomenal. I can’t exactly recommend you try to overheat your plastic when vacuum forming, but instances such as this are awesome little happy accidents.
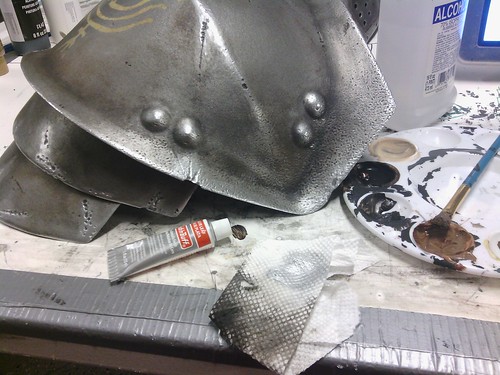
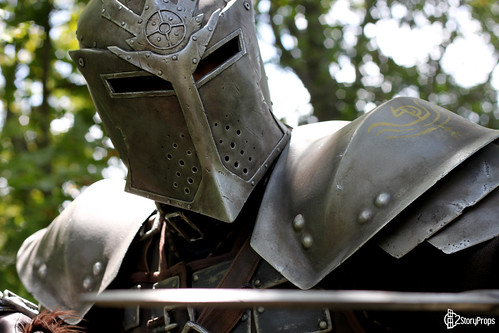
Since the shoulders would be large, noticeable components on the costume, I wanted the weathering to really stand out. I used the same weathering technique that I used on the helmet, but I’ll recap here. Prior to any paint work, I used my dremel to add in some physical weathering. Then the armor was primed and base-coated, and then dusted over lightly with a darker base coat color to tone it down a little. I then gave it several washes in blacks and browns to help bring out the details. But you can’t weather in a regular, even approach or else it will look too patterned and planned. So I then took a more local approach with some brush work here and there, applying darker weathering sporadically around the part. To finalize the paint job, I hit the highlights with a little bit of Rub N Buff.
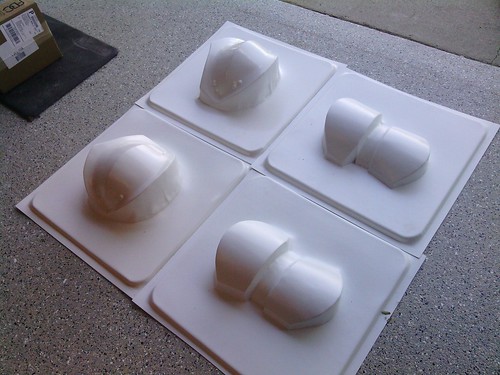
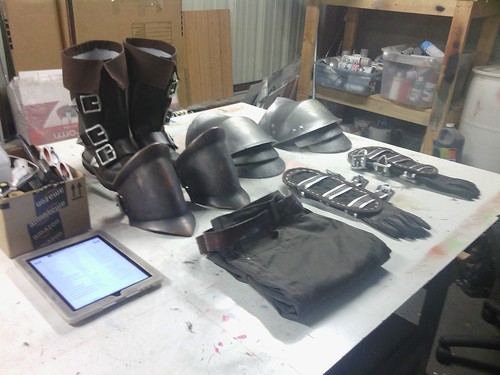
I don’t have many photos of the knee armor, but it went through the same process. The knees were padded out with some foam to bring them out from my knee a little bit, and then painted in a bronze color and weathered in the same manner as previously mentioned. In lieu of any sort of progress photo, here’s a photo of some of the components neatly arranged on a table for some reason.
Greeblies and Miscellaneous Components
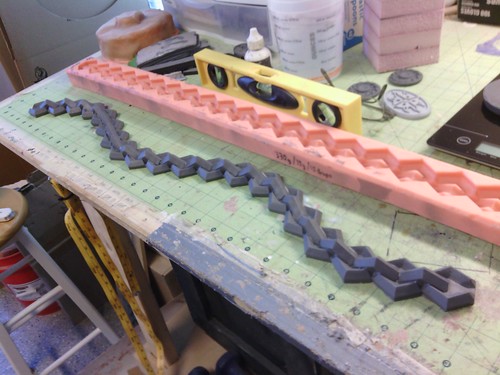
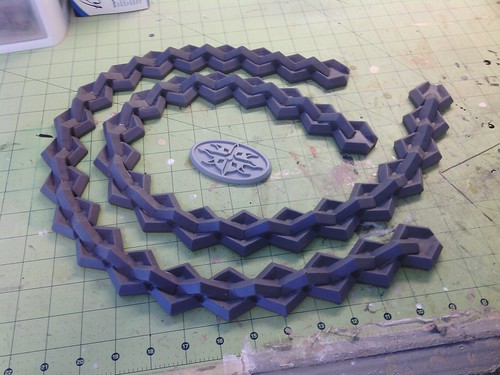
The belt was probably the most labor-intensive component among the greeblies, so I’ll discuss it first. It’s quite deceptively simple. I looked around at various Halloween websites to see if I could find some sort of reasonable store-bought solution, as time was beginning to become a major factor. I couldn’t find anything remotely close, as I suspected I wouldn’t, so I had to make it. It’s some sort of diamond-shaped chain, so I sculpted two of the links and made a mold. Wayne helped me cast several dozen copies of each link, after which I glued them all together and onto a piece of MDF so I could make a mold of al of them together. I decided that I only needed to mold about 3 feet of the belt, and I could cast up two belts and attach them where necessary. I would have excess belt length in the end, but I’d rather have it too long than not having enough there.

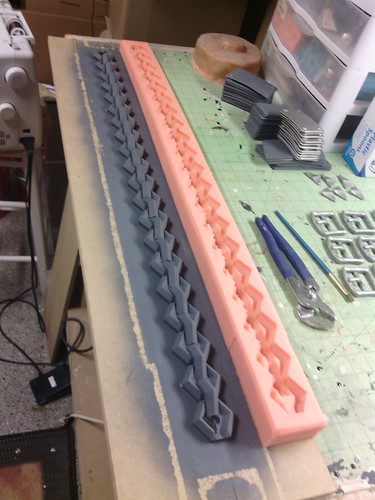
I really wanted to cast it out of foam. That would keep it nice and light. However, I was apparently doing everything right, but I could never get it to work out. The foam would keep collapsing. Without time or money to keep troubleshooting the foam method, I switched gears and sourced some other materials from Reynolds Advanced Materials (my go-to Smooth On distributor). I’m sure there are plenty of other rubbers I could have used, but I opted for Mold Max 14NV, which is a very soft, very flexible rubber that is compatible with the dye I already had on hand. Furthermore, it was compatible with the rubber I used for the belt mold.** The castings came out beautifully, and they ended up not being too heavy for the costume. I did have some trouble painting and weathering them, however, but I found Rub N Buff and little black acrylic worked ok. It’s definitely a temporary solution, as I have yet to find any paint that wouldn’t flake off this rubber. It’s easy to touch up, though, and once it’s on the costume, it’s not going to be flexing too much anyways.

** It turns out that the rubber used for the belt technically isn’t compatible with the rubber I used for the mold. Initially, 14NV was listed as a urethane rubber. However, Reynolds AM’s website is still relatively new, and some months after the fact, they have corrected it to show it being a silicone rubber. Silicones are supposed to bond directly to other silicones without any sort of release agent between the two, and I wasn’t using any sort of release agent. So I got lucky, lesson learned, but I’m happy it all worked out anyways. Whew!
The belt buckle was some more laser cut sintra, this time slightly bent after assembly to give it more depth. The part was clayed up and molded, and a casting was later affixed to the front of a quick-clip for final belt assembly. And I don’t have any photos showing this part, but the rubber components of the belt were actually sewn (by hand) to a length of Velcro so it could be attached to the costume. For costumes like this where proportions are important, it’s always good to be able to affix belts and similar items in place so they don’t slip down your body or otherwise move around.
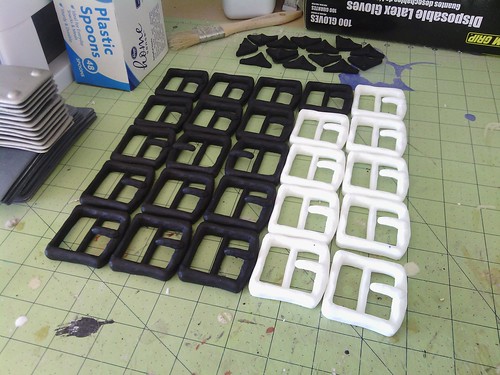
The buckles throughout the costume, like the studs on the skirt panels, were sculpted from some 1/4” sintra and then molded. Wayne helped cast them for me while I frantically worked on the rest of the costume. Later, after the costume had been completed, the designer of the in-game Dawnguard armor actually found my work and contacted me, apologizing to me for the excessive number of buckles. After the castings were made, they were affixed to their various components, two of which were some leather belts. I didn’t have the time or money to source actual leather, so I whipped up some quick vinyl belts instead, since they were not going to be load-lifting. They will be upgraded to actual leather in the coming months, however.
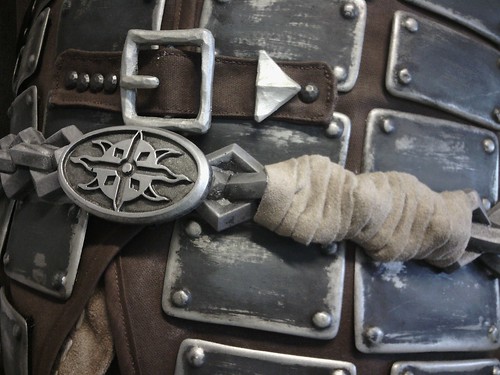
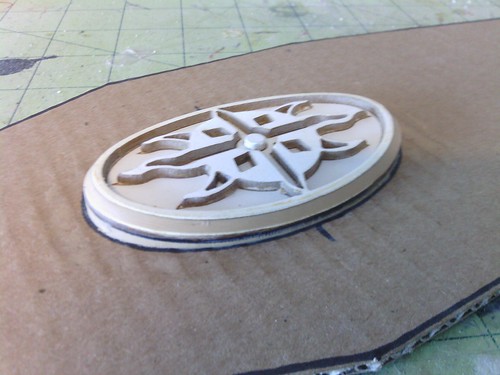
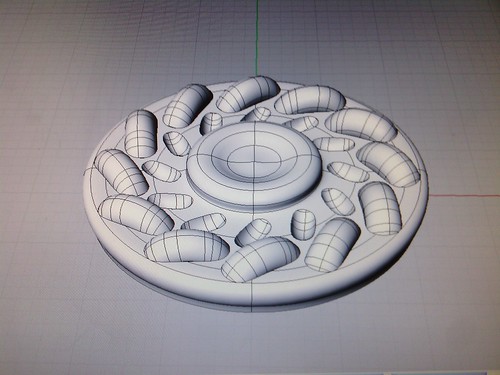
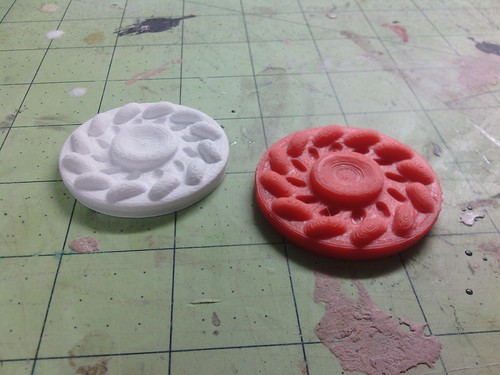
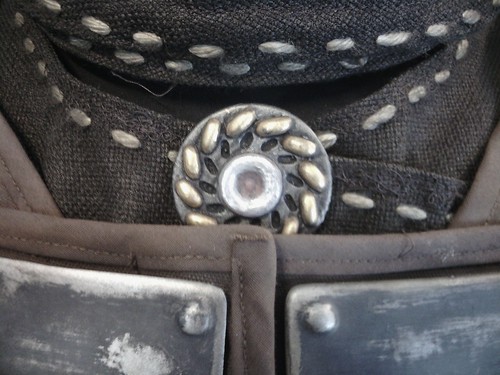
The little medallion that sits at the base of the neck was my second venture into 3D printing. I knew I could sculpt it by hand, but I figured I’d try out one local source for 3D printing. I modeled something resembling the medallion (it’s kind of a difficult item to see up close in reference imagery) and we printed two of them. After several heavy coats of primer, they were molded and cast in resin. Sure, I could have just used the 3D printed piece itself, but I had long-since figured I’d offer kits at some point, so I needed to mold as many components as I could, the medallion being one of them. The final medallion, after being painted and weathered, had a safety pin attached to the back of it so it could simply be pinned in place on the shirt.
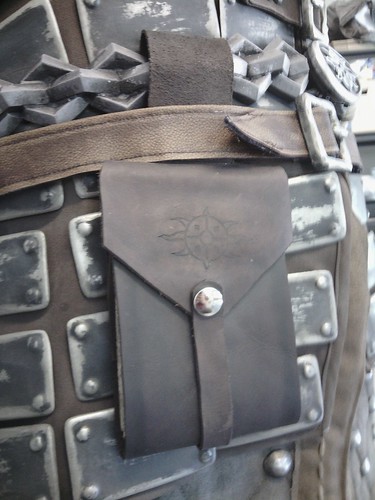
The last detail, at least in time for its Dragon Con 2014 debut, would be the book that is attached to the belt. I debated for a while on whether it was a book or some kind of pouch, but the texture on the sides let me to decide it was a book. And it made sense to me, since the Dawnguard are vampire hunters, I figured it may be some kind of small spell book or prayer book for their protection. So I found some thick Arches Cover water color paper, tore it down (for the rough edges), and bound it together. Using a template I developed, a friend in Nashville created the leather cover for the book. I later stamped the Dawnguard sun emblem into it with some laser cut acrylic and weathered the pages by burning their edges. After doing some washes on the leather cover, it was looped over the belt, and I could call the detailing finished.

The absolute final touch was a bit of airbrushing to really bring it in. To get subtle aging on cloth, you could all the time in the world spot dying, coffee staining, and hand painting everything. But with only a few weeks before Dragon Con, I needed a quick solution, so I airbrushed various color effects all over every cloth component on the costume.
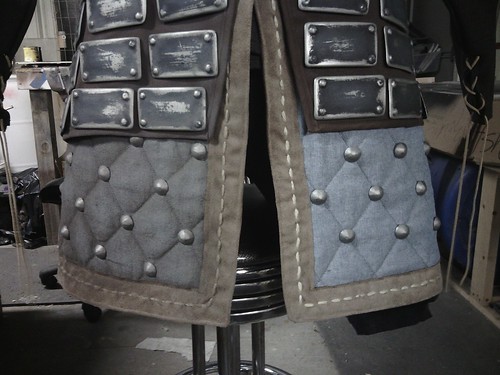
(Airbrushed, left. Not airbrushed, right.)
Post Build
In closing, I hadn’t built a full costume this detailed in quite a while. In fact, I hadn’t worked on a project to this degree since our ODST costumes from 2010! Since then, it has mostly been props, single costume components, or costumes that only required purchased goods for the components I didn’t produce myself (such as the tuxedos for our Daft Punk costumes). I’m super excited to have completed it, though, and it’s a wonderful project in the long-term as well, considering how exceedingly modular the players’ costumes can be in Skyrim itself. I can make any number of helmets or weapons from Skyrim, and still have a costume I can wear them with and it all fits within the established lore.

I really learned a lot from building this costume too. I mean I know mold making, I know vacuum forming, I know all these different types of crafting. But what I really learned was gauging my workload, scheduling individual parts assembly, managing my own deadlines, and expanding on current knowledge. Skyrim costumes really kick your ass when you get into the knitty gritty, and if you want to build toward a certain quality, you really have to learn to pace yourself.
Part 1 – Dawnguard Full Helmet and Nordic Daggers
Part 2 – Fabric components to the Dawnguard Heavy Armor
Flickr Album – Visual documentation of the building process
Don’t forget to check us out on Facebook! Like our page to follow us weekly with project updates, How2 Tips, and convention appearances.
- David, 2StoryProps
No comments:
Post a Comment