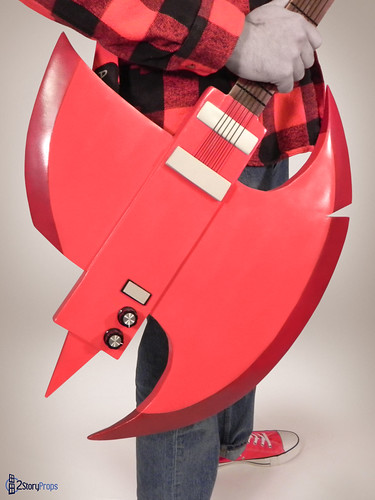
September 10, 2015

Nora Valkyrie's Magnhild from RWBY

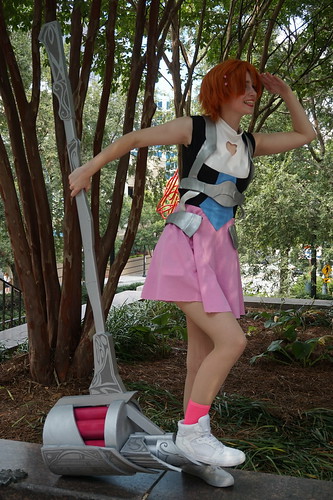
If you have been to a convention in the last two years, chances are you have seen a few people cosplaying as characters from the Rooster Teeth show RWBY. The show is made in the style of anime and Japanese video games, and has A LOT of really interesting props and costume designs. For Momocon 2015 a few friends here in Huntsville decided we were going to put a RWBY, or more appropriately a JNPR, group together for the con. For this project I was in charge of the weapons and props.
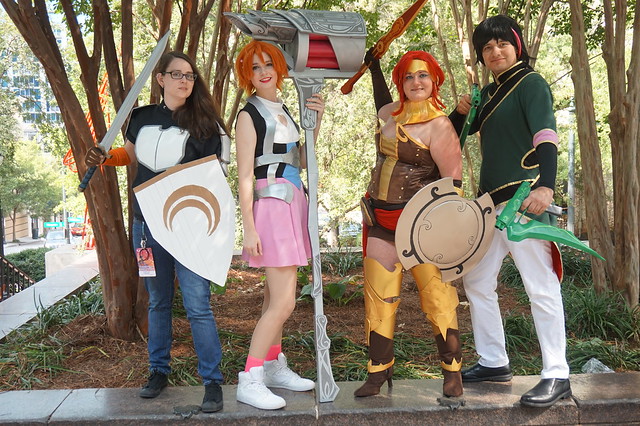
DSC01208

We’ll start by showing off the single largest prop, Nora’s hammer.

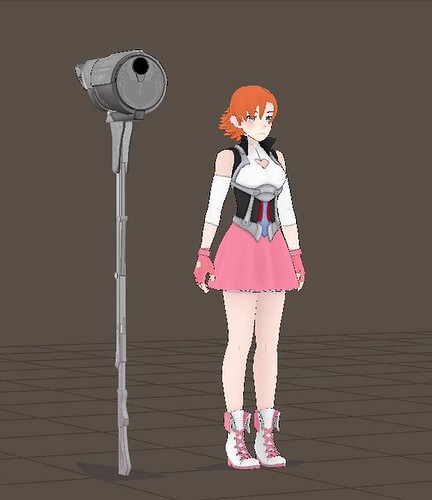
human_pinkie_pie_by_scarecrow113-d83cb9a

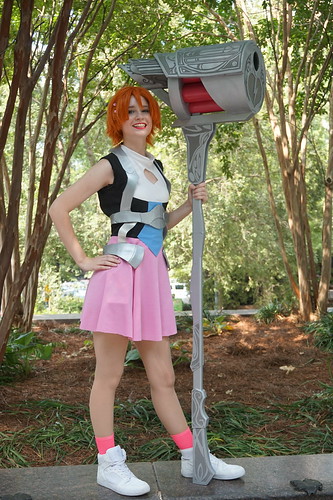
All the weapons in the show, except Jaune’s sword and shield at the time of this writing, function as melee weapons and guns. In Nora’s case, her weapon is a hammer that transforms into a grenade launcher. While I don’t want to say it is impossible to make a prop that transforms, my friend was only interested in the hammer, plus a short deadline lead to the build being only the hammer mode. The project started, as always, by gathering reference material. Monty was very helpful to the fan community and posted multiple shots of all the characters and their weapons on his Facebook page, even going as far as providing a panel break down for the hammer. For scale I decided to make the hammed about 6 feet tall, which would make it 3 inches taller than my friend and about my height.
1377145_480904315357779_1577687998_n

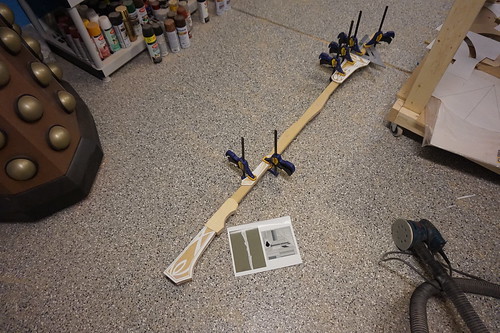
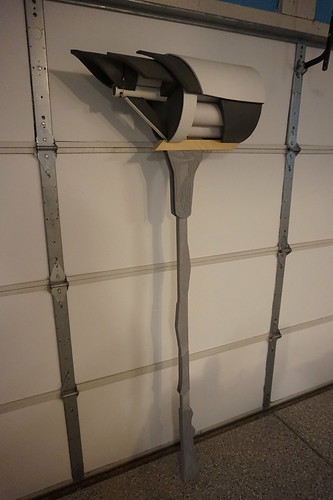
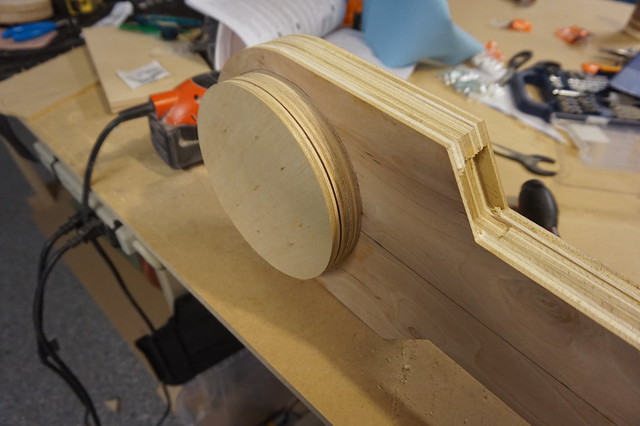
The build was separated into two components; the handle and the head. The handle started off as several strips of ¼” MDF glued together to make a 6 foot long piece 1.5” wide and 1.0” thick. I chose MDF because it was cheap and worked well on the Marshall Lee and Marceline guitars, but if I did it again I would use birch plywood which is a bit stronger and lighter. Additional pieces of MDF were glued on for the two pivot joints and the bottom. My friend wanted to help, so I had her draw the filigree patterns, which I then transferred to 0.04” styrene left over from my R2-D2 build then attached using super glue. After a bit of putty work the handle was primed and sanded into its final shape.

DSC00283

DSC00292

DSC00300

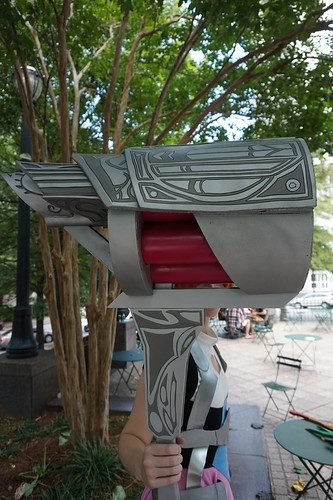
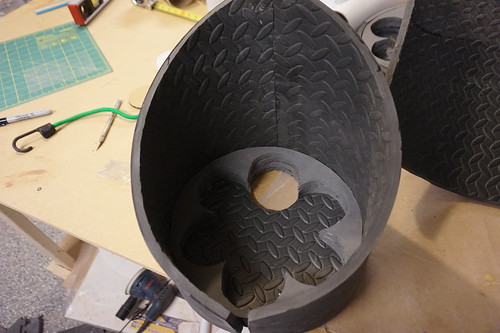
There was a bit of back and forth on how to make the head; either from vacuum formed plastic or EVA foam. I decided to go the foam route as it would save some time and allow my friend to contribute to the build more easily. After making a rough sketch I started by building up the drum portion with 3” mailing tubes and EVA foam. From there I started to build the head of the hammer layer by layer using old floor mats from my apartment and foamie mats from Hobby Lobby. Most of the hammer is joined with contact adhesive and hot glue.
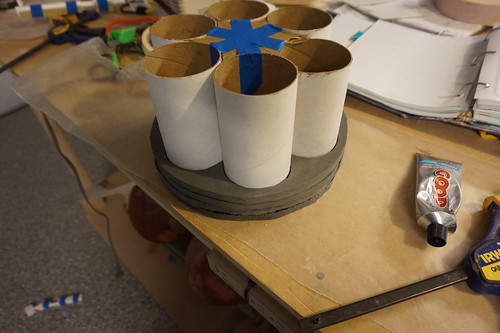
DSC00314

DSC00322

DSC00329

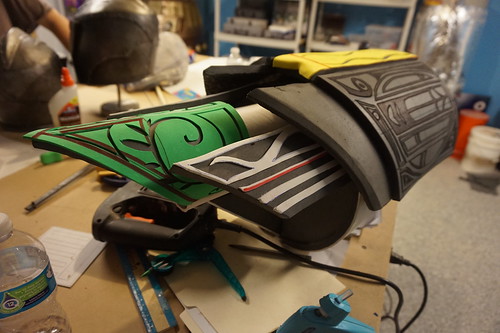
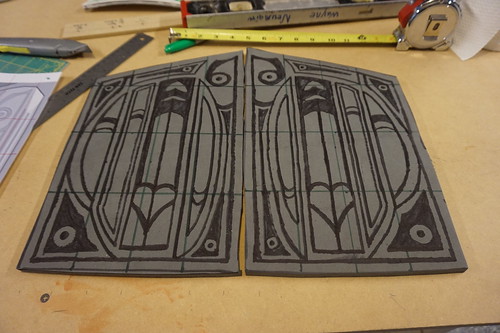
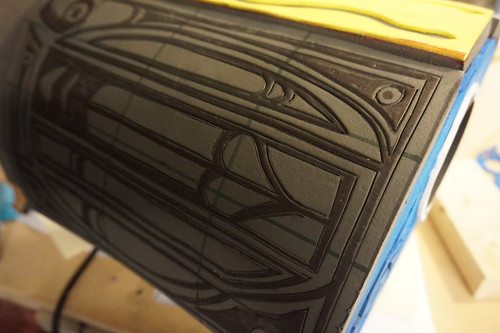
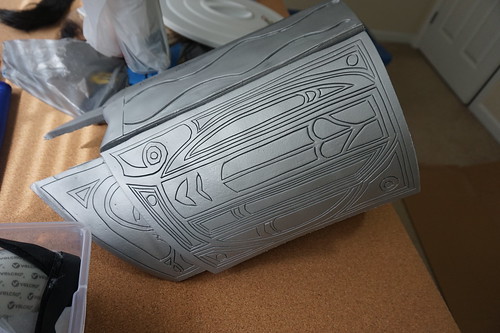
The original plan was to cut the filigree out of foam sheet and glue that to the hammer. What we found out though is the foam stretches, and it is almost impossible to get pieces to fit properly with each other or form a proper straight line. After our first attempt I ended up taking the sides of the hammer off and re-drawing a new pattern on eva foam, then scoring it with a knife and hitting it with a heat gun to give me clean engravings in the foam.
DSC00390

DSC00394

DSC00396

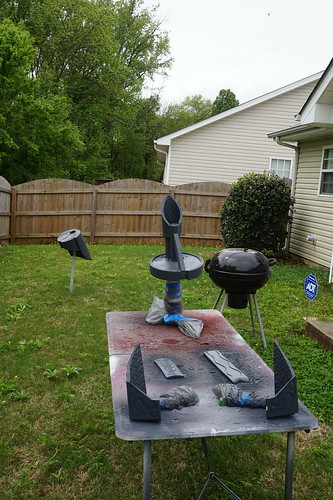
The foam needed to be sealed, so it was hit with several layers of black PlastiDip. Everything was then coated in Rustoleum primer and aluminum paint. My friend added the dark grey by hand with brush on acrylic paint.
DSC00405

DSC00429

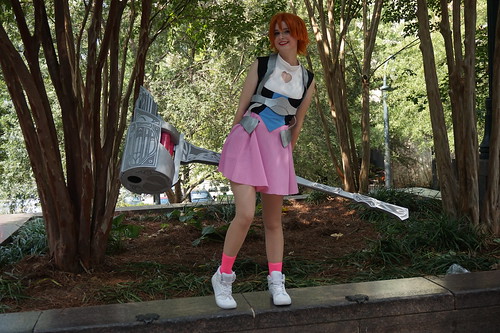
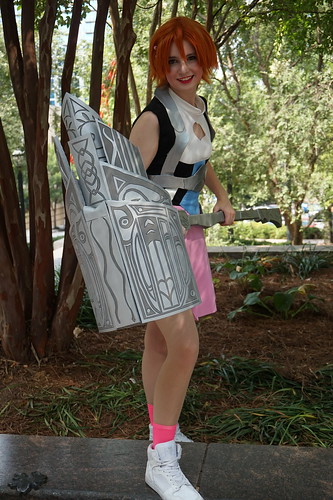
The hammer ended up a bit taller than expected, but over all I am very happy with the result, especially as this is my first foam build. Next write up going up will be Lie Ren’s StormFlower pistols.
DSC01229

DSC01231

DSC01233

DSC01235

DSC01239

To stay up to date with our other projects, click here to follow us on Facebook.

For more build pictures, visit the flickr album click here.

-Wayne, 2StoryProps

Click here for Lie Ren's StormFlower Pistols.

Click here for Pyrrha Nikos' Milo and Akouo!

Click here for Jaune Arc's Crocea Mors!

August 26, 2015

R2-D2

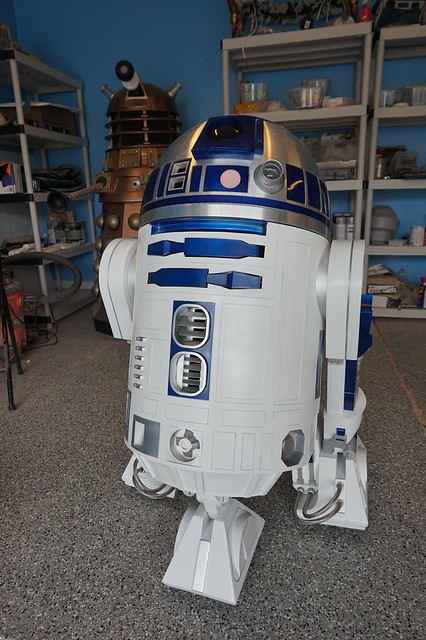
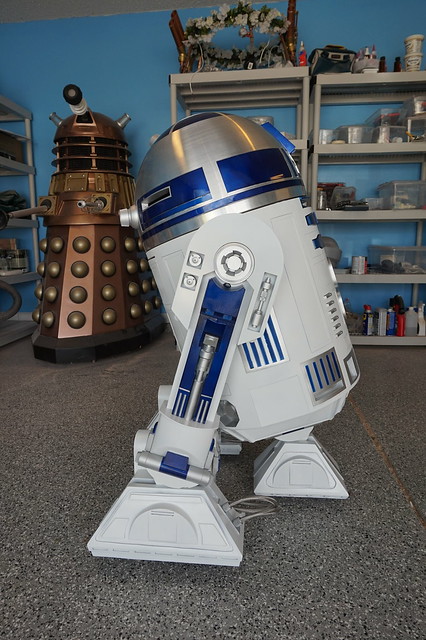
While we strive to build unique props, the trailers for The Force Awakens made me really excited about Star Wars again and gave me the push I needed to build a prop I have wanted since I was 8, R2-D2.

DSC01065

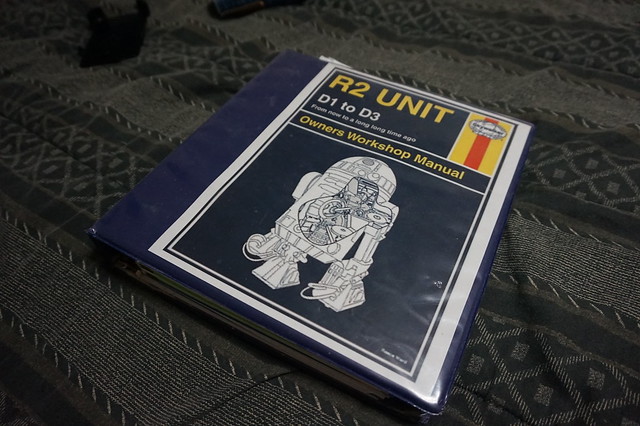
Unlike our typical builds, there is A LOT of information on line about this prop and a very large community of builders who have built their own R2’s or other astromechs. Many of these builders have dedicated entire blogs to their builds. For this write up we are going to keep things pretty top level and cover key points and parts unique to our particular droid. If you found this blog entry because you are planning to build a droid of your own, the first thing you will need to do is become a member of astromech.net, which is the R2 builders group. Once you have a user name on the forum, the next step is to join the clubs yahoo group as this is where all the drawings are posted. I hesitate to say “plans” as the drawings and templates have dimensions but are not step by step instructions. I also recommend printing the drawings and putting them in a binder so you can reference them later.

DSC01165

And now, onto our build!
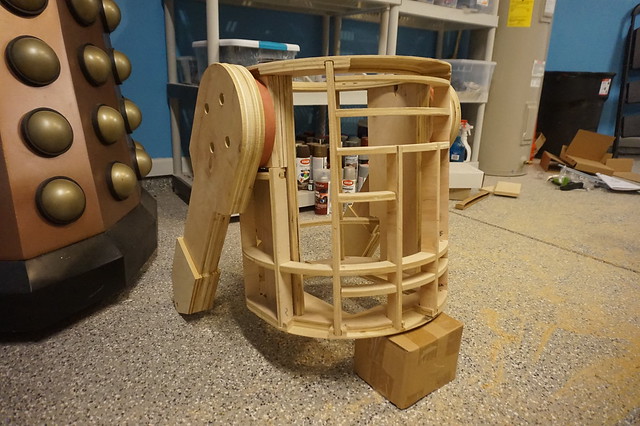
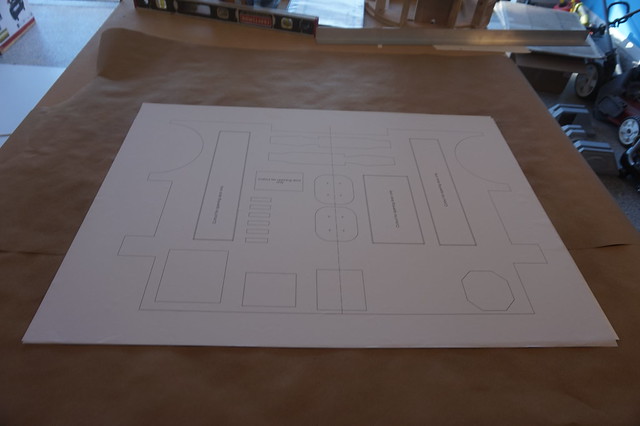
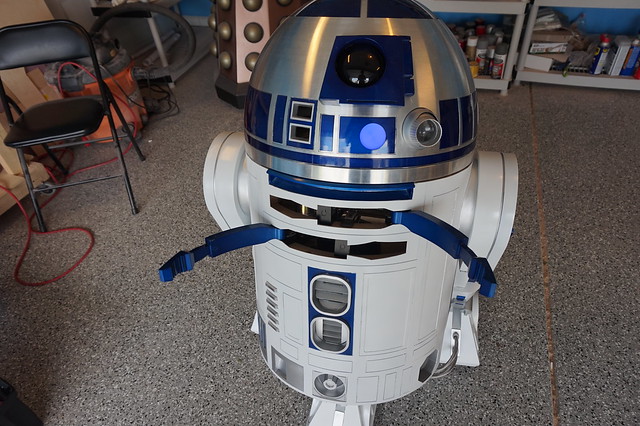
Most builders go one of three routes; styrene, aluminum, and plywood. Aluminum is pretty expensive and heavy, and a completely styrene droid is probably a quicker build and very light, but I had concerns about the strength. Thus, I decided to go the plywood route. R2’s skeleton is made from various pieces of ½” and ¾” thick Birch plywood cut out using the Senna plans. Rather than cut all the parts by hand, MindGear Labs here in Huntsville converted the PDF plans into a cut file and CNC’d all the parts on their large table. With minimal sanding I was able to put everything together with Elmer’s carpenter glue.

DSC00035

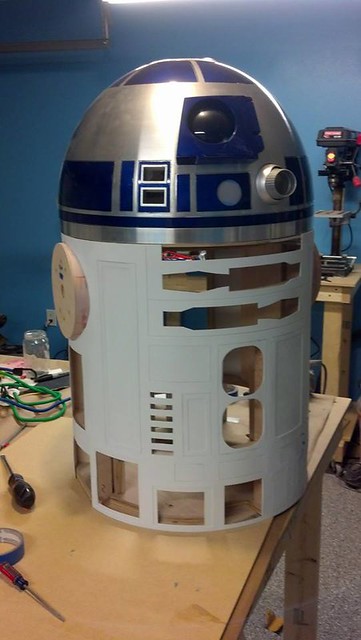
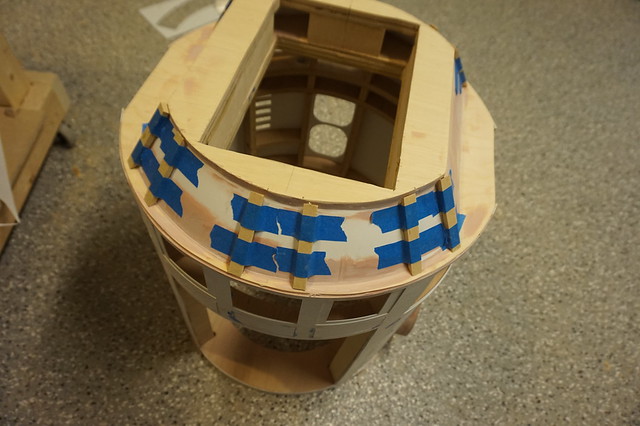
For the skin, I purchased an 4x8 foot sheet of 0.04” styrene and had the skin templates printed full size at Kinkos. The templates were attached to the plastic with spray adhesive and all the necessary parts cut out by hand with a Stanley knife. The skin is 2 layers. The inner layer was glued to the wood frame with Goop and held in place with bungee cords for 24 hours. Once that layer cured, the outer layer was taped on and attached using super glue.

DSC00142

DSC00144

10950687_10104689580564770_4345843287965171292_n

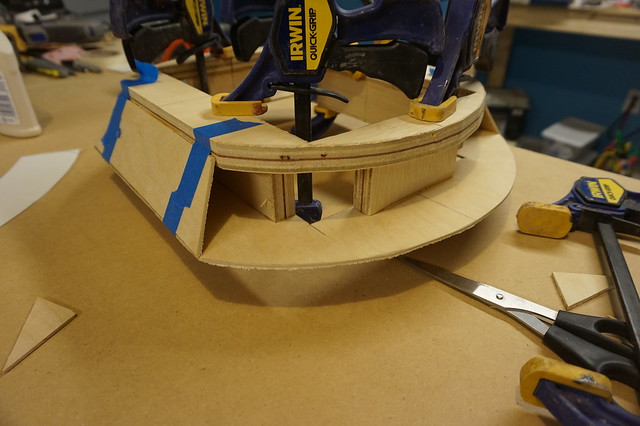
Initially I wanted to vacuum form the skirt to put our proto-former to use. I decided to make it out of wood instead so the body could be set upright when the legs are off. The basic shape was made with plywood and the curved surfaces created with styrene glued on with Goop. After the glue dried I filled the cavities with Foam-It! 3 to provide internal support. The ribs were made using MDF.

DSC00154

DSC00165

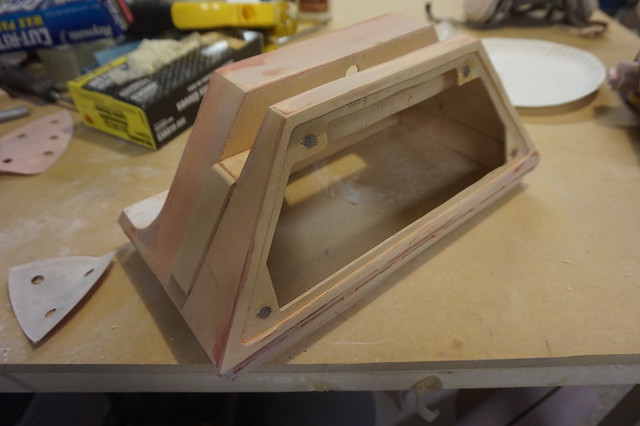
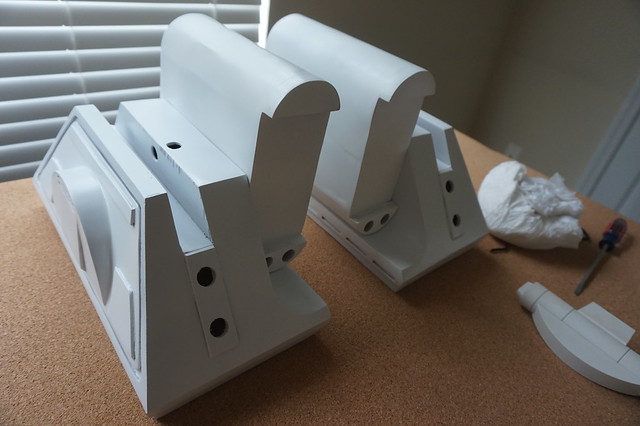
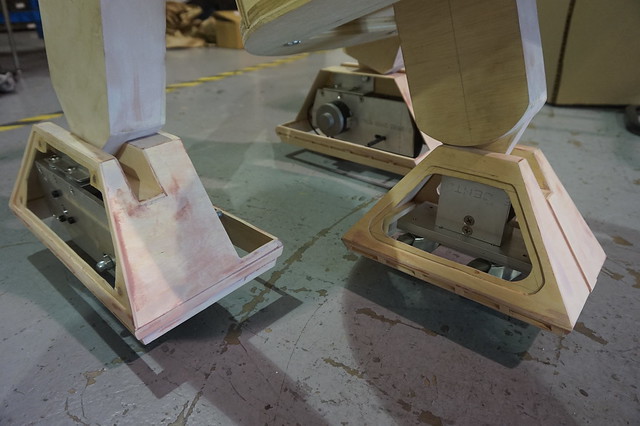
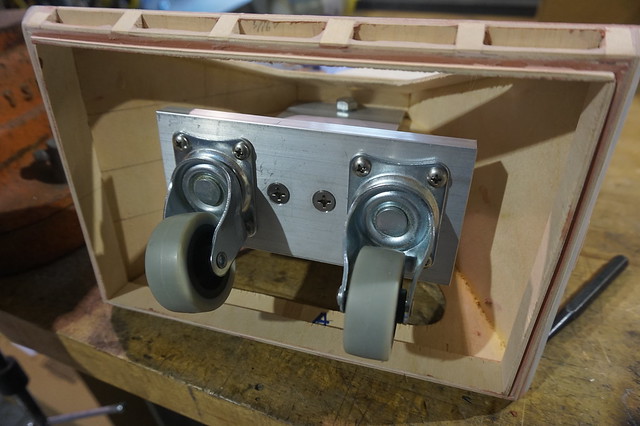
The cosmetic shells for the feet were made from 1/8” plywood. For the outer feet there is an access panel held on with rare earth magnets so I can put a nut on the joint bolt. The “battery box” that covers the motor was made using styrene and plywood, and is held on with magnets as well. Inside each foot is an electric scooter motor and wheel supported by an aluminum bracket manufactured by one of my co-workers after I made a mock-up out of MDF.

DSC00134

DSC00524

DSC00116

The center foot has the worst joint design I’ve ever seen. For years I thought the side panels would come off and you could slide a bolt in that way. Turns out the top edge of the panel is BELOW the pivot, so it is impossible to run a bolt straight through. Instead, I designed a bracket with two threaded bolts which tighten from either side into the pivot point on the leg. Again, a mockup was made and then an aluminum version was made for the droid.

DSC00112

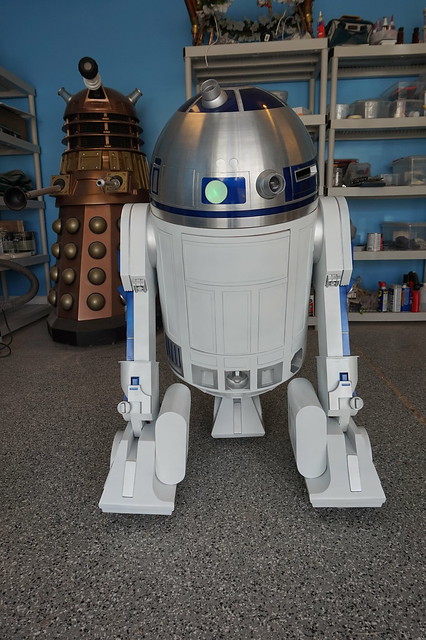
The legs were built from several layers of plywood CNC’d at MindGear. An aluminum tube was glued into the pivot joint where the bolt runs though. While I made the ankle pieces, all the other greeblies with the exception of the booster frame were purchased from resinparts.com. The booster frame was bought from a friend, and modified so it would be held on with magnets. The shoulders were assembled from several layers water jetted out of 1/8” styrene using files created by David.

DSC00033

DSC00509

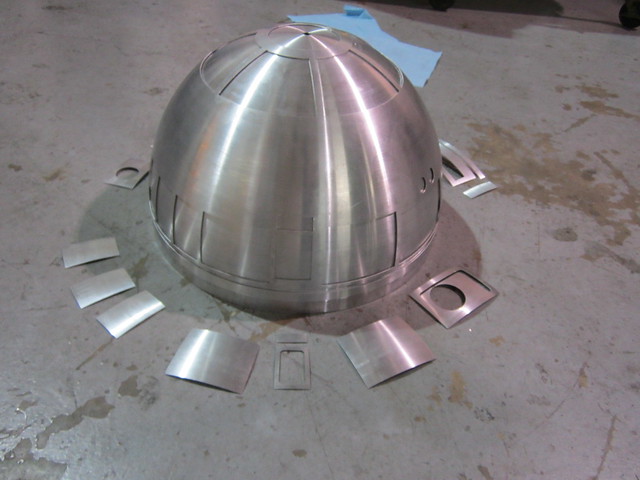
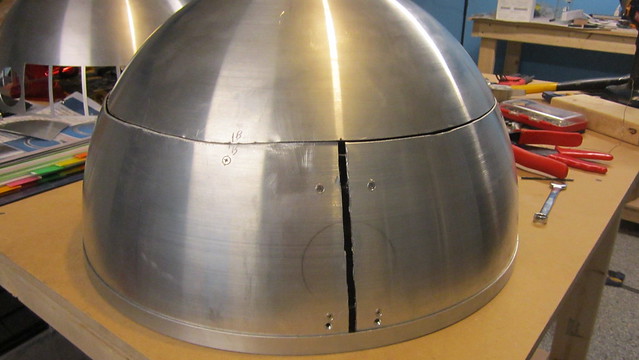
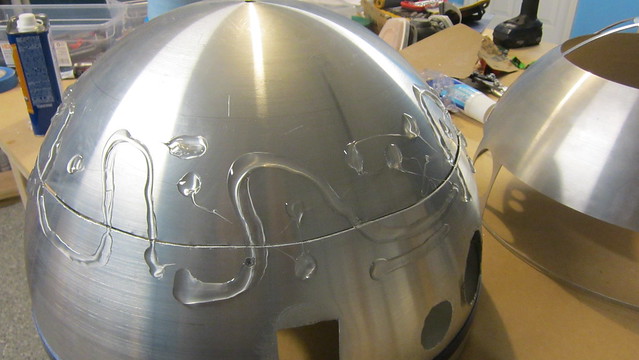
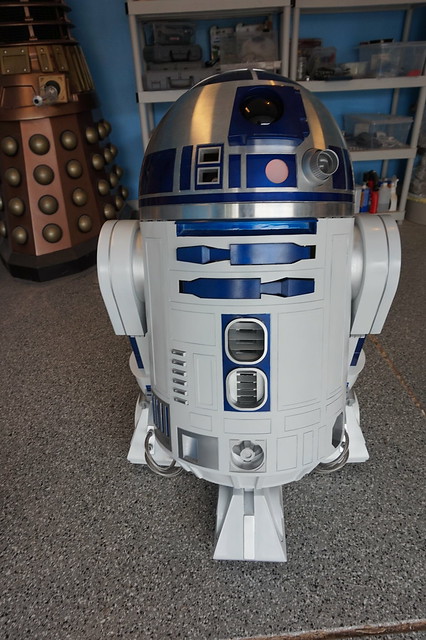
The dome is what is referred to as the “300mm Dome” and is the go to for most builders. Getting one typically requires waiting for a run to occur, but I found a forum member who was looking to part with his un-started kit. The kit contains 2 domes; the outer which is laser cut and the slightly smaller inner dome. To finish the kit I had to cut all the panels out by hand and file down the edges. Most of the panels were then painted blue (more on that in a bit). In a perfect world the inner dome would have the same curve, but it doesn’t. I had to do some extensive modifications to it to make it fit properly including adding an expanding -joint and cutting holes where the lights would be. Once all the cutting and painter were done the dome was glued together with Goop. The radar lens is a 4” ornament, and the indicator light covers are made from plastic off a milk jug. All resin greeblies once again were purchased from resinparts.com.

IMG_1153

IMG_2012

IMG_2031

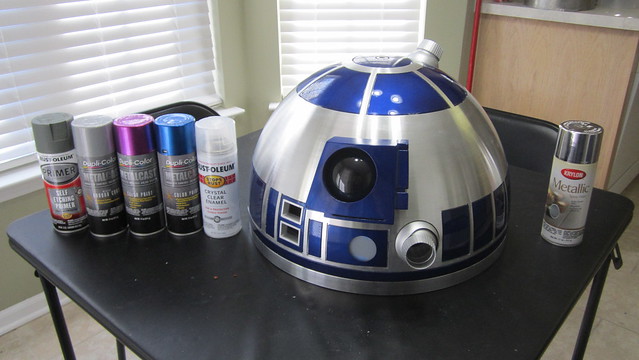
Since this was meant to be a KISS build, I decided early on to use rattle cans for the paint. The white is Krylon gloss white while the silver is Krylon aluminum. The blue color was achieved by painting each piece with purple anodized paint, followed by blue anodized paint. It takes a bit of practice but produces a very rich “electric blue”

IMG_2039

IMG_2061

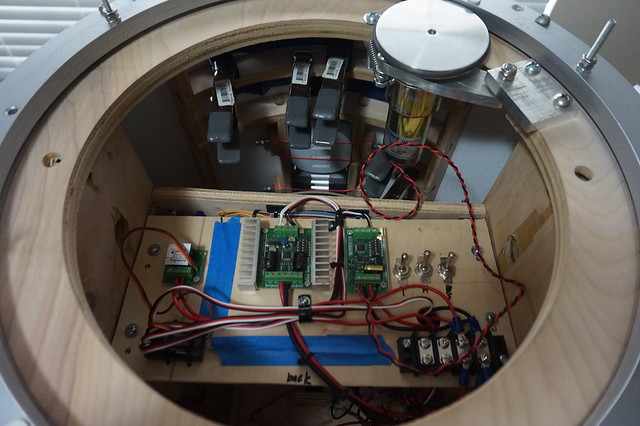
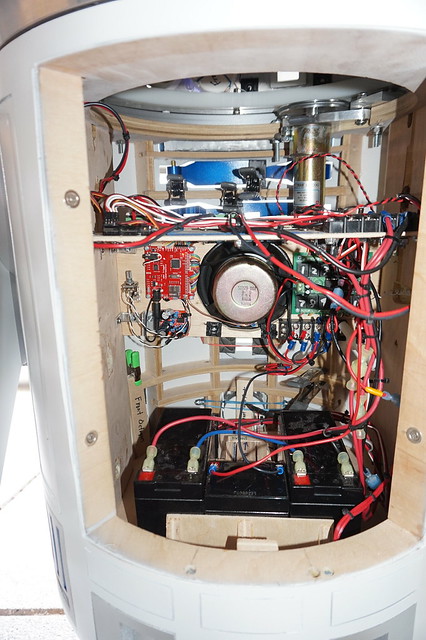
One interesting aspect of this build is it completes a circle. I learned how to motorize the Dalek by reading the R2 forums, and now I motorized an R2 from lessons learned building the Dalek. They have about the same control system, except the R2 does not have electric brakes in his wheels and components were scaled down. The head and feet run on two 12V, 10 amp hour batteries wired in series while his sound system runs on a single 12V, 2 amp hour battery.

DSC01059

Speaking of sounds, our good friend Daniel help us make R2’s sound system very unique. Not only can he beep, he can play music and beep and the same time. This is accomplished using a SparkFun wav trigger. p>

DSC01067

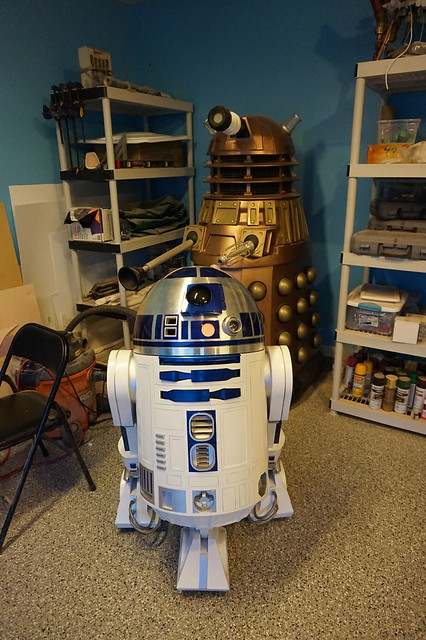
Our little droid has been to a few events this year and while he doesn’t have the intimidating presence of his Dalek big brother, he has been fun to drive and much easier to transport. After putting this build off and am very happy to finally have an R2 of my own and now that he is out of the way I can get back to the more unique projects. Keep an eye out for write ups concerning our JNPR costume group coming soon!

DSC01063

DSC01066

DSC01071

DSC01072

DSC01077

DSC_0176

To stay up to date with R2’s appearances and our other projects, click here to follow us on Facebook.

For more build pictures, visit the flickr album click here.

-Wayne, 2StoryProps

March 18, 2015

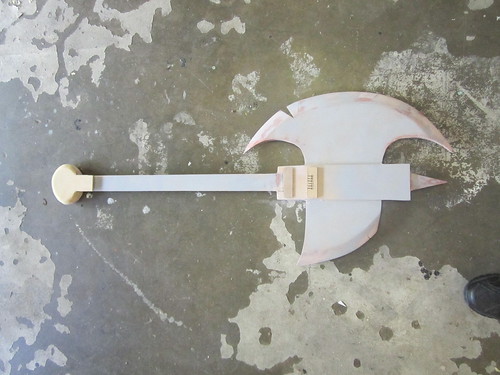
Marshall Lee Axe Guitar (Adventure Time)

Back in 2013 I helped a friend out by making a replica of Marceline’s axe bass from Adventure Time. It was a fun, quick little build and I was very happy with how it came out, especially since I had to finish the thing inside of two weeks. Late last summer with Dragon*Con approaching I decided to build the gender swapped version for quick casual costume to bring to the con.

Fionna_and_Marshall_Lee2

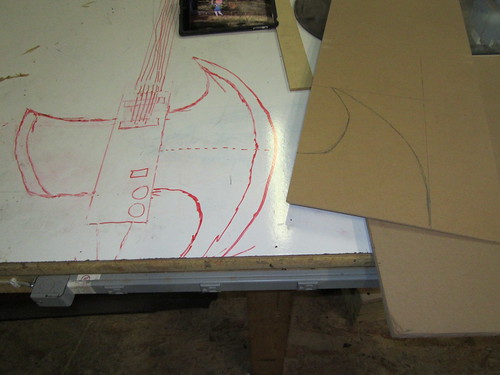
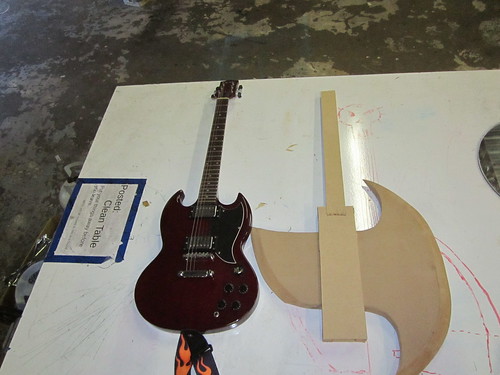
The build started by sketching out a design on the white board at the shop so I could see it full size. I used the real guitar I own (I do not know how to play, I bought if for Rock Smith) to determine the size of the body and neck. Looking at the references I realized Marshall’s guitar has a very long neck, and lengthened it almost 9 inches compared to my real guitar. The body is made up of layers of ½” and ¼” MDF while the neck is made of four layers of ¼” MDF. I decided not to use the foam method I used for Marceline to simplify the construction and speed up the build. The trade-off is I have a bit more weight, but compared to other items I bring to conventions I think it is manageable, especially since the final weight is comparable to a real guitar.

IMG_1312

IMG_1324

IMG_1349

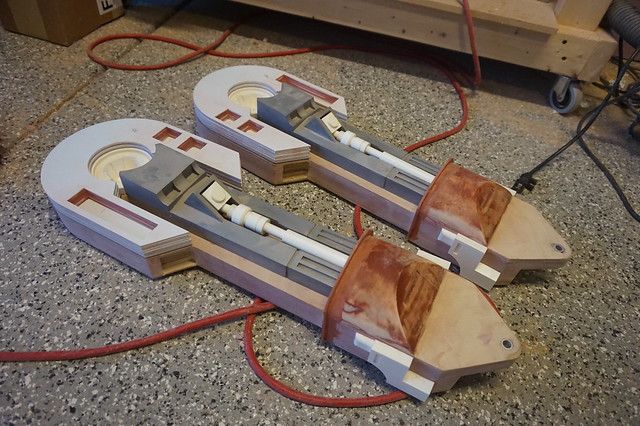
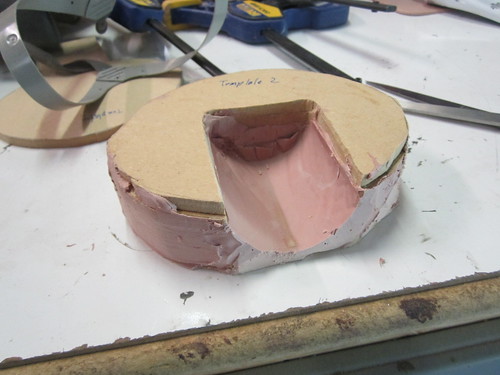
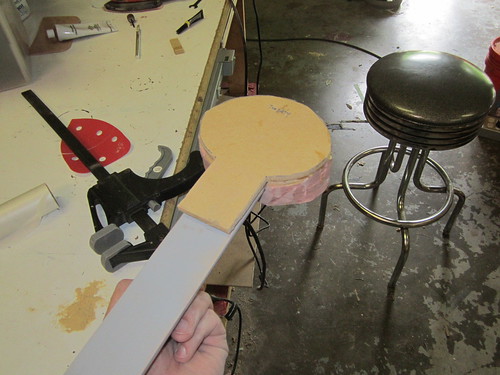
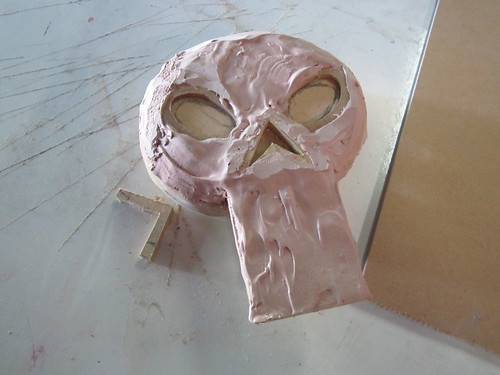
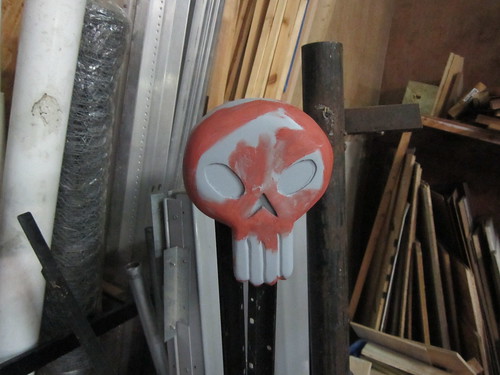
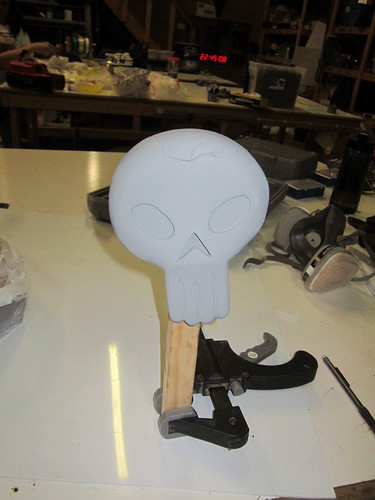
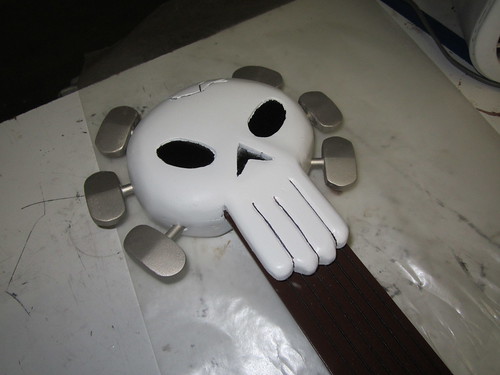
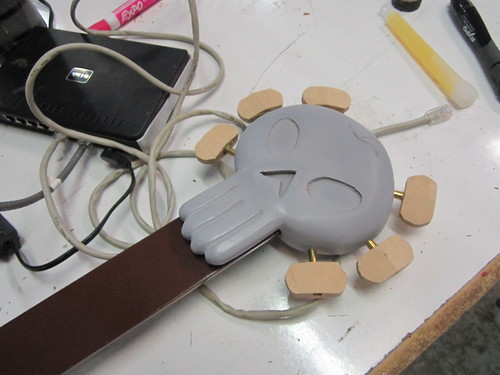
The major difference between the guitar and the bass is the head. Marceline’s bass has a normal head which more or less is like a real instrument and allowed me to use real tuning hardware. Marshall’s instead has a skull that sits over the entire head of the guitar. To make this piece, I made a template and cut out 7 layers of ¼” MDF. The first 6 were glued together and sanded to fit around the neck of the guitar. To match the curve on the back of the neck, the neck was wrapped in wax paper and then pressed into the skull with bondo. The top piece was then glued on, giving me a form that slided right onto the neck of the guitar.

IMG_1343

IMG_1348

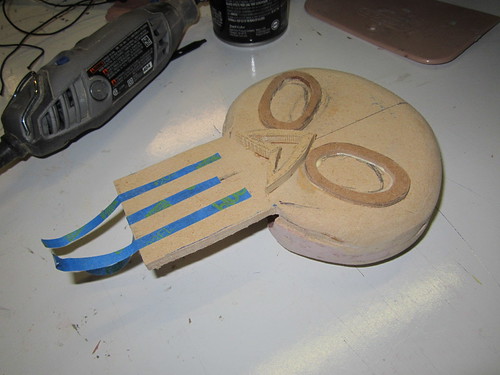
Using a dremmel and palm sander, the rough form was shaped into the round skull. For the face, I cut the outlines for the eyes and nose and glued them to the form. Bondo was then used to blend the shapes into the main form, giving me clean cavities for the eyes and nose. The teeth were shaped using the dremmel’s sanding drum.

IMG_1351

IMG_1352

IMG_1360

IMG_1373

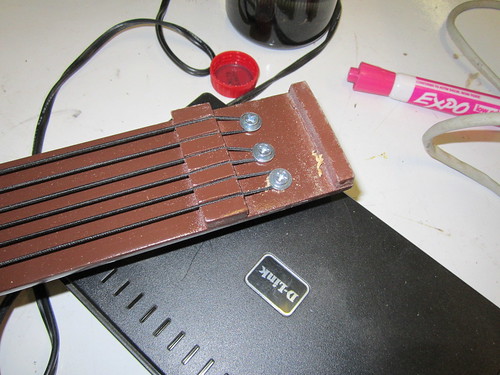
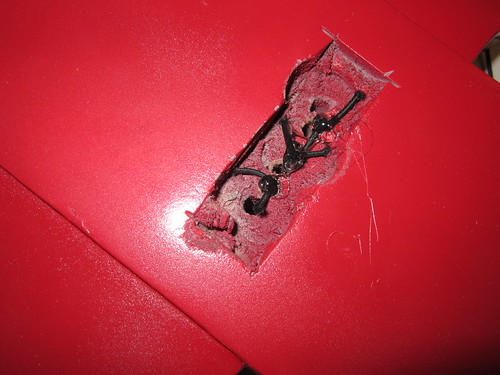
Unlike Marceline’s bass, I could not use real tuning knobs. Instead I shaped them from brass rod and MDF. Since I can’t use the tuning knobs to tighten the strings, they are screwed directly to the neck under the skull then tied in pairs on the inside of the guitar’s body.

IMG_1397

IMG_1398

IMG_1400

Everything else was basically the same as Marceline’s build. The guitar was primed and painted, the strings added, and real knobs were attached using brass rods. The total build time was comparable to Marceline’s, going from start to completion inside of 2 weeks.

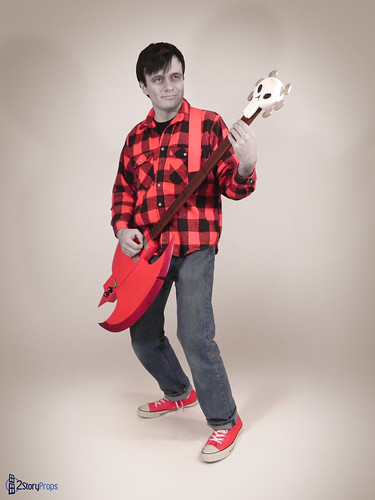
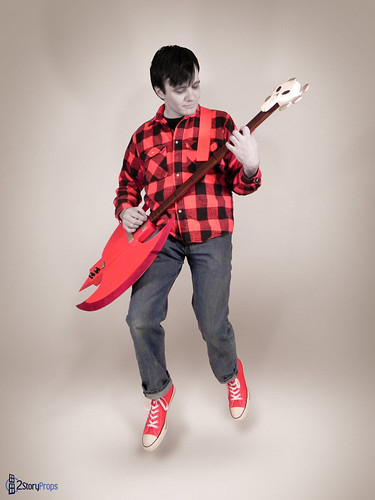
While I intended to debut Marshall Lee at Dragon*Con 2014, I decided against it as I currently have no experience with body paint and I did not want to risk getting any on the moon suit while changing between costumes. One of my co-workers, however, decided to borrow it so it did make it to the con. For our project photo shoot David used his photoshop magic to make my skin appear grey. I will post a picture to our facebook page if I ever get around to trying the full make up.

IMG_1409

DSCN6940_edited

DSCN6952_edited

DSCN6955_edited

This was a very fun build and I am glad to have worked on both guitars. This is probably my last Adventure Time prop for a while but as always we are working on some pretty cool stuff that we hope to share soon. As always thanks for reading!

Click here to see more build pictures on our Flickr page!

Don’t forget to check us out on Facebook! Like our page to follow us weekly with project updates, How2 Tips, and convention appearances.

- Wayne, 2StoryProps