

I was going to write up a summary of what Bioshock is for those unfamiliar with the game, but you can easily find that information on Wikipedia. For the purpose of this post, I’ll just mention that Subject Delta is the first successful Big Daddy prototype and the character you play as in Bioshock 2. The trailer should give you an idea what the general mood of the game is.
My suit started off with a pepakura file I stumbled upon on the 405th. The thread if you are interested can be found here:
http://www.405th.com/showthread.php/23746-Bioshock-2-W.i.p
After two fold attempts I managed to get the helmet to a scale where it fit over my head and touches my shoulders. The model is good, but I did have to do some cutting and taping to get the chest to close into my figure. To ensure the helmet maintained its shape during fiberglass I covered my ODST mannequin with plastic and taped the helmet on top of it.
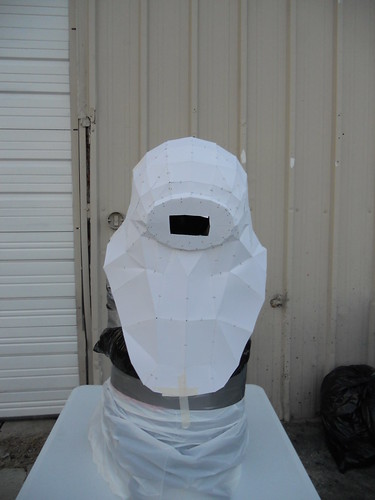
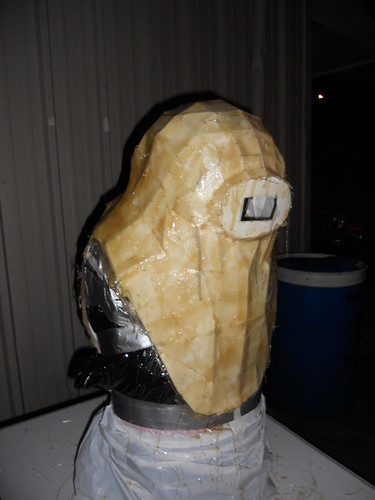
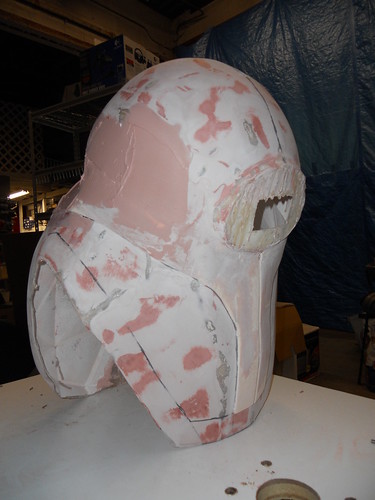
Since the pepakura is only being used as a basis for sculpting, I broke the usual rule and put the glass on the outside of the helmet. Starting by painting a thin layer of resin onto the cardstock, I added several layers of glass cloth and mat to create a strong base for bondo work and prevent any bending.
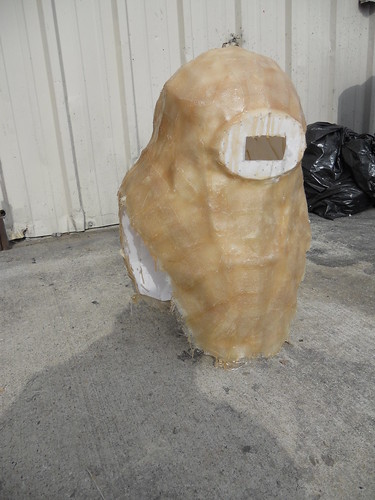
Then of course came bondo, sanding, and glazing putty. When the base layer was smooth I took a sharpie and a ruler and laid out where the raised surfaces would be.
To raise the various layers, I used balsa wood cut into small pieces to follow the curve of the helmet. In the past I would have used epoxy for this step but thankfully Dave introduced me to the wonders of hot glue, so this process went from a full day to less than an hour. Once the wood was on, it was sanded and then filled with bondo and sanded to the appropriate shape.

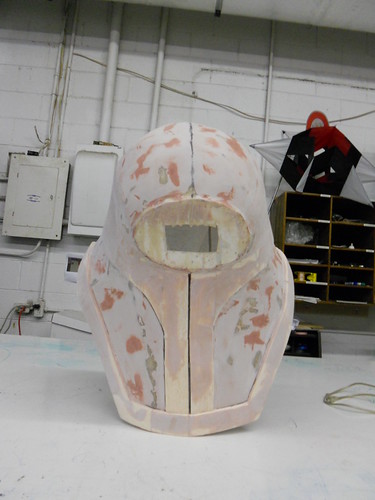
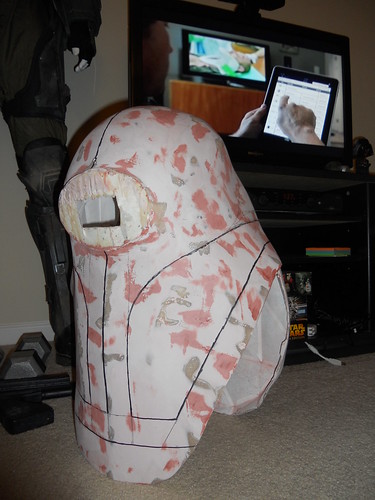
After more putty and sanding, I reached a point where I wanted to hit the helmet with primer to see how the surface looked and how much smoothing was needed:
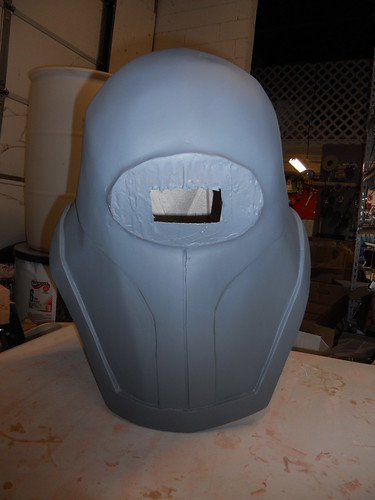
Overall I am very happy with how this is coming out so far. My next step will be to add the camera and face plate, followed by the relief valve, flashlights, and rivets. To keep the weight down on the final product I will be molding this helmet so I am wearing a casting rather than ½” thick bondo.
Stay tuned!