November 13, 2014

Dalek Repairs and Upgrades 2014

Back in 2011 I was trying to find a cool project to build for the next Dragon*Con when I was introduced to Doctor Who. I though the Daleks were really neat characters, but the fact I had never seen one at any of the conventions I attended made this a very tempting project. After I heard that there was going to be a Doctor Who convention here in Huntsville I had the last push I needed and got to work. After about 5 months of wood working and 3 months of electronics, I had my very own Dalek, whom I’ve named Braun after the famous rocket scientist.

Since his debut at Con Kasterborous 2012, Braun has had a very interesting life. He won an award in the 2012 Dragon*Con masquerade cosplaying as the scariest thing he could think of (The Doctor), has helped raise money for charity at GMX 2013, and as of now has been the flower girl in four weddings, complete with pneumatic flower cannons! Everywhere he has been the reaction has been great and has led to some really interesting stories.

During all this time however, Braun has been getting a little beat up. He acquired quite a few dings and scratches over the last two years, but nothing too bad. However, during Kami Con 2014 his plunger arm caught one of the mascot’s dresses and the support box finally gave way.

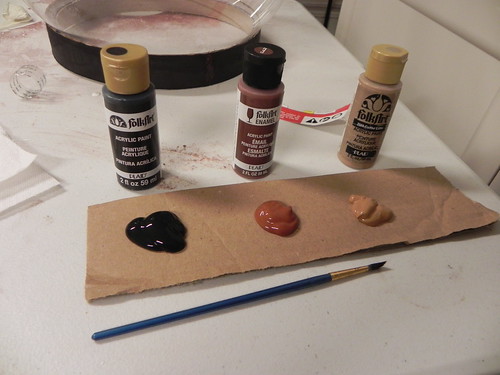
The damage itself wasn’t too bad. What was bad was the fact that the paint I used originally was discontinued, so I had no way to do a touch up that would blend into the existing paint. After searching several stores I found Rustoleum Aged Copper at Home Depot. It was a close match, but not close enough. Thus, my simple repair suddenly became a long process of repainting the entire Dalek!

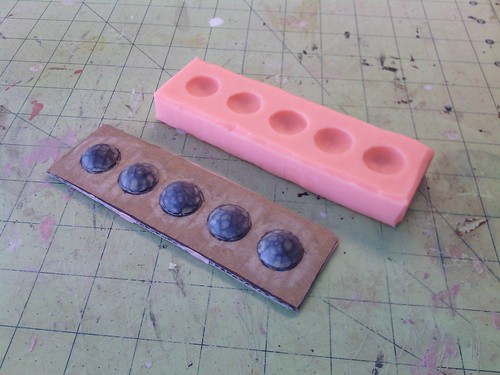
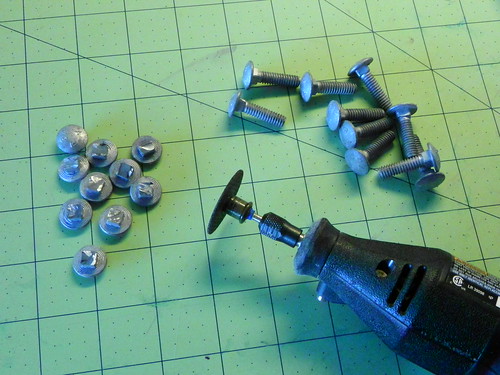
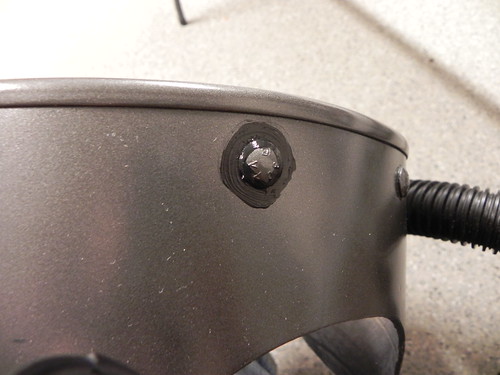
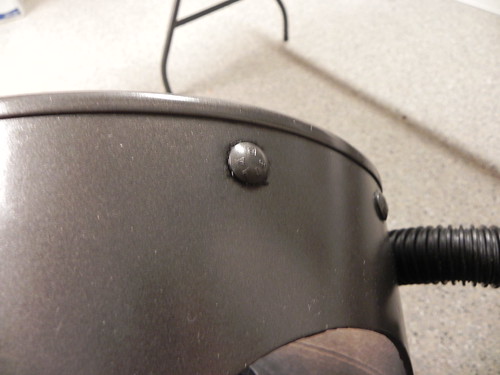
The first step was to remove all the non-copper colored parts from the Dalek. The slats were simple enough as they are held on by bolts. The hemispheres on the other hand had to be peeled off and all the old hot glue removed. Since this process damaged the finish on the skirt, I had to re-putty and finish the whole thing.

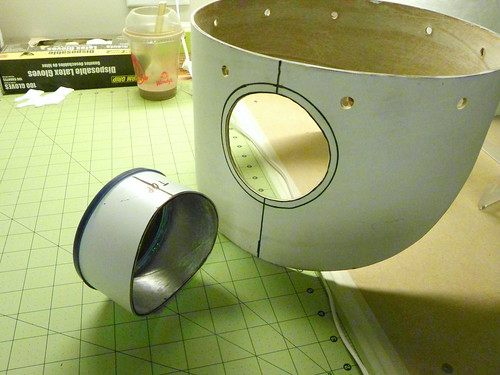
To help keep the arm on in the future, I reinforced the arm block with small pieces of wood. The cover was then epoxied back on and blended with the body so you can’t see the seam. With all the dents filled in, Braun was repainted and reassembled. I really like his new color as the old paint left blotches. It’s hard to see in pictures but the new finish is much more even and more metallic than before.

With Braun down for repairs anyway, I decided it was time to fix something that has bothered me for two years. When I built Braun I had no idea how to build a robot, and time was running out for Dragon*Con. I decided to go quick and simple and put his head on one center mounted gear-down motor. This let me rotate the head, but would not let the eye move up and down. Thus for the first 2 years Braun could only look a person in the eye if they were a specific height.

The old set up. The center mounted motor has already been removed.

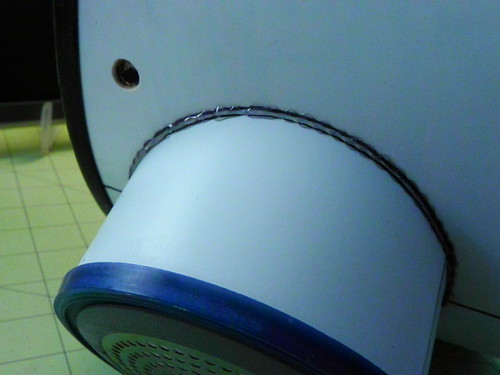
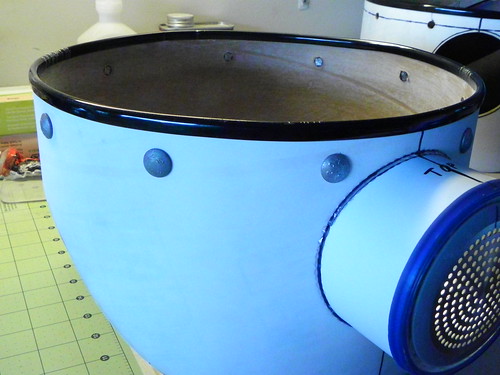
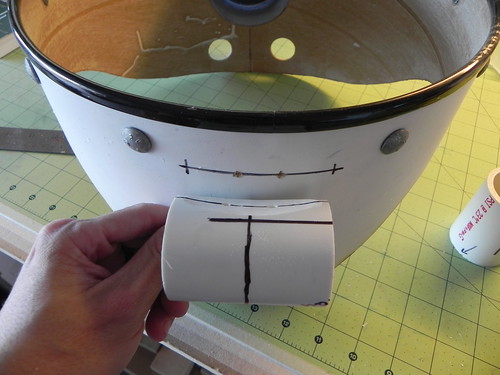
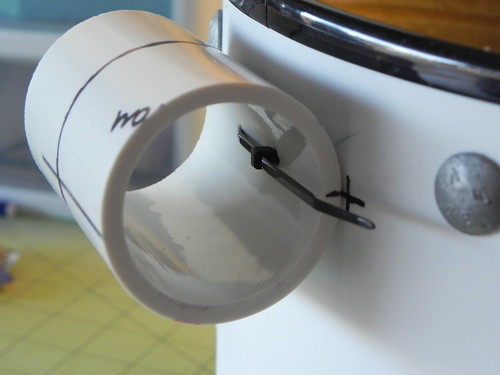
The first thing I had to do was get rid of the gear down motor in the center of Braun’s head. In its place I added a slip ring. This device allows the head to rotate fully while maintaining electrical connections. I purchased a 6 wire model to allow 3 for the servo and two for the new rotating motors.

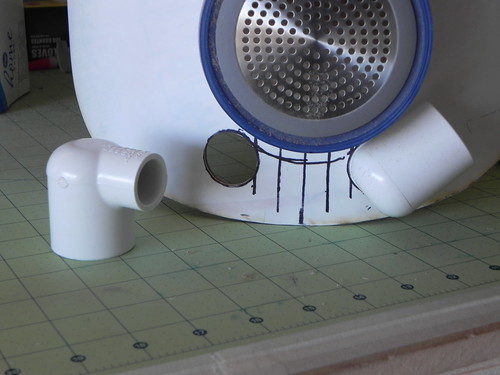
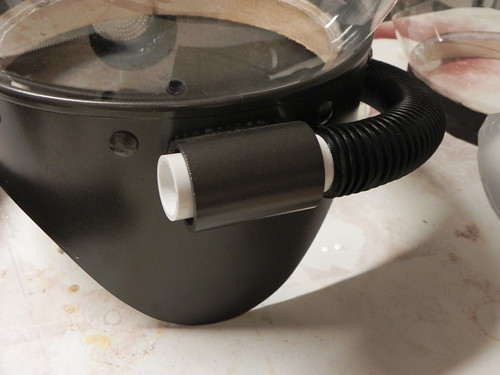
In order to make Braun look left and right, I had to add a new motor that would drive his head using a wheel that would ride on the top of his neck. For this process, I had to balance the motor’s rpms and the drive wheel diameter such that the head would not spin too fast. After crunching some numbers in excel, I settled on two 300 rpm high torque motors. My co-worker Jason was nice enough to machine the drive wheels out of aluminum. The tires are thick o-rings. As before, the motor system is controlled by a 10 amp speed controller in Braun’s body.

Making the eye move up and down involved a fair amount of math and compromise. I usually try to keep these write ups from being too technical, but there are two concepts you will need to be familiar with to understand how this works. First, in order to make an object rotate a torque must be applied. The amount of torque is equal to the force in the direction of rotation times the distance the force is applied. Thus, if you want to increase torque, you either need to increase the force or how far the force is from the point of rotation. This is why wrenches work because they are increasing the distance in the equation. The other property is that the force of a spring is equal to the distance it is stretched times its spring constant. As far as how this applies to the Dalek, well start with the eye stalk itself. The eye stalk only weighs about 1 pound, but the center of gravity is about 12 inches from the pivot point. This means the eye is providing 12 inch pounds of torque on the pivot. In order for the eye to stay in one position, an equal torque must be applied in the opposite direction. Since the pivot point of the actuation system can only be 1.5 inches from the pivot due to the design, the required force holding force is 8 pounds! Most servos cannot provide that amount of force. Thus I needed a way to balance the eye with a spring.

Using an excel spread sheet and plugging in several spring options from McMaster, I finally had a system that worked (on paper at least). I ordered the parts and built up the balancing mechanism. Turns out I was within a fraction of an inch of being balanced! The final component was to add the servo. The location of the servo is designed so the full 45 degree range of motion of the eye matches with full up and full down on the controller (this is the channel that normally controls throttle on airplanes). Originally I was going to use a 66 oz-in servo, but found it could not move the momentum of the eye. I then upgraded to a 240 oz-in servo which solved the issue. After two years Braun could finally move his eye stalk up and down! I found through a few events that this simple change adds a lot of emotion to Braun and helps his seem more life-like.

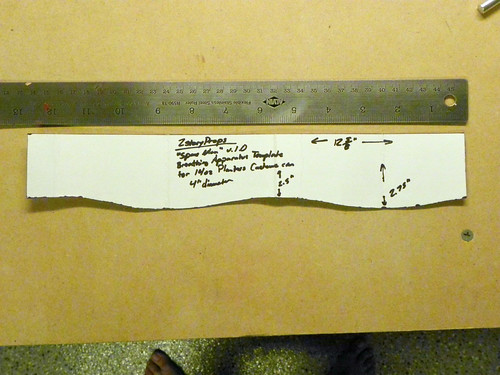
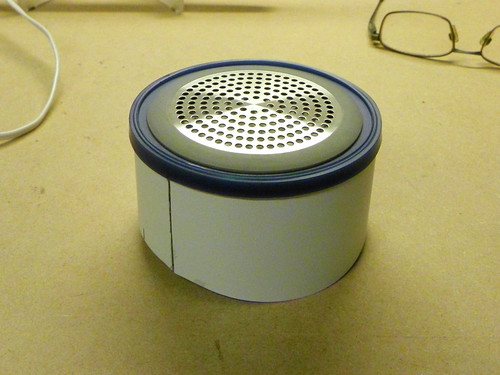
You may recall I mentioned Braun has been a flower girl on several occasions. Braun’s part time job started when our friend Daniel, who gave us the wheel chair motors that drive Braun, asked if the Dalek could be in his wedding. Initially I assumed Braun was going to be the ring bearer, but another friend’s R2D2 had that job. As a joke, I suggest Braun be the flower girl and, “Shoot flowers at people as it goes down the aisle.” A few days later Dan calls me asking if we can fit pneumatic cannon on the Dalek. He shows up with this copper ring system that contains four solenoid valves, which I then connected to the 12 channel remote that runs Braun’s sound effects. The flower petals are then propelled by a small paintball tank hidden inside the Dalek.

Having taken Braun to numerous events I always seem to receive questions about things Braun can’t do or features they think should be added. The three most common are;

Why don’t the arms move?

Why don’t the ear lights flash?

Why don’t you set up a system so you can talk real time through Braun?

I had plans to make the arms move, but at every event there is always someone who will yank on Braun’s arms. If he had a mechanism to move them, they likely would be broken by this action, so for the time being the arms will remain stagnant. The lights are a project I hope to address, but the voice I like to leave as a recording so I don’t have to wear a microphone. The ear lights are something we will likely fix at a later date.

This write up is a little bit behind. Like several months. Braun’s new features and paint have been seen at several events now and I am just glad to have him running around and scaring people again, and I hope to have keep him operational for many years to come. We have a few items currently finished that will have write ups coming soon and we are hard at work on some new items as well. Thanks for reading and stay tuned!

Click here for more pictures of Braun's rebuild and upgrades!

September 23, 2014

Skyrim: Dawnguard, Part 2

Onto the fabric parts!

I rather like sewing, to be honest. Like every other creative act, it has its tedium, but having a well-made fabric costume component completed by your own hands is such a wonderfully rewarding feeling. Flashy armor, props, and helmets are awesome and super fun to make, but poor underlying fabric work can really bring down a costume experience for me. So every time I am presented with some kind of fabric work, I make an earnest effort to exceed the quality of my previous sewing work. This project had a few key areas that would really test my abilities: an inner shirt, two padded armor skirts, the vest onto which the armor plating is attached, and the glove pads.

A lot of my sewing projects thus far have been minor components – balaclavas, shoulder pads, simple spandex gloves, stuff like that, stuff that can be patterned flat rather easily. This project would require custom patterning, though. As I’ve grown in the costuming community, I’ve learned to appreciate totally custom patterning from scratch. Modifying existing patterns has its place and is a good starting point, but if you want to shoot for accuracy and quality from the get go, there’s no better way than to make your patterns from scratch. By doing so, you gain a valuable, intensely intimate knowledge of your build. You understand how it’s put together and why it’s put together that way, and that knowledge can make or break your stress levels later into the build when deadlines are looming. So I’ll say right off the bat that this project has made me a true-believer in custom patterning.

The Inner Shirt

Prior to doing any patterning or sewing work, Wayne and I both made duct tape mannequins of each other for various projects. Take your pick of the possibly hundreds of duct tape mannequin tutorials out there, I won’t go into it here since I wouldn’t be adding anything unique to that topic. I hung my duct tape mannequin in my garage-turned-shop at the same shoulder height as myself, so I had an accurate height reference. My duct tape mannequin doesn’t have legs, so you’ll see it supported underneath by stacks of Home Depot buckets in the following photos, real classy like.

Starting with the patterning for the shirt, I found it’s best to just jump right in and start pinning on large sheets of fabric. I used cheap muslin as my patterning fabric. You can use anything you like, but make sure it stretches (or doesn’t stretch) like your final fabric. I know that a lot of people use cheapy printed fabric, but the solid, blank color of the muslin is helpful in making marks and notes. As you make cuts and refine shapes, you are able to make a once rectangular piece of fabric fit over the complex curvature of your body. However, sometimes the fabric won’t bend right, and that’s where seams come in. I found very quickly that it’s critical to piece together new bits of fabric onto older layers, and then remove it and rebuild whole chunks of your patterns with new fabric. Errors get worked out that way, but more importantly, you begin to gain knowledge of how it all goes together. The more I patterned it out, the more I understood the design of the shirt. I won’t go into “how to sew” or anything, the takeaway from this I learned the importance of making custom patterns.

It's important to note here that I strayed slightly from the design of the character design in the game. Some of the character variants in Skyrim show the armor without the large shoulder armor, revealing the shoulder area of the inner shirt. I don't know if there is any specific terminology to describe the "tucked under" look of the sleeves, but the inner shirt has a layered approach to its shoulder seams. I didn't quite know how to address that during my pattern making, and it's possible I was making it unnecessarily complicated in my own mind. However, my solution was to just sew the shoulders as regular shoulder seams because my costume build would include the shoulder armor pieces, and the armor would cover that area anyways. As you'll read below, I'm all for getting the details as right as you can, but in this particular area of the costume, I could cut that corner without any repercussions later on. So if you have an eye for details and are comparing my work with the character art, understand that I am aware of the differences.

IMG_20140524_124600

IMG_20140524_182513

The process was long and tedious, but I found that the more refined my patterning work got, the quicker the pace became. The initial stages of the patterning took the longest, as wielding a rather large piece of fabric while attempting to find your working boundaries can be a cumbersome process. By the end, however, it wouldn’t take more than 5 or 10 minutes to pin a new piece on, test fit, adjust a line, and recut a new pattern piece. Once I had all the pieces finalized, I was able to transfer my patterns to the final fabric and begin sewing.

The fabric I chose was some kind of wool knit. I’m not a fabric expert, so I couldn’t tell you what specific kind. What I was looking for was color and texture. I wanted something that had a thick, exaggerated weave that could still be noticed among the other details on the costume. Considering that the majority of clothing items in Skyrim can be compared to medieval clothing in the real world, I feel my choice in fabric was “period” appropriate. It’s slightly itchy, though, so I lined the neck with a t-shirt style cotton. I would be wearing a t-shirt under this as well, so for the most part I was protected from the itch fabric, but I really didn’t want to scratch my neck raw over the course of a few hours while wearing the costume.

IMG_20140526_210636

IMG_20140526_233319

The thing about Skyrim costumes is that the character design is always so very intricate. They don’t leave any detail behind. It’s all there, and I feel it’s important to at least make a stab at all the details, otherwise it might feel unfinished. I’ve always felt that if you add a detail that might not ever be seen or warrant any special attention, it’ll be a nice little surprise for when someone does find it. Doing so is world-building and enriches the history of the character you are presenting. However, if you leave off the details that you think “might” not be seen, all of a sudden it can be like there’s a gaping void there that can’t be ignored. So I try to give all the details at least a little bit of my attention. A detail found throughout the Dawnguard costume is some thick stitching around certain edges. Since machine-sewn stitches would provide the structure, this detail stitching would be replicated in yarn and be purely cosmetic.

IMG_20140604_212020

The Padded Armor Skirts

The skirts were made by quilting denim together with the wrong side out. I chose denim fabric for the texture, and the wrong side was used for the color since the right side was too vibrant and blue. It was quilted with a single layer of low-loft batting, which allowed the skirts to remain relatively thin and light. The suede edging was sewn in place and, like the shirt, more faux stitching was added with yarn. The quilting and edging went rather quickly, but each skirt took about an hour and a half to stitch around the edges. The needles I was using would not puncture the suede, so the suede had to be cut with an Xacto blade, hole-by-hole to accommodate for the thickness of the yarn and the needle. Tedious is putting it nicely.

IMG_20140607_100319

IMG_20140607_181100

A lot of times I have a general idea of how I want a costume to go together, but the details get worked out as I work. In this case, I didn’t know how I was going to attach the skirts to the rest of the costume. I thought maybe affixing them to a belt would be suitable, but then I realized that I didn’t want to wear too many belts. So I had to attach them to something else. I remembered the modularity of the Dawnguard costumes in-game, and decided that if I ever wanted to venture out in one of the skirtless variants, I needed the skirts to be removable. I ended up Velcro-ing them into place on the shirt. The Velcro would hold them vertically, while the outer vest would provide lateral support against any unforeseen tugging.

IMG_20140611_185322

To finish off the skirts, I needed to place a stud at every intersection in the quilted denim. Some intersections toward the top would not receive a stud because they would interfere with the vest and main belt later on, but the bulk of them received a little resin stud. To make the studs, I carved five little bumps out of some 1/4” thick sintra and made a mold of them. I didn’t know if any of them would pull off during regular wear and tear, so I cast up over a hundred studs in total so I’d have extras. After they were painted, they were glued into place with some E6000 glue.

IMG_20140608_115610

IMG_20140612_182718

The Armor Vest

The vest began the exact same way as the shirt, with the exception that the patterning was developed with the finished shirt on the duct tape mannequin. Doing that isn’t so much of a fitting (size) consideration as it was positioning and scaling considerations. I needed it to have the correct proportions as the game reference, so working on top of the finished layers beneath it was the way to go. Besides, you’re not really going to mess anything up by pinning to more cloth, at least in this instance.

On the reference material from the game, the vest material is somewhat ambiguous. I suspect it’s intended to be leather, but several factors prevented that from happening, among which were cost, time, and capabilities. Instead of leather, I searched my local fabric stores high and low for a suitable replacement and arrived on a waterproof, plasticized canvas that was the right color. It also had a very small, tight weave that didn’t really show too much of a texture.

IMG_20140613_180808

IMG_20140614_203904

Now the in-game character model shows that the vest closes in the front with three clasps. Not only did I have the time to develop fully working buckles (more on that in Part 3), but I was sure that doing so would not make it look correct, as the buckles would be pulling in odd ways. So I needed a way to close the vest in the front so it would lay correctly on my body regardless of the three buckles. The solution was to hide a zipper as the real closure and just make the buckles purely cosmetic.

IMG_20140614_204441

At this point, the vest was not complete, but I had to turn my attention to the armor and the gloves, so some of the vest components would sit in an unfinished state for a few weeks. The shoulders were sewn and pinned in place, but I couldn’t permanently install them until I got my materials back from the seamstress that worked on my gloves (more on that below). When I got the materials back, I sewed up the shoulder straps from some brown vinyl and permanently installed the shoulder assemblies into the rest of the vest. Regarding the buckles across the chest, those would not be installed until the armor (Part 3) was installed because I would need the armor in place for positioning.

The Gloves

I don’t have much in the way of progress photos of the gloves. The gloves themselves are some generic long-cuffed Renaissance faire type gloves that I ordered online. I figured the glove pads were going to be a little mini project on their own, but I was running short on time and needed to pass them off to a local seamstress to build for me. The design and work involved wasn’t anything I couldn’t tackle on my own, but the vest, armor, and all the various other details were burning up the rest of time. So I made a pattern of everything I needed, purchased the necessary materials, and met with the seamstress to go over the parts I needed her to build. A few weeks later, I had the parts in-hand but quickly found that I needed to modify them. The edging around the glove pads was just too thin, so I had to remove the edging and install my own.
IMG_20140722_222251

Like I said at the beginning, I really like the fabric work. It’s certainly something I need to know way more about, as my knowledge on the matter is simply making a sewing machine “go.” I can understand folds and seams, and this build in particular has forced me to learn how to make my own patterns, but I feel I haven’t even begun to touch on the vast amount of knowledge on the matter. We at 2StoryProps strive to learn and improve with each project we work on, and the items discussed in just this one post have really pushed me into a place where I can enjoy the fabric work.

Part 1 of the Dawnguard series can be found here. Part 3 of the Dawnguard series will discuss the various armor pieces on the costume, as well as a whole myriad of details that were needed to complete the look. As usual, you can find the full Flickr photo set of the Dawnguard photo here.

September 17, 2014

Retro Spacemen (For the Budget Cosplayer!)

DSCN5582_poster

While Wayne and I regularly converse on our upcoming builds, it’s always exciting when two people arrive on a single idea totally separate from one another. Unbeknownst to either of us, we had each had a secret desire to build some kind of generic, campy, intentionally crappy retro sci-fi “spaceman” costume, as if it were something stolen from the set of some forgotten sci-fi B-movie serial. In September of 2013, I had just moved into my new house and began setting up my shop. In order to break in the space, we decided to build the retro spacemen.

Like most of our builds, we set a few main goals. Typically our builds are all about using some new, fancy material, or learning some method needed to produce a certain part. With this build, however, we wanted to build the two suits for as little money as possible, and in as little time as possible. We figured it’d be a good Halloween build, and we had a tutorial in mind for it the entire time. So here is your 2014 Halloween costume, 2StoryProps fans! (If you make one based on this tutorial, we’d seriously love for you to send us a photo!)

Right off the bat, here’s a price list. This is unusual for us (well, for me at least) as we typically operate with the understanding that this is an expensive hobby to participate in, so we generally don't tally up receipts to determine the penny-by-penny exact costs of our builds. But again, we wanted to really focus on how cheaply we could build these costumes. This list may not exactly be entirely comprehensive, as there may be a bit or bobble missing, but the bulk of what you need to build a Retro Sci-Fi helmet is there (unfortunately, we do not have the receipts for the custom fabric components available at this time). With a few tools of your own and the items on this list, you can build your own Retro Spaceman! Your local pricing and availability may vary.

PRICE LIST (online items reflect cost with shipping)

$33.26 - 14 in. Clear Acrylic Globe, 5.25 in. Neckless Opening from 1000bulbs.com
$45.00 - Navy Blue Flightsuit from Mashern.com
$1.81 - .75" x 60" PVC Pipe from Lowes
$1.08 - .75" PVC Coupling x4 from Lowes
$3.12 - 1.5" x 24" PVC Pipe from Lowes
$19.98 - 1.25" x 8' Vacuum Hose from Lowes
$1.20 - .75" Lagbolt x10 from Lowes
$1.32 - 1" x .5" PVC Elbow x2 from Lowes
$0.92 - .75" PVC Cap x2 from Home Depot
$10.76 - 12" x 48" Diameter Cardboard Concrete Form from Home Depot
$3.97 - Black Nitrile Chemical Gloves from Home Depot
$5.98 - Cashews (Canned Nuts) from Wal-Mart
$4.97 - Sink Strainer from Wal-Mart
$20.00 - Waterproof Knee Boots from Wal-Mart
~ $10.00 - Black Nylon Pistol Belt (we already had ours)

This tutorial will mostly follow the construction of the helmet, which is actually based on a similar design by a member of the Replica Prop Forum. That thread can be found here. We began with a couple of 14” acrylic globes, which we commonly use for Deadmau5 heads, and some giant cardboard tubes from Home Depot. The tubes are normally used for concrete forms and have a waxy coating on the interior. Using some poster board, we developed a template for each of us that would provide the right curve to follow each of our necklines. I have a bigger, drum-like chest while Wayne has a slimmer frame, so the necks of our helmets had to be different. Making adjustments along the way to bring everything to a comfortable height, we were off to a good start rather quickly.

DSCN5458

DSCN5461

DSCN5462

DSCN5465

DSCN5467

Next, really focusing on the “cheap” aspect of the build, we used some peanut cans and drain covers for the little “com box” on the front. Whatever it is. The cans were sheathed in some scrap For Sale sign styrene, but that’s certainly not necessary. Using the lid, the drain cover was glued into place and the com box was basically done.

DSCN5469

DSCN5471

DSCN5476

DSCN5479

DSCN5481

Now there are a few things that happened in quick succession without any real necessary order. Most of these things can be done out of the order presented here, and believe me, writing this a year after they were built, I’m sure I’m telling you something in an incorrect order. The first thing was coating the cardboard neck ring in resin. This isn’t necessary, but as a stickler for sturdiness, I was wary of the cardboard’s sturdiness over the long term, so I felt it needed something extra to strengthen it. I brushed on several layers of Smooth Cast 300 and sanded it smooth to give the cardboard a nice, rigid shell. Again, not necessary for the cheap factor, but it was something I personally wanted to do. Unfortunately, I don’t have any photos of that process, so we’ll jump right into the next bit.

The next thing was to place some fake bolts around the top of the neck ring. These are wholly cosmetic and don’t provide any real function, but I figured it would be best to get them at least placed early on in the build. The bolts were some cheap lag bolts from Lowes that were cut off at the head and glued into place with some hot glue. At the same time, I also mounted the com box in place and used a bead of hot glue around it on the outside to make for some nice fake welding detail. I also popped on some car door edging around the top rim of the neck assembly for a little bit of detailing and to clean up that edge for when the globe would be mounted later on.

DSCN5500

DSCN5492

DSCN5499

DSCN5503

To finish off the primary construction of the neck assembly, we needed hoses. Utilizing some PVC connectors and short lengths of corresponding pipe, we added some vacuum hose. So far, nothing in this build has been terribly difficult to accomplish, and this was no different. It really was just some drill work, some zip-ties, and some hot glue (both for adhesion and for fake welding details).

DSCN5509

DSCN5482

DSCN5511

DSCN5512

DSCN5554

The neck assembly is basically done at this point and ready for a little paint. In keeping with the low-budget B-movie theme, we kept it all super simple. Some metallic gunmetal spray paint and some craft paint was all it needed.

DSCN5561

DSCN5562

DSCN5563

Of course, how would we ever survive in the total vacuum of a dank, poorly-lit sound stage without our bubble helmets? We discussed the merits of mounting the globes permanently in place as well as making the globes removable, and we decided to go with the removable option. That way we can walk around with the neck assemblies in place and not have to worry about carrying a huge, unwieldy contraption. Plus, we have plans for upgrades that would include mounting tanks to the neck assemblies, so making the neck assemblies more of a part of the costume as opposed to part of the helmet was key.

In order to make the bubble helmet removable, we lined the neck ring with some EVA foam from a floor mat, held in place with hot glue. This not only helped provide some strength to the neck ring, but it made for a soft lining that would provide “just enough” tension on the globe to keep in in place. Then, using more of the cardboard from our concrete form, we made an inner neck ring that would fit snugly within the foam lining. That ring was glued closed and then transferred to the globe, where we cut an opening just smaller than the neck ring. This smaller opening allowed for some overlap between the ring and the globe, making it easy to hot glue together. (Please note: in the photo below, the bolts you see around the neck assembly were temporarily installed in this manner for neck ring fitting purposes. They were later cut short and glued in correctly.)

DSCN5494

DSCN5496

And with that, the helmets are basically done. The design is so perfectly simple that you can really run wild with it. But we needed to take it further – we needed matching costumes to go with them. We started with our standard pick of Rothco flightsuits and decided to build from there. Wayne and I collaborated on a design for a padded vest that is not terribly unlike the motocross armor used for the various Stormtrooper accessories in Star Wars, and once we agreed on the final design, Wayne took to crafting the vests.

Wayne started off by drawing the shape we wanted onto a cheap t-shirt so he could create a pattern without the need of a duct tape mannequin. The pattern was transferred to poster board, and then cut from upholstery pleather. We decided to incorporate the same color-coding we used on our ODST armor, thus I have a red shoulder while Wayne’s vest has a black one. The vests were made quilted by sewing a layer of batting between the vinyl and a polyester backing, and the edges were finished with bias tape. If you attempt this, we recommend using a thinner vinyl/pleather as it was very difficult to get through our aging $80 Brother sewing machines. Each vest closes at the bottom by connecting to a military gun belt (the same belts we use for our Ghostbuster costumes) via elastic straps and snaps.

IMG_0888

IMG_0877

The patches were made in the same manner as the ones on our Apollo space suit, by using printable silk which you can find at Jo-Ann’s. Since we were aiming for “1950s sci fi” I made a flag image with 48 stars and created a retro version of our logo. Wayne printed the patches out on the printable silk, then reinforced them with interfacing, and finally sewed them to the flight suits.

IMG_0883

IMG_0884

The suits were finished off with black rubber gloves from Home Depot and rubber work boots from Wal-Mart. While we have plans to make 1950’s ray guns at some point, for Halloween we decided to use this as an excuse to add more Nerf guns to our already massive collection.

DSCN5575

DSCN5574

DSCN5582_edited

For the rest of the photos, view our Flickr set here.

July 29, 2014

Skyrim: Dawnguard, Part 1

I have been a long-time fan of The Elder Scrolls games. I still boast that my all-time favorite single video game is Morrowind. Oblivion kind of put a bad taste in my mouth, but Skyrim made it all better. But with the almost infinite character variation, it’s difficult for me to settle on a costume or prop to build from it while still maintaining an identifiable appearance at a convention. It’s just a personal thing for me, but not everything in the games is terribly distinguishable among other games in the genre. So it’s taken me several years to muster up the effort to make something from TES. After buying the Legendary Edition for PC, I worked toward the Dawnguard campaign and fell in love.

Since a full costume is going to be a nightmare to write about, I’m only going to write about the main features of the costume: the helmet, the armor, some of the main cloth components, and the weapons. This blog post will discuss the helmet and the pair of Nordic Daggers I opted to build for Dragon Con.

The Dawnguard Full Helmet

The helmet started off as a 3D model I designed, based on my own screen grabs. I’m not into pulling game models because they are often low-poly, or the polygons don’t match the implied shapes that the graphic skin display. It can be like a bowl full of chips – my intent is to replicate the lump of chips, but the bowl doesn’t work for me. That may be a rough analogy, but I don’t know how any other way to adequately describe the experience from my POV. Anyways, the 3D model was designed purposefully simplistic, so that my Bondo sculpting would be what you see in the end. The model was then processed through Pepakura, which shouldn’t be anything new if you’ve been following our build write-ups. So I won’t go into depth there.

IMG_20140118_183839

IMG_20140123_000309

IMG_20140126_140954

After the paper model was printed, built, and slushed in resin, I took to the Bondo work. This ended up being rather tricky for me. I’m used to sculpting something that’s supposed to be perfect and smooth, either with graceful, gentle curves, or hard, flat edges and faces. I set out to sculpt this helmet to appear as if the blacksmith who made it had to crank 15 of them out in a day, so I had to reel in the quality on this one intentionally – not to be lazy and produce a bad sculpt, but rather to intentionally make it slightly misshapen, rough around the edges, imperfect. You know, government quality. So this meant grinding in a flattened, semi-faceted surface throughout that would mimic the appearance of metal roughly hammered over a beat up anvil. I also wanted to intentionally weather it from the get-go, since all the Dawnguard stuff is super beat up hand-me-downs from a bygone era, kept up by a lone blacksmith.

That’s not to say there isn’t careful detailing involved in it, however. I’ve been trying to integrate laser-cut components more and more into my builds, and this helmet gave me a perfect opportunity. In addition to the thin crosshairs logo on the forehead, this thing has too many rivets in it to remember a correct count, so I opted to laser cut a ton of little circles out of some sintra, glue them on, and then beat them up with some rough sandpaper. This would make every rivet unique, but would also give them the appearance of being soft metal hammered into place.

Overall, nothing terribly new was happening here. There was your typical Bondo work, which included the masking tape method wherein you peel up the tape while the Bondo is still wet to reveal a sharp edge. This method was used extensively throughout this build. There was also plenty of hand-crafting plastic sheet involved, primarily around the eyes and forehead details. The laser cut work was opted for out of time and labor considerations for the most part, but also just to make certain details less stressful to deal with.

IMG_20140131_152501

IMG_20140202_170420

IMG_20140216_144504

IMG_20140216_192000

IMG_20140219_230227

IMG_20140305_075455

IMG_20140308_110843

IMG_20140308_115409

IMG_20140315_181243

When the base helmet model was complete, the real work that would bring it into the world of Skyrim would begin. Prior to molding, I decided to weather it so that all the scratches and dents would be embedded in the model. A lot of people would frown upon that, since it would make it tedious to fill in if someone wanted to do a “clean” version. However, I decided that as the builder, I would play the part of the game and just give myself an old, beat-up helmet from the start. That’s how it is in the game, so that’s how it is in the sculpt. The weathering details were accomplished by “drawing” them in with a metal grinding bit in my dremel. I basically just sat there for several hours, scrutinizing my reference images while scratching it gouges and pits. It was really fun to do, and I think the effect worked out pretty well since they mostly disappear when viewed from only a few feet away. So it’s not like I took a pick axe to it; it’s a really subtle effect that will only bolster the painted weathering later on.

IMG_20140315_221944

IMG_20140316_140811

IMG_20140316_142330

DSCN6119

Then I took to molding the helmet. I decided a simple two-part mold with a seam right down the center would be easiest, based on the types of undercuts this thing had around the faceplate. Undercuts can be managed well enough if you plan for them ahead of time and work out ways of getting resin into them effectively. On this helmet, basically all the edges around the faceplate were undercuts in some regard, but they weren’t harsh enough to warrant some kind of crazy mold. Being able to peel the mold off in left and right halves made it easy to deal with. Molding material used was Rebound 25 from Smooth On, and fiberglass mat and cloth for the mother mold.

IMG_20140419_160833

IMG_20140419_173758

IMG_20140420_123648

I look around for new molding techniques all the time, but oddly enough I hadn’t come across this until I saw Frank Ippolito (I think!) do this on his Zoidberg head mold. You sculpt a little wedge shape into the mothermold so that you can insert a pair of flathead screwdrivers into it. It makes demolding way, way easier, especially when you’ve had the mold cranked down tight onto itself for several hours during casting. The mothermold can lock up on itself, and the screwdriver slots remove unneeded stresses you might otherwise put on it by trying to twist, tug, or bend it.

IMG_20140424_181719

And ta-da!

DSCN6217

Next came paint. Luckily I was able to find two rattle cans that had the right colors for it. I don’t have any sort of fancy paint setup, so right now I just stick with rattle cans, hand-painting, and a little airbrushing. I’ve switched from Krylon to Rusoleum in my paint work, and their metallic are pretty nice. After a solid base coat was applied, I hit it with several black and brown washes, selectively adding in some minor rust effects and other isolated dirty spots. To really drive home the point that this helmet had been around for a while, I used some Rub N Buff on a lot of the edges to highlight the really worn areas. The key to using Rub N Buff in a weathering capacity is to use it very, very lightly. Both in how you apply it, and in how much you apply.

DSCN6219a_preview

DSCN6225a

After painting, I spruced up the inside with a hard hat liner for comfortable convention wear, and a little black paint. Here’s some glamor shots on the final product.

DSCN6229_edited

DSCN6266_edited

DSCN6236_edited

The Nordic Daggers

For the record, I do have Dawnguard weapons in progress, but with the full costume taking up a substantial amount of my time and financial resources, I needed some kind of smaller weapon that wouldn’t take long to build so I’d have something ready for Dragon Con 2014. I opted for a pair of Nordic Daggers from the Dragonborn expansion pack. Their dinky, cheap, practically harmless weapons in-game, but they are very dynamic looking items, and they share a design lineage with all the other Nordic weapons and armor throughout the game, the Dawnguard stuff included. So I felt it would be a nice to sport a pair of them with the costume until I’m able to produce a better weapon later on.

And here’s where I totally cop-out on you guys. I’m not going to tell you how I built it, other than a few highlights. Instead, I’m going to let my time-lapse video do the work for me. Part of the reason for the build was specifically to shoot a time-lapse video of a build, start to finish. Prior to shooting the video, I designed the daggers in Adobe Illustrator and used the vector files to laser cut some layers of plastic. Since the daggers have a sharp, finely detailed appearance, the crisp lines of produced by the laser cutter would be suitable for the build. During the rest of the build, I utilized plenty of Apoxy Sculpt when sculpting the grip. After making a mold, the castings were finished off in much the same way the helmet was, except for the addition of a little (synthetic) fur and suede on the grip. Enjoy the video, and check out some of the glamor shots below!


DSCN6166_edited

DSCN6165_edited

DSCN6171_edited

DSCN6181_edited

DSCN6182_edited

For all the progress photos for all things Dawnguard, check out our flickr set here:

https://www.flickr.com/photos/2storyprops/14067345436/in/set-72157640552352423/