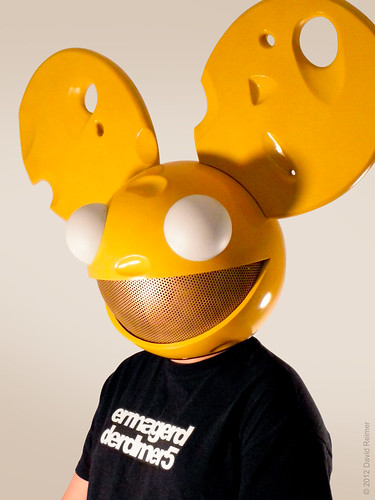
So lots of you have been asking about the Cheese Head: What are the dimensions? How did you make the ears hard? How did you do the mouth? It’s been a long time coming, but here is how it was made!
Wayne’s made several Mau5 heads in the past, but this was my first one. I wanted to try something different in terms of what others out there on the internet have done. I can’t speak for certain, of course, in case there is some Deadmau5 builder out there not posting his photos online, but this seems to be one of the first fan attempts at the Cheese Head, or any of the “hard heads” for that matter. As such, I really had to approach this thing from the ground up. After having built it, I understand where I may do things entirely different on a future attempt to reduce weight or make the process faster, etc., but this blog post will go over how I made this one in particular.
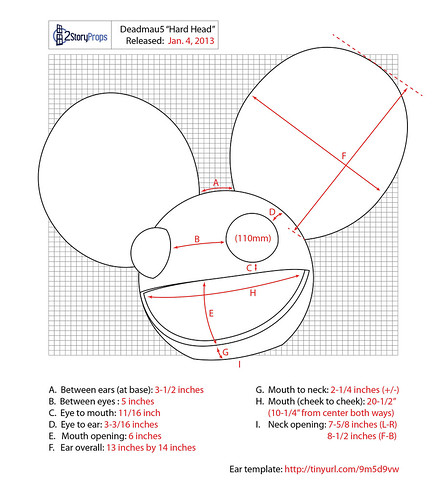
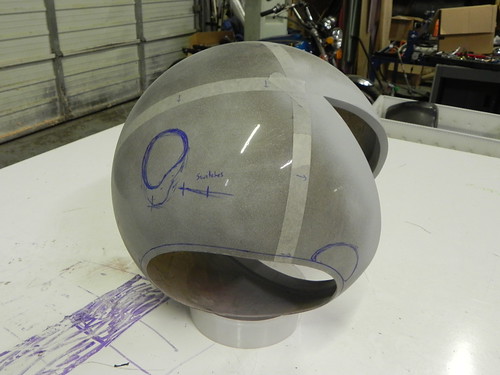
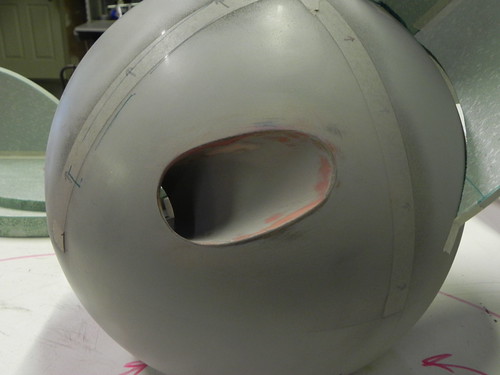
So the first thing I had to do was decide on all my centerlines and cut the mouth out. I poured over my source material, which was mostly sourced from the Deadmau5 facebook page and my own screen captures of the Meowington Hax show in Toronto, which is offered as a feature-length film on iTunes. Some years back, Joel Zimmerman (Deadmau5) uploaded a series of images to his facebook page showing all the measurements and angles of a basic Deadmau5 head. However, that was during his “cloth head” era, and the measurements and angles have all changed since then. It was definitely a good place to start, however, as it gave me a good starting point to start repositioning those elements according to my references of the newer style head. Unfortunately, for those of you seeking exacting measurements and angles, I can only offer a few basic ones to help you along (you’re going to have to do some of the work on your own!). They will be posted at the end of this write up. Anyways, with those new measurements and angles in-hand, I cut out the mouth.
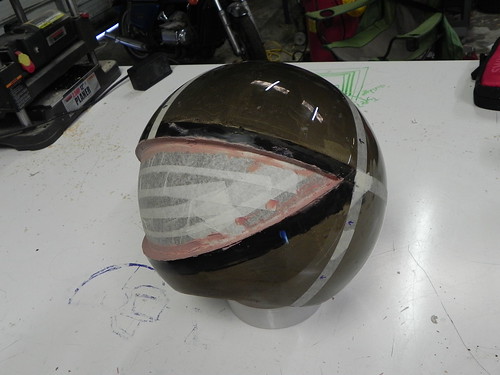
It’s worth noting here that the mouth on the Cheese Head (and all subsequent “hard heads”) does not actually meet at polar opposites like the cloth heads. The corners of the mouth are brought forward about 3/4” to accommodate for the hinged visor mechanism. It’s unclear if the Cheese Head has a hinged visor, but it still follows the same formula as the other hard heads.
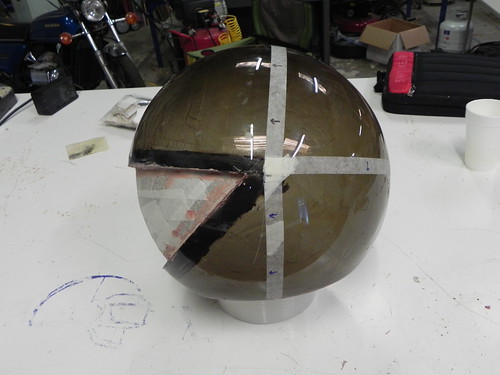
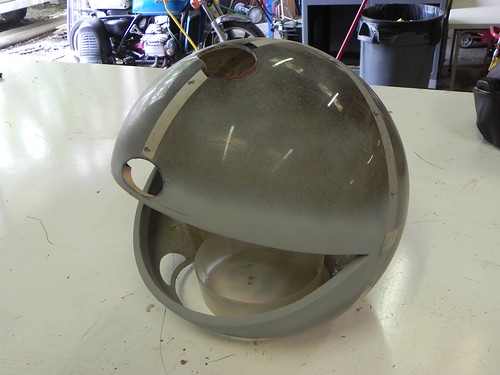
I saw a method used by a member of The Replica Prop Forum that really resonated with me, and it involved custom-cut MDF lips instead of the typical foam lips. I liked this idea because this would be a hard-head, and the foam lips would present a problem when working the mouth area with bondo. So I made a template of the inside curvature of the globe with some cardboard (the globe is a 14” diameter light fixture globe, so just do a 14” diameter semi-circle, and shave it down from there until it fits perfectly), and used that to cut out two semi-circles in 3/4” MDF and glued those in with some JB Weld. Then I smoothed out the joints with bondo. I kept the mouth cutout and taped it back in place during most of the construction to help retain some of the globe’s structure, since it gets really floppy when you cut the mouth and neck holes out, and the potential for cracking becomes a huge issue.
Realizing how floppy the globe was, I decided to fiberglass the inside of it to rebuild its strength. The real Deadmau5 heads are likely injection molded plastic or solid fiberglass pieces anyways, and I knew I would be dealing with some surface sculpting later on, so a more rigid globe structure was necessary. I don’t have any photos of that stage, though, but scroll through our previous builds for info on fiberglassing. The only thing to note here is that if you decide to fiberglass the inside of your globes, sand then heck out of the interior with some 60 grit sandpaper. I mean really tear it up inside. The acrylic is so smooth that there is a chance the fiberglass would delaminate from the globe without that texture to help it grip and bond.
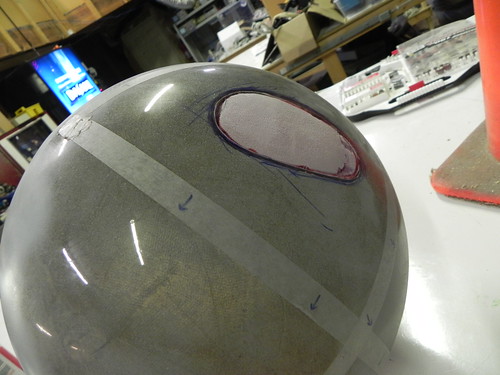
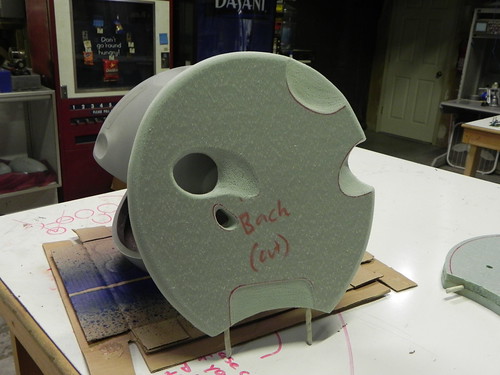
Next came the pits in the surface of the globe. There was really no special process involved in placing them other than the good ol’ eyeball method. It was pretty meticulous, though, and this is where good references come in hand. Going back to my screenshots of the Meowington Hax movie, I ended up taking screenshot after screenshot, frame by frame, so I could get good points of reference in relation to the ear lines, the mouth, the eyes, the switch placements, everything I could think of so that I could correctly place these pits. In the end, they may still be “wrong” if placed next to the actual Cheese Head, but it’s really the best way to do it without some kind of advanced 3D reverse engineering system, and…
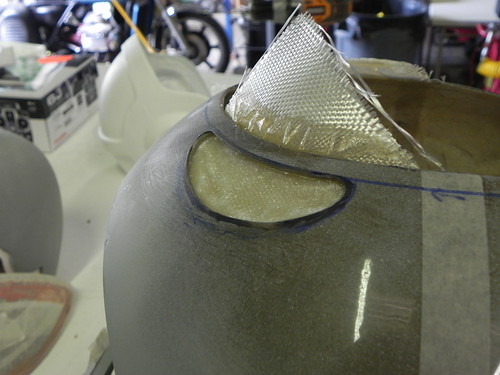
Next, I cut out the pits entirely, and then filled the holes with huge lumps of clay. On the inside, I shaped the clay to the basic pit shape, and then fiberglassed over the clay (on the inside), creating a solid surface so I could sculpt the pit on the outside with bondo.
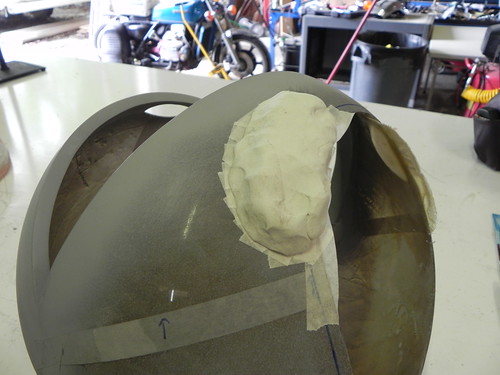
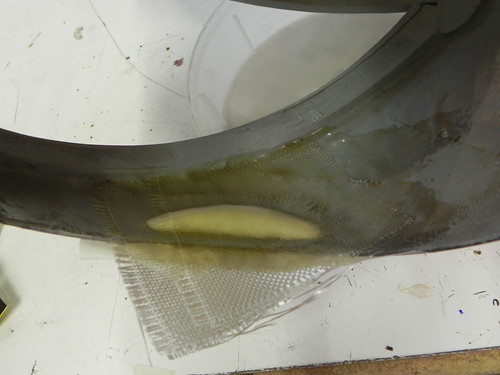

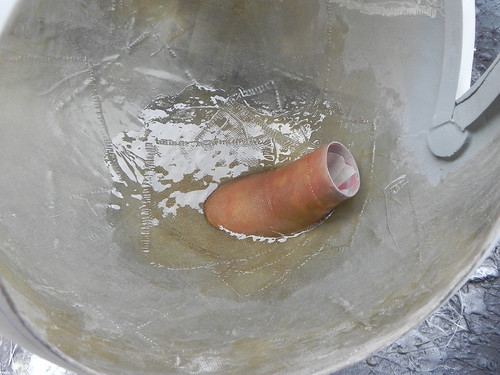
Most of the pits were just surface treatments, so I did that all over the globe. However, there is one “pass-through” pit that required a different approach. Stay with me here, as this one gets wiggy. First, I glued a few sheets of foam together. Then I cut it out in the shape of the “negative space” created by that pass-through pit, essentially the open space inside the “tube.” I made sure that it matched the surface curvature of the globe as well so that the walls of the pass-through would meet up with the surface of the globe. I also cut out the corresponding hole on the globe at this point.

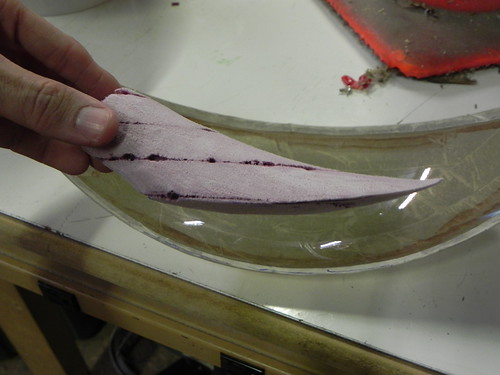
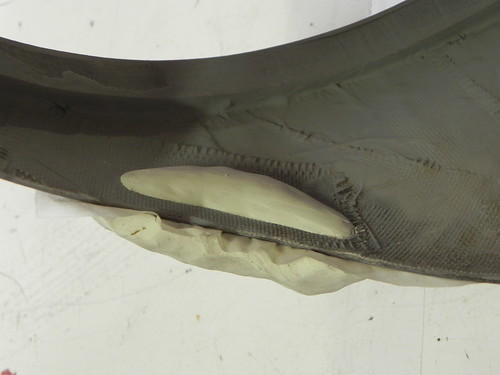
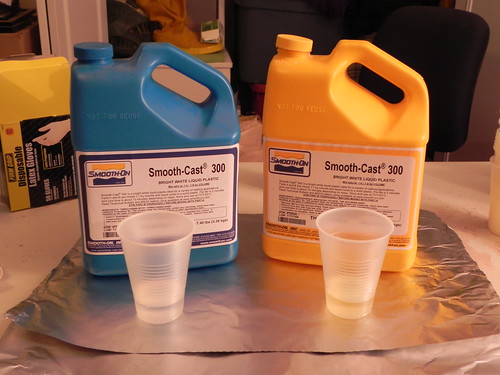
Then I coated that piece in some smooth cast resin (which doesn’t eat the foam) and then fiberglassed over that piece. After the fiberglass cured, I trimmed up both openings of the pass-through and then removed the foam with a dremel leaving an oddly-shaped fiberglass tube.
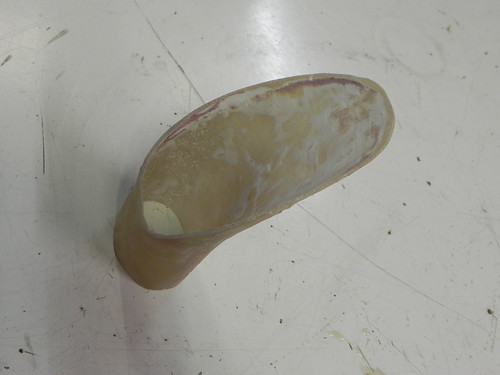
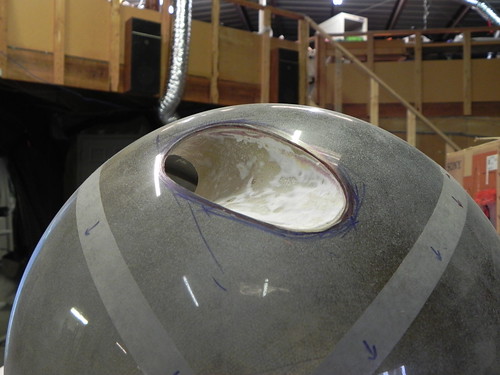

After test fitting it in place, I sealed up the gap with some masking tape, which also held it in place, and then I fiberglassed the tube in place. Back on the outside, I smoothed out the joint with some bondo, and voila!
At this point, the main leg work on the globe was essentially done, so I could turn my attention elsewhere. I began with the ears, which presented a challenge in that they needed to be hardened. I’m still not happy with them, but for the purposes of this build and the convention the head needed to attend, the end result isn’t too bad. Going back to my reference material, I mapped out the correct shape of the ears as well as the locations of all the pits and holes in the ears. The template for these are linked at the bottom of this post.
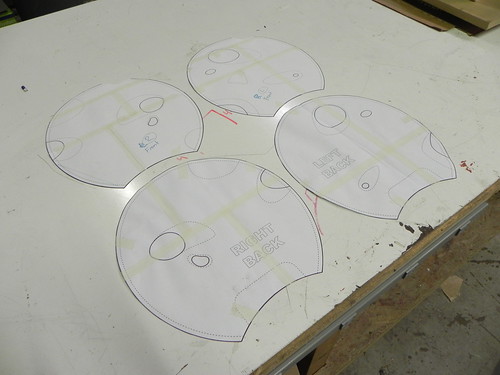
Most people use insulation foam sheet, so I decided to stick with that. I cut out the shape of the ears and installed threaded rods into them, like most other Deadmau5 builders would do. I’m not happy with this method but for the time I had left to finish the head, it works fine. Nothing special up to this point. After the glue was dry, I took to the ears with a dremel and some sandpaper in order to cut the holes out. By the end, I stopped using the dremel completely and just used sandpaper.
In order to harden the ears, I needed to coat them in something I could sand smooth for a glossy painted finish, so I coated the ears in a layer of undiluted wood glue. A lot of times when working with foam and wood glue, you would dilute it to create a light, protective skin. However, wood glue gets rock hard when it’s cured, so leaving it undiluted allows for a tougher skin. After the wood glue, I coated the ears in several layers Smooth Cast 300 resin, and then sanded them smooth, finishing them up with a teensy bit of spot putty.


I’ll pause here to express my discontent with these ears. As I mentioned earlier, they’re “fine,” but they are pretty heavy. For the cloth heads, the foam isn’t that heavy, but for the hard heads, if you use this method, the wood glue and the resin add a lot of weight. Outside of non-weight related problems, it was actually not too bad wearing it at a convention. But with this style ear, you’re not going to be thrashing around at a rave or head banging behind the decks in this thing. So just fair warning on these ears. If we ever get around to building our larger vacuum forming machine, I’ll be making hollow, vacuum-formed ears that would be SUPER lightweight and likely more accurate to what the real Deadmau5 hard heads like like.
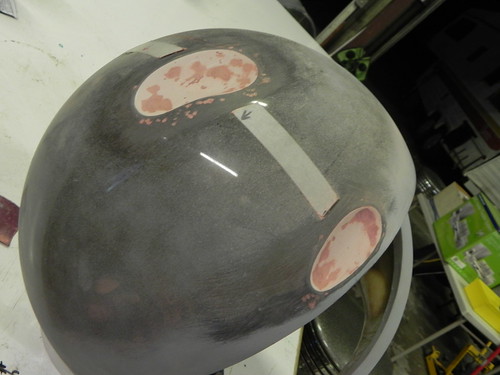
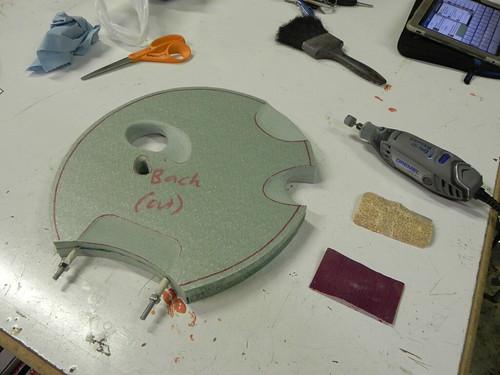
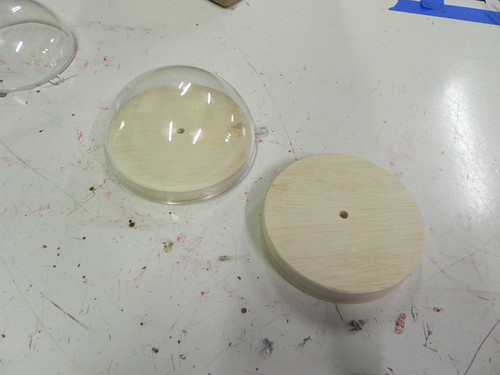
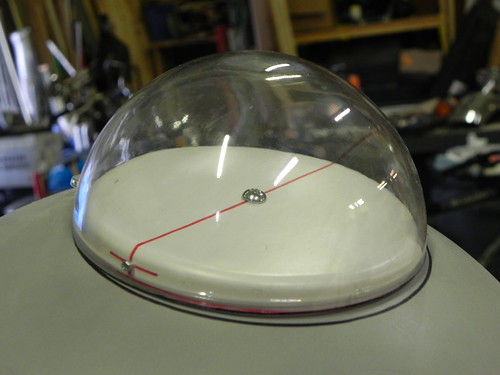
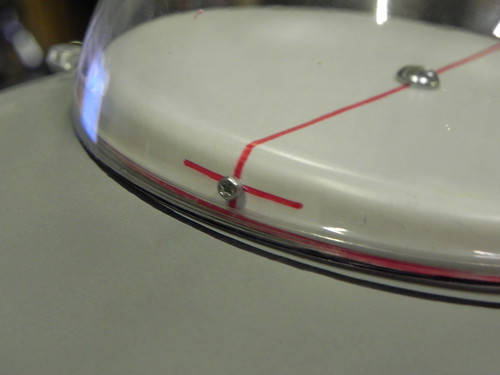
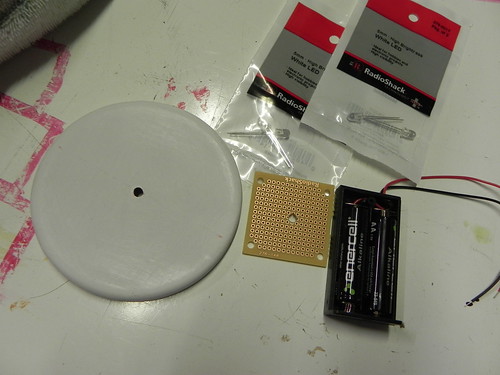
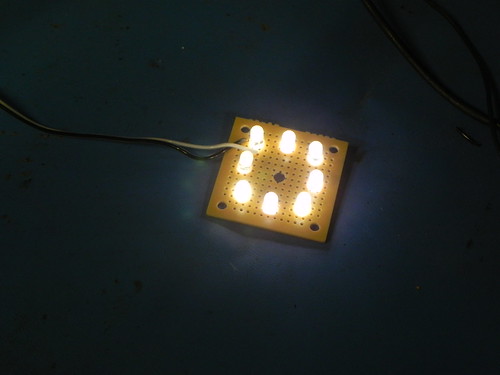
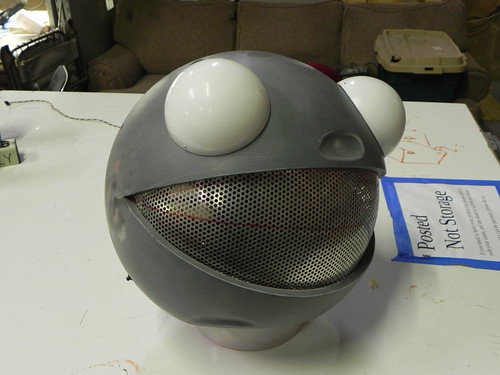
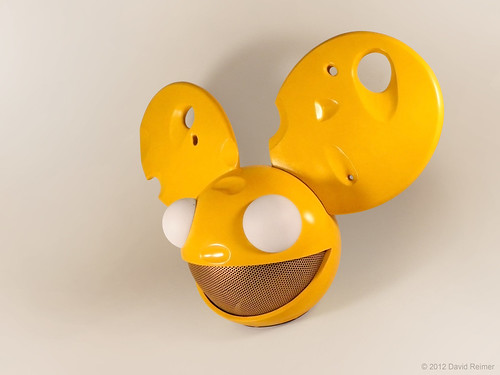
Next came the eyes. Originally I felt like the 110mm ornament globes that everyone uses were too big for this head, so I bought some 100mm ornament globes. They ended up being too small, and when the ears were put in place, the 110mm globes worked out well. So no change there. I noticed in my references that the eyes are held in place with two tiny screws or clips, and they are held to some kind of base plate. In order to accomplish this, I cut out a wood circle and vacuum formed two small plates that were the exact inner dimensions of the 100mm ornament globe. These plates serve as the mounting plate of the ornament globe to the main globe, but they also serve as a platform for the electronics in the eyes (which are essentially just a bunch of LEDs).

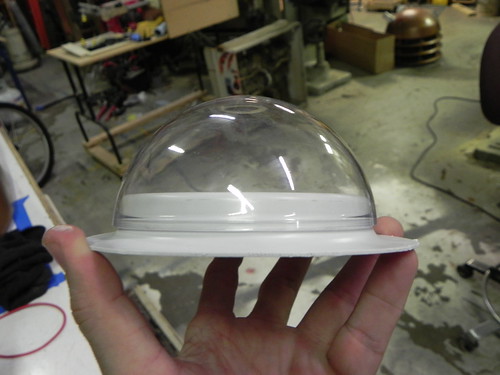
The eyes are tricky. I kept saying that after Dragon*Con 2012 I would rework the eyes by making custom vacuum-formed eyes, but that hasn’t happened yet, so I’ll just tell you about what I did. It’s certainly not the best way to do it, since I know for a fact that the globes I used are “wrong” in relation to the source material, but it works fine for convention purposes. I enlisted Wayne’s help here, as electronics are above my head. In basic terms, we wired up a bunch of LEDs so that only one pair of wires was going into the head. The board on which all the LEDs are wired ended up getting secured in place via the screw that holds they eye’s base plate in place.
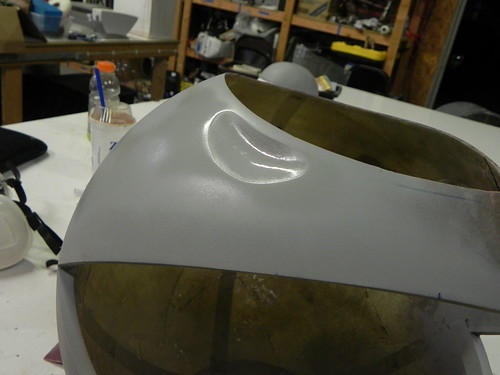
Making the globes white was the tricky part, and this is the part I’m not terribly happy with. Starting from a clear globe, I ended up just misting white primer over it in as even of a layer as I could get. I think I ended up spraying on two or three layers, being careful not to make the layers too thick. The problem with this is that the real eyes are glossy, and this method makes for a very matte finish. I also believe the eyes on the real one are custom vacuum-formed white ABS, which would generate a warm, even glow, while the paint method generates a dull, uneven glow. Don’t get me wrong, though! These eyes look fantastic in photos! But in person, they are very underwhelming.
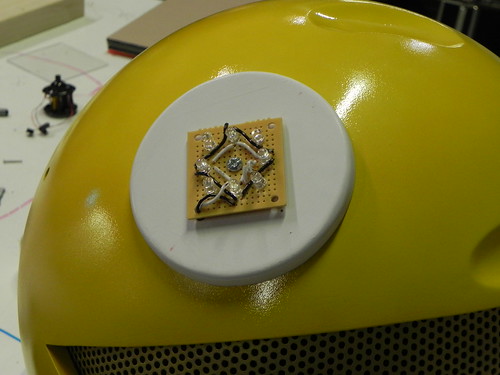
(Pictured below is a previous attempt, but it shows the attachment method.)

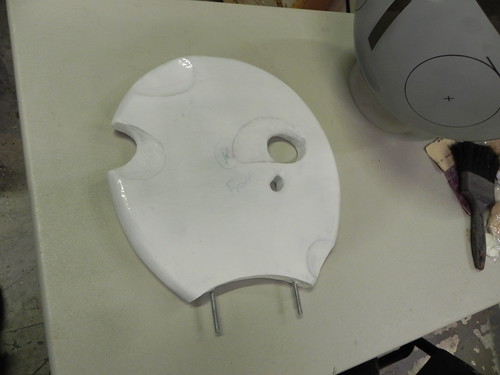
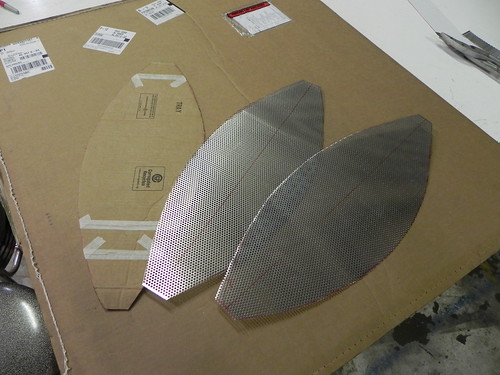
Next I needed to make the mouth. On a lot of the real hard heads, the mouth is perforated aluminum sheet. Sourcing the right sheet took a little time, but that really wasn’t the hard part. The hard part was getting it into the right shape. To curve flat metal sheet into complex curves, you need a tool called an English Wheel. Through a cinched roller mechanism, the English Wheel basically slowly stretches the metal and smooths it out at the same time, resulting in complex curves. Here’s the problem: I don’t have an English Wheel, nor do I know how to use one. I searched high and low for someone who could do it for me. Here in Huntsville, there is an arts center that has a resident copper artist. I ended up hooking up with her and had her create the curve in the metal for me. I won’t be giving out her contact information, so please don’t bother asking. If you’re following along and have gotten this far, look around locally for metal artists at craft fairs, arts centers, schools/universities, or look for metal working shops or custom automotive body shops. They are definitely out there, but it will take some searching. After this experience, though, an English Wheel is definitely on my to-buy list.


Next came the interior. After reading this paragraph, you’ll likely ask yourself, “Why didn’t he just use a hard hat?” I’m not sure on the actual construction of the real cloth heads, but fan builds generally have a hard hat installed inside. This provides a custom fit with the necessary lift the head requires. You would attach it with some screws at the crown of the head and the screws would be covered up with the cloth. No biggie. But that can’t be the case with the hard heads. I suppose you could glue in or otherwise secure a threaded desk foot or something on the inside, but I personally wouldn’t trust the glue to endure the stresses convention wear or dance wear would put on it, so a different plan had to be made.
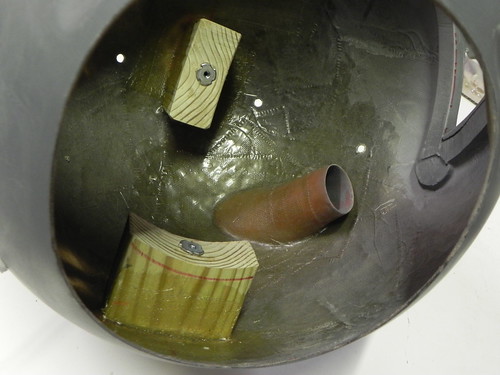
I also liked the idea of there being a skull cap. Inside the hard heads, there is a custom-fitted fiberglass skull cap held in by some lightweight metal brackets. Not having the resources to make custom metal brackets, or the time to really delve into more creative methods, I ended up fiberglassing two blocks of wood in that held a trimmed T-ball helmet in place. The trimmed T-ball helmet, with the padding removed was actually a perfect analog for a fiberglass skull cap, and the wood blocks were cut so that they held the skull cap at the right distance from the globe in both Y and Z dimensions. The wood blocks definitely add to the weight, but it’s a fairly easy way of going about it without needing to hide bolts from the outside or worry about making life casts for custom fiberglass skull caps.
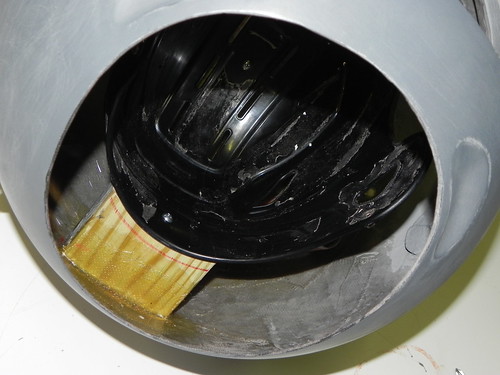
After the skull cap was in place (and, in fact, after the head was painted), I needed to install the LEDs. They are simply hooked up to a battery case that is secured to one of the wooden blocks inside with some Velcro. Wire management was accomplished by using little adhesive clips from Home Depot.

After painting it, final assembly was just a matter of gluing in the mouth with some hot glue, attaching the LEDs/baseplates to the globe with a nut and bolt, screwing on the eyes, installing the ears, and then installing the skullcap. Final fitting on the skull cap had to be done with the head fully assembled because I need to feel the weight of the head in relation to the foam inserts I would add.


So here’s a fun little fact. Some months after having completed the Cheese Head, Lance Thackerey (the guy who won the Talenthouse completion to design the next Deadmau5 head for that year, designer of the Cheese Head) found me on DeviantArt. He contacted me to express how impressed he was with my build.
Time for links!
Full photo album
Ear templates (.zip file download) | Not currently available due to web server issues.
Perforated metal sheet
14” acrylic globe (for main head)
110mm ornament globes (for eyes)
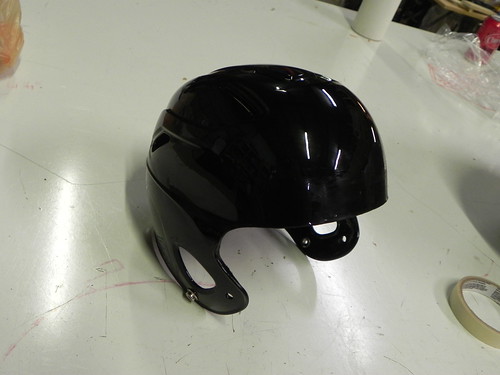
T-ball batting helmet (I bought mine locally)
And just because you’ve read to the bottom, here are some free measurements for you! These were made months after building the head (while writing this blog post!), and only taken off the finished piece. None of these were made during construction. I can’t provide any more than this as a lot of the angles and such were made on-the-fly.