
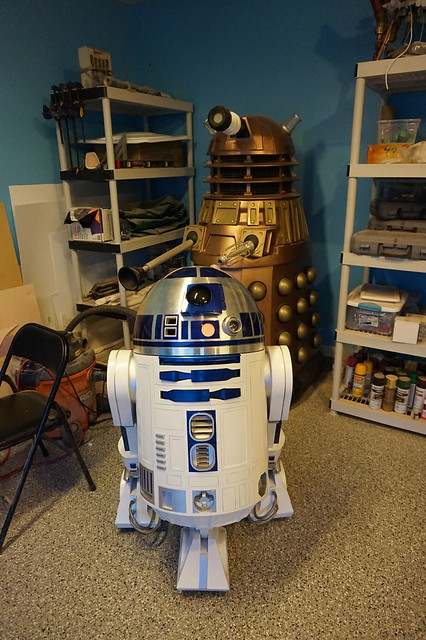
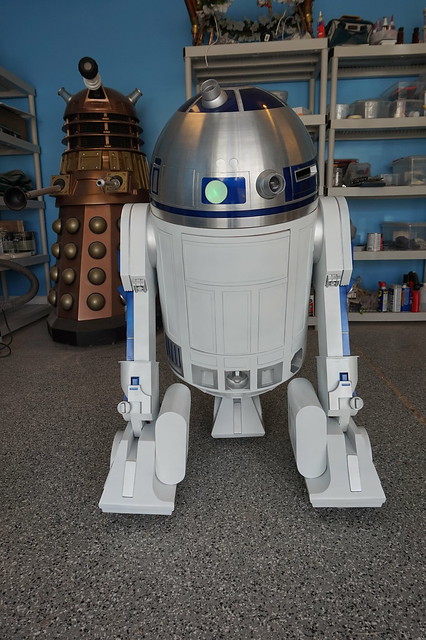
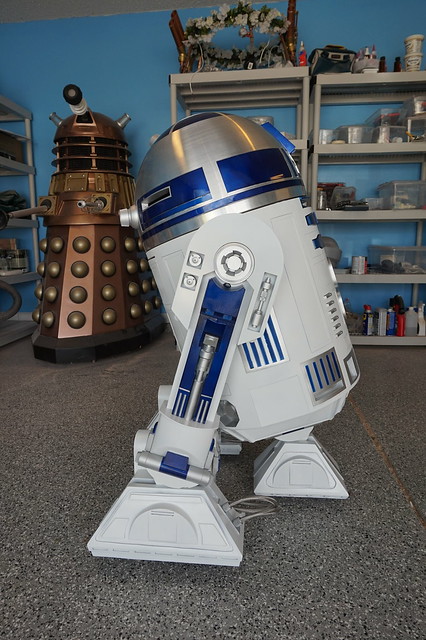
While we strive to build unique props, the trailers for The Force Awakens made me really excited about Star Wars again and gave me the push I needed to build a prop I have wanted since I was 8, R2-D2.
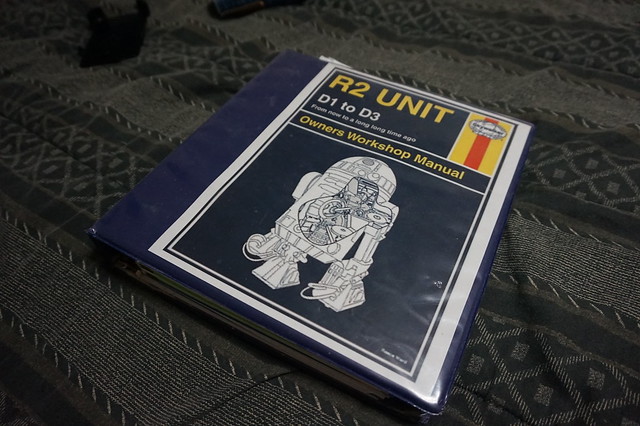
Unlike our typical builds, there is A LOT of information on line about this prop and a very large community of builders who have built their own R2’s or other astromechs. Many of these builders have dedicated entire blogs to their builds. For this write up we are going to keep things pretty top level and cover key points and parts unique to our particular droid. If you found this blog entry because you are planning to build a droid of your own, the first thing you will need to do is become a member of astromech.net, which is the R2 builders group. Once you have a user name on the forum, the next step is to join the clubs yahoo group as this is where all the drawings are posted. I hesitate to say “plans” as the drawings and templates have dimensions but are not step by step instructions. I also recommend printing the drawings and putting them in a binder so you can reference them later.
And now, onto our build!
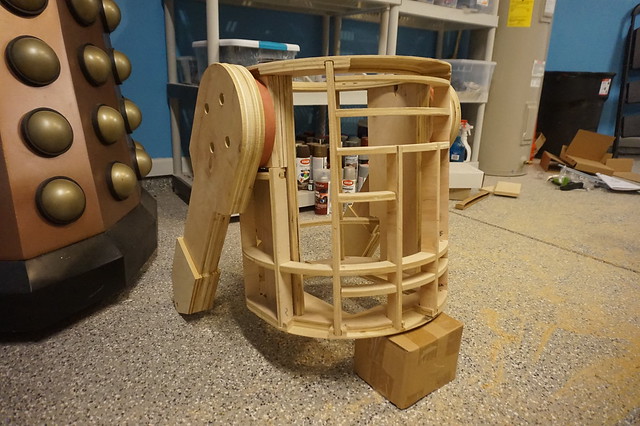
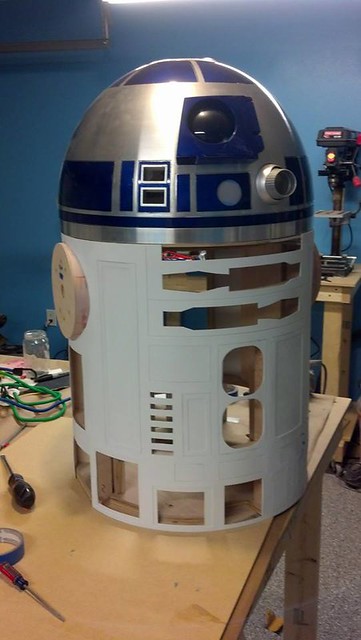
Most builders go one of three routes; styrene, aluminum, and plywood. Aluminum is pretty expensive and heavy, and a completely styrene droid is probably a quicker build and very light, but I had concerns about the strength. Thus, I decided to go the plywood route. R2’s skeleton is made from various pieces of ½” and ¾” thick Birch plywood cut out using the Senna plans. Rather than cut all the parts by hand, MindGear Labs here in Huntsville converted the PDF plans into a cut file and CNC’d all the parts on their large table. With minimal sanding I was able to put everything together with Elmer’s carpenter glue.
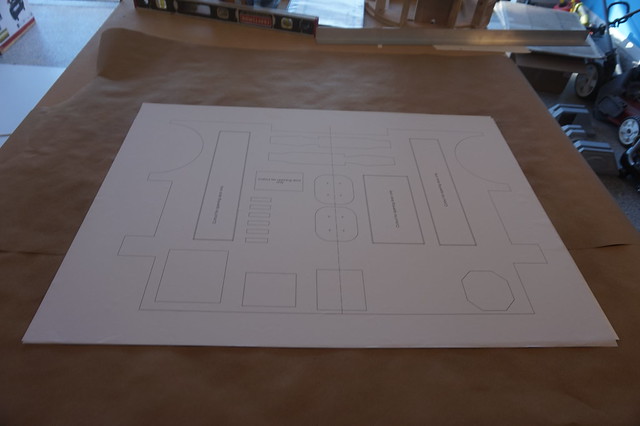
For the skin, I purchased an 4x8 foot sheet of 0.04” styrene and had the skin templates printed full size at Kinkos. The templates were attached to the plastic with spray adhesive and all the necessary parts cut out by hand with a Stanley knife. The skin is 2 layers. The inner layer was glued to the wood frame with Goop and held in place with bungee cords for 24 hours. Once that layer cured, the outer layer was taped on and attached using super glue.

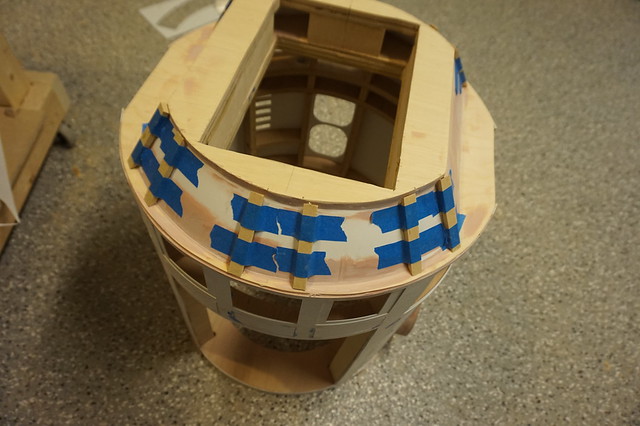
Initially I wanted to vacuum form the skirt to put our proto-former to use. I decided to make it out of wood instead so the body could be set upright when the legs are off. The basic shape was made with plywood and the curved surfaces created with styrene glued on with Goop. After the glue dried I filled the cavities with Foam-It! 3 to provide internal support. The ribs were made using MDF.

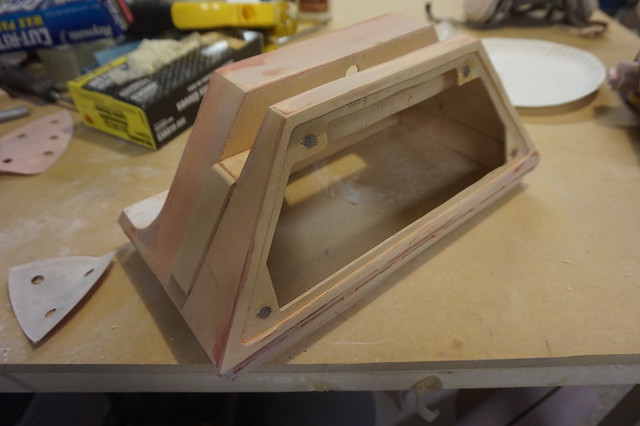
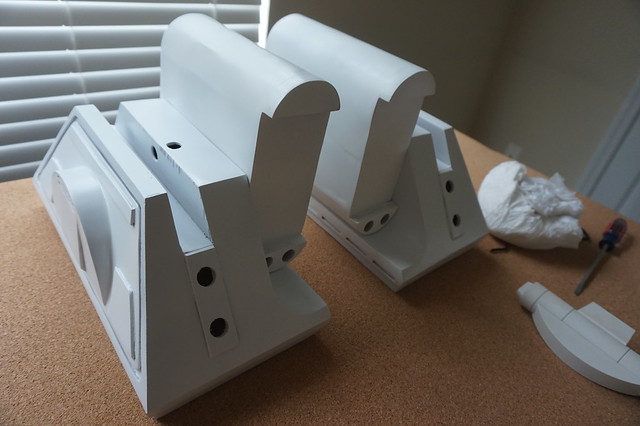
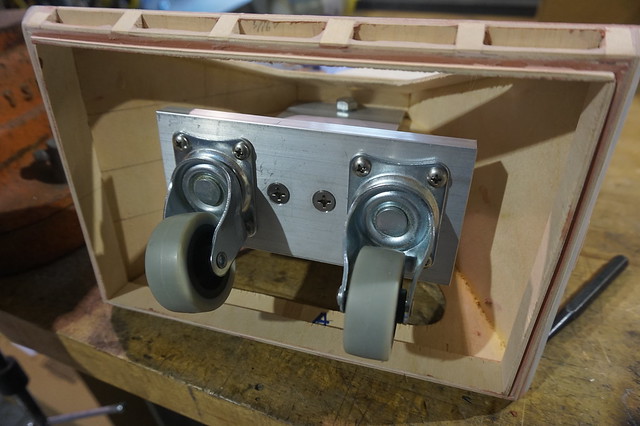
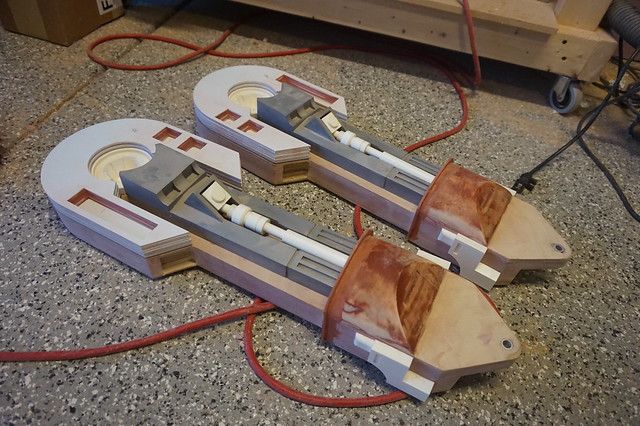
The cosmetic shells for the feet were made from 1/8” plywood. For the outer feet there is an access panel held on with rare earth magnets so I can put a nut on the joint bolt. The “battery box” that covers the motor was made using styrene and plywood, and is held on with magnets as well. Inside each foot is an electric scooter motor and wheel supported by an aluminum bracket manufactured by one of my co-workers after I made a mock-up out of MDF.
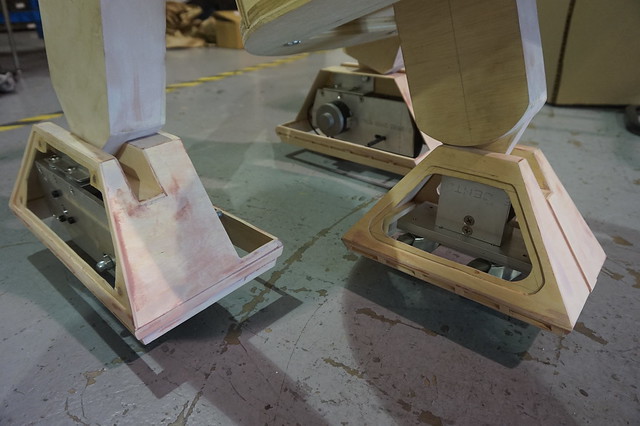
The center foot has the worst joint design I’ve ever seen. For years I thought the side panels would come off and you could slide a bolt in that way. Turns out the top edge of the panel is BELOW the pivot, so it is impossible to run a bolt straight through. Instead, I designed a bracket with two threaded bolts which tighten from either side into the pivot point on the leg. Again, a mockup was made and then an aluminum version was made for the droid.
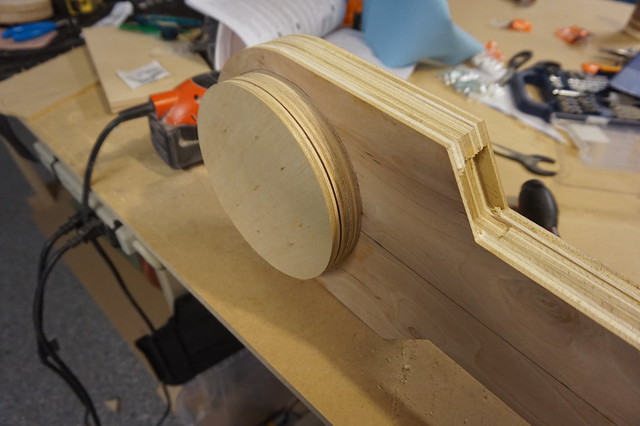
The legs were built from several layers of plywood CNC’d at MindGear. An aluminum tube was glued into the pivot joint where the bolt runs though. While I made the ankle pieces, all the other greeblies with the exception of the booster frame were purchased from resinparts.com. The booster frame was bought from a friend, and modified so it would be held on with magnets. The shoulders were assembled from several layers water jetted out of 1/8” styrene using files created by David.
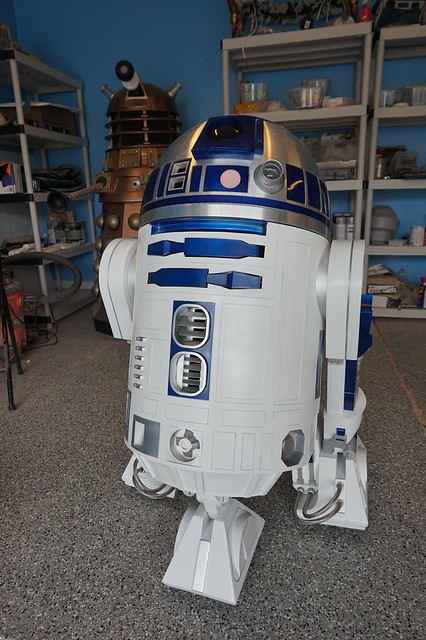
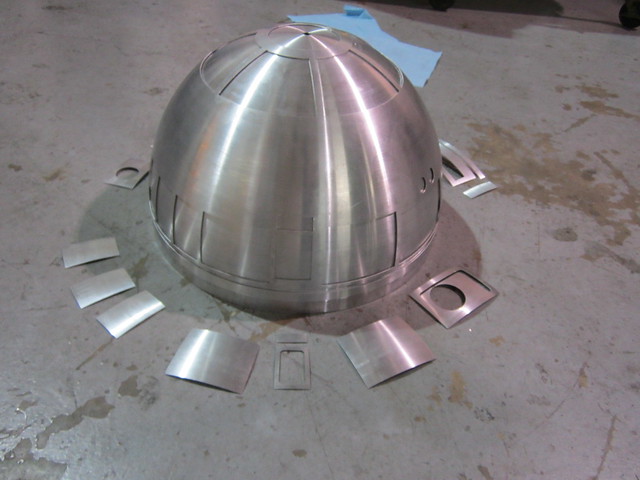
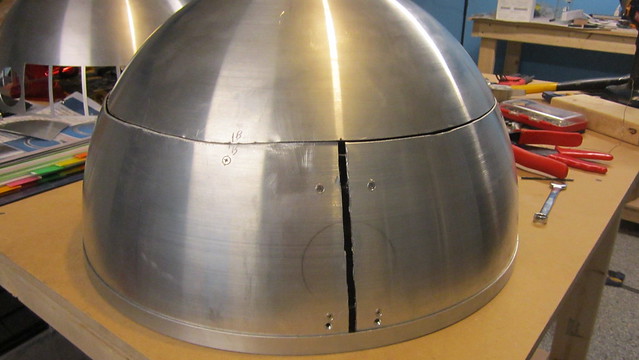
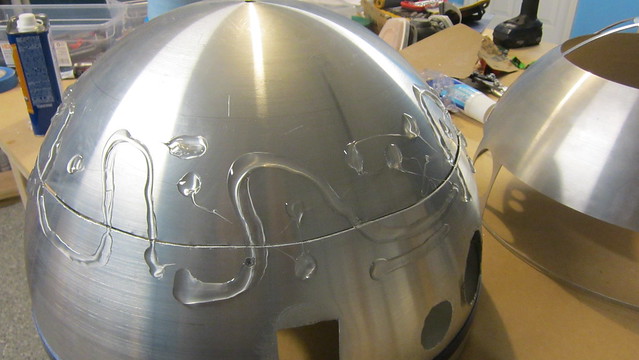
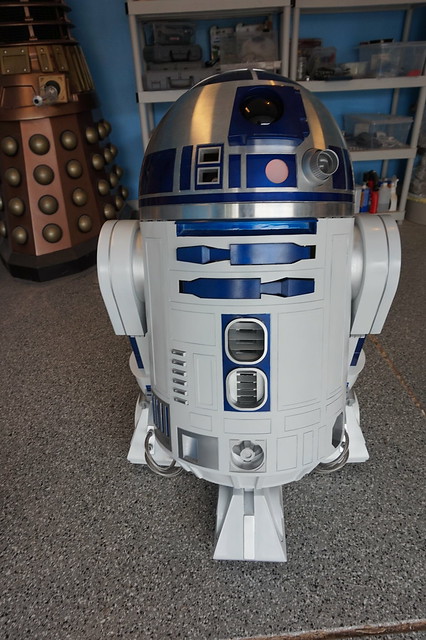
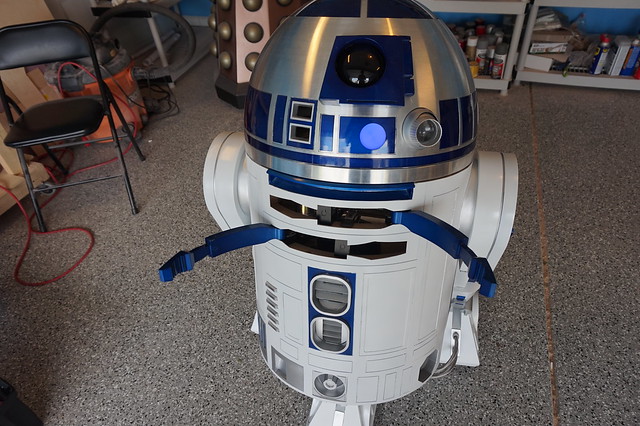
The dome is what is referred to as the “300mm Dome” and is the go to for most builders. Getting one typically requires waiting for a run to occur, but I found a forum member who was looking to part with his un-started kit. The kit contains 2 domes; the outer which is laser cut and the slightly smaller inner dome. To finish the kit I had to cut all the panels out by hand and file down the edges. Most of the panels were then painted blue (more on that in a bit). In a perfect world the inner dome would have the same curve, but it doesn’t. I had to do some extensive modifications to it to make it fit properly including adding an expanding -joint and cutting holes where the lights would be. Once all the cutting and painter were done the dome was glued together with Goop. The radar lens is a 4” ornament, and the indicator light covers are made from plastic off a milk jug. All resin greeblies once again were purchased from resinparts.com.
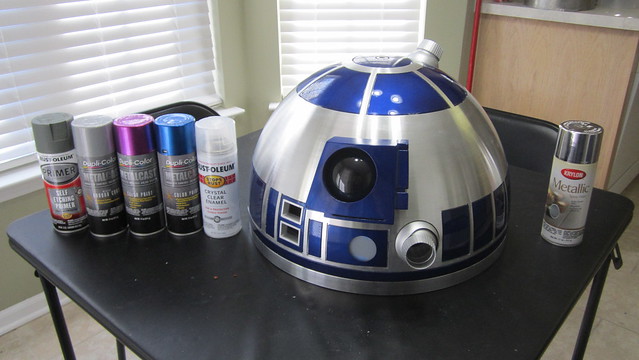
Since this was meant to be a KISS build, I decided early on to use rattle cans for the paint. The white is Krylon gloss white while the silver is Krylon aluminum. The blue color was achieved by painting each piece with purple anodized paint, followed by blue anodized paint. It takes a bit of practice but produces a very rich “electric blue”

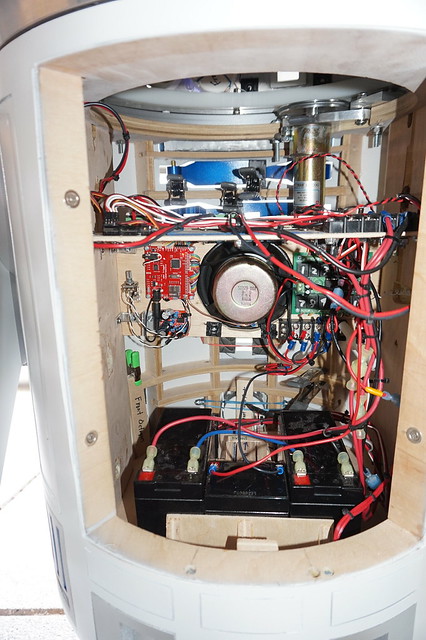
One interesting aspect of this build is it completes a circle. I learned how to motorize the Dalek by reading the R2 forums, and now I motorized an R2 from lessons learned building the Dalek. They have about the same control system, except the R2 does not have electric brakes in his wheels and components were scaled down. The head and feet run on two 12V, 10 amp hour batteries wired in series while his sound system runs on a single 12V, 2 amp hour battery.
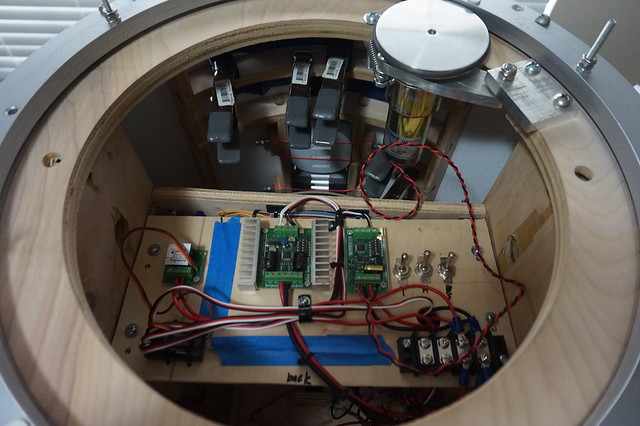
Speaking of sounds, our good friend Daniel help us make R2’s sound system very unique. Not only can he beep, he can play music and beep and the same time. This is accomplished using a SparkFun wav trigger. p>
Our little droid has been to a few events this year and while he doesn’t have the intimidating presence of his Dalek big brother, he has been fun to drive and much easier to transport. After putting this build off and am very happy to finally have an R2 of my own and now that he is out of the way I can get back to the more unique projects. Keep an eye out for write ups concerning our JNPR costume group coming soon!

To stay up to date with R2’s appearances and our other projects, click here to follow us on Facebook.
For more build pictures, visit the flickr album click here.-Wayne, 2StoryProps