
I recently had a very similar experience.
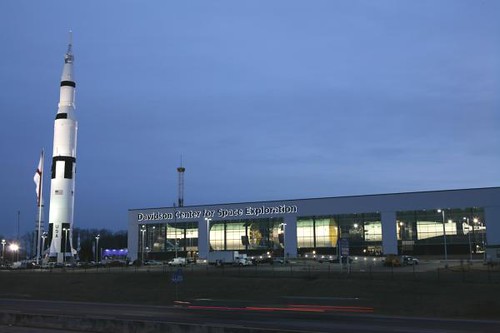
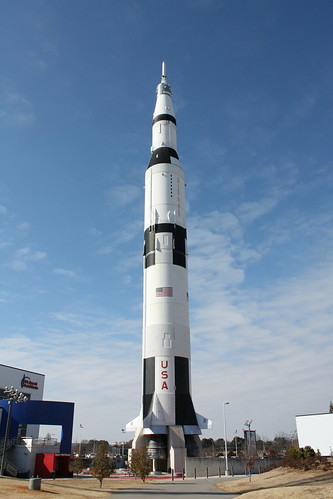
As we live in Huntsville we are in a historically significant location related to the Space Race as the rockets that carried men to the moon were developed here. Many artifacts from this period are on located at the U.S Space and Rocket Center, including one of the 3 Saturn V rockets left in the world. I’ve visited the museum several times and have taken many pictures of the moon suits they have on display, but I could never get closer than a few feet as they are in display cases. Earlier this year, I decided to go for broke and asked the museum if I could examine one of the A7L moon suits they have up close to take measurements and pictures so I could build a more accurate suit. A few calls with the curator, a research application, and several emails later, I received approval for a day in the archives where several suits and other artifacts are being preserved! Armed with calipers, rules, a note book, and a good camera I went to the museum to physically touch a piece of history!
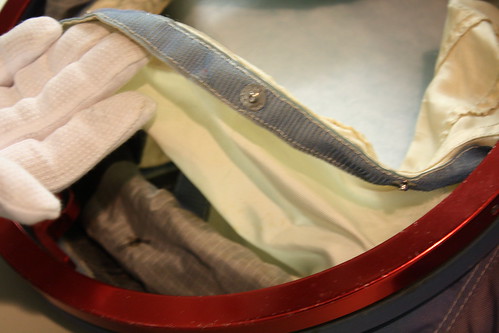
Since the suits are priceless artifacts, before I could examine them I had to remove any sharp objects that could damage them and wear a pair of white cotton gloves to prevent any skin oils from tarnishing the materials. The suits themselves along with other artifacts are kept in a temperature and humidity controlled room, affectionetly called the morgue. I could literally spend years checking out everything in there, but my focus on this trip was to learn as much as I could about the A7L pressure suit. We started by pulling out an A7L pressure garment (the inner part of the suit) out from the shelves so I could document the connectors and seals.
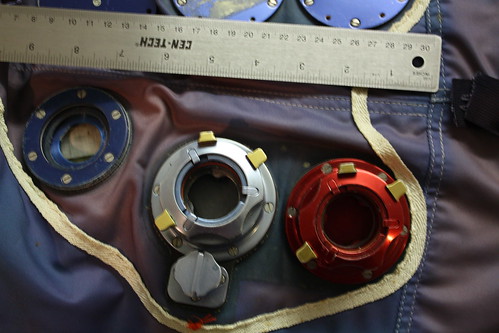
The first thing I noticed was the suits today are incredibly stiff. The natural rubber they were made with dried out over the last 40 plus years, making them very hard and brittle. Touching rubber areas made a crunching sound, and it was impossible to bend any of the joints or open the suit to look inside as I had hoped. I started of measuring the connectors and found while I made the size of the base correct, the pivot portion has a different, and more streamline shape. Using calipers I took detailed measurements and will be working on new sculpts for my next build.
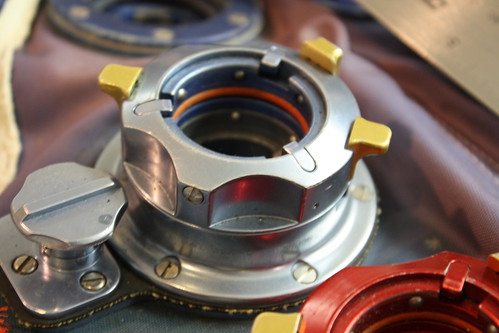

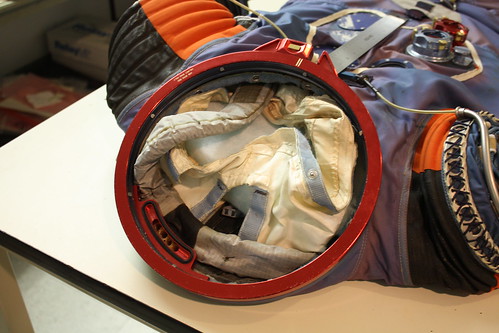
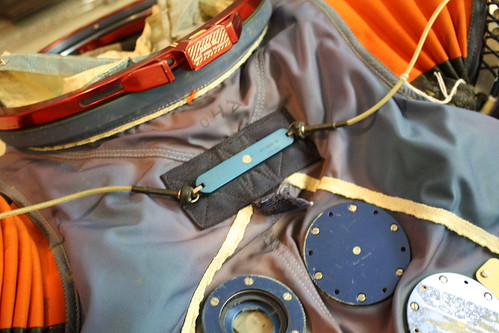
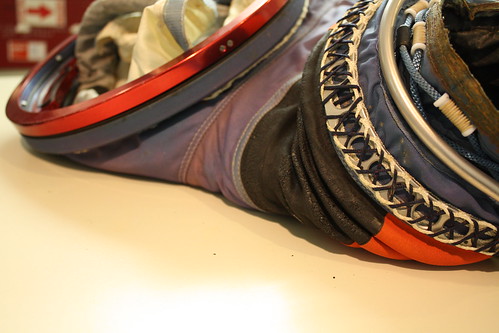
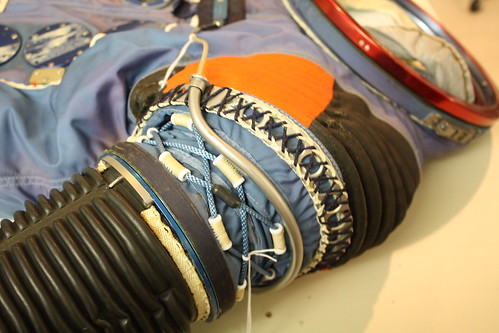
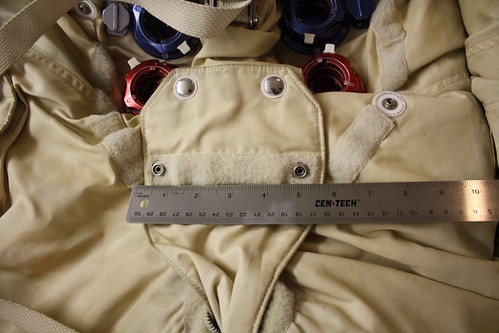
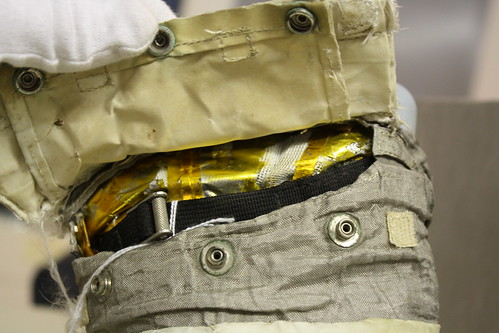
Moving up to the neck ring, I found I was very close with my original dimensions. I finally discovered how the rig itself attaches to the suit; the bottom half of the ring has a channel on it that a rubber gasket molded into the rubber bladder of the suit itself fits in and is secured with a metal ring, allowing it to easily be removed. I also found that the suit has an inner liner that snaps into place on the bladder just below the neck ring. The hoses you see in the pictures run from the oxygen inlets to the helmet so the “fresh air” can move around the bubble helmet. My suits will likely always use magnets, but the real helmet is secured using spring loaded pins.
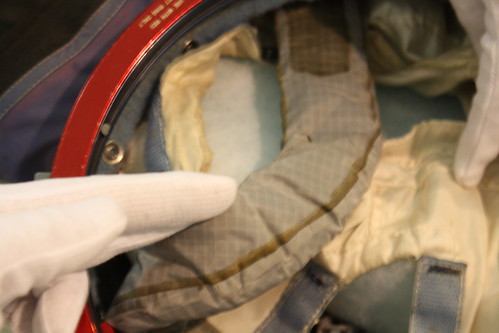
The various cables you see were used in conjunction with the bellows to keep the suit at constant volume. Without the bellows, the astronaut would not be able to move as the pressure would keep the suit in an expanded position. Without the cables and pullies, the bellows would want to expand out like an accordion. The set up for the shoulder was very interesting to see and I took a few circumference measurements to determine how thick the arms should be. It’s about 17 inches round at the bicep. The shoulders also have a stiff support ring where to see the black and white stitches, and a pivot barring so you can turn your arm. The big shoulders are the key detail I really want to fix with my next build.
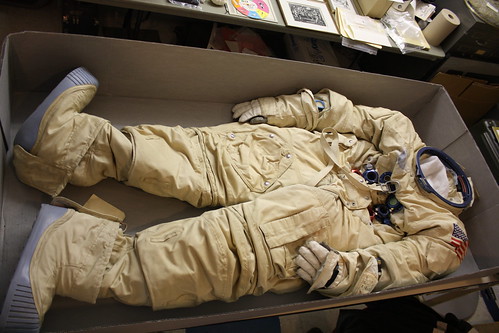
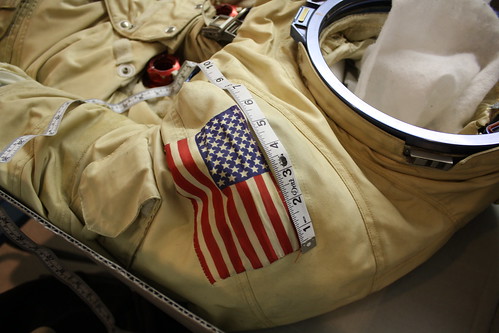
Next was time to examine the micro-meteoroid garment. Originally, we thought there were several sitting in a few boxes (without the pressure suit) but we found they were either from an earlier version of the A7L or perhaps even from an early suit altogether. To the best of my knowledge, they would have dated back to Apollo 8 where Lovell was the Command Module Pilot and Fred Haise was the back up for the Lunar Module Pilot. There was still useful information to be found, plus the name on the garment peaked my interest. I took some measurements of the patches and flag. I’ve known for a while that the fabric is Teflon, but when you see it up-close you realize that it is a very thick woven material, much thicker and stiffer than the Tyvek or nylon many costume suits are made from.

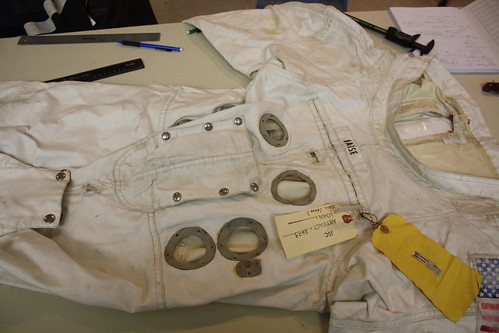
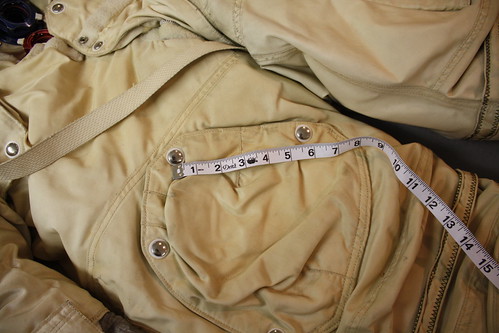
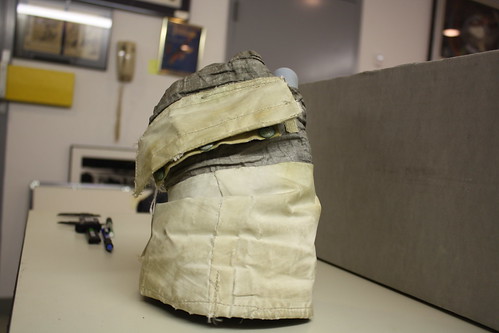
At the time of this writing, my intent for my next moon suit build is a better replica of Jim Lovell’s Apollo 13 A7L. The archives had at least two A7LB suits (Apollo 15-17era) in beautiful condition, and if my intentions change or the opportunity comes up I would love to go back and examine them, but for now we stuck with the A7L. The suit they had was mostly complete but had turned yellow over time. The size tag had no name, indicating it was likely a training or development suit not assigned to a specific mission. For comparison, the size listed for the astronaut was their names as the crewman suits were tailored to each astronaut. The chest was bunched up, but I was able to get measurements of the pockets, helmet adjustment straps, and access flaps.
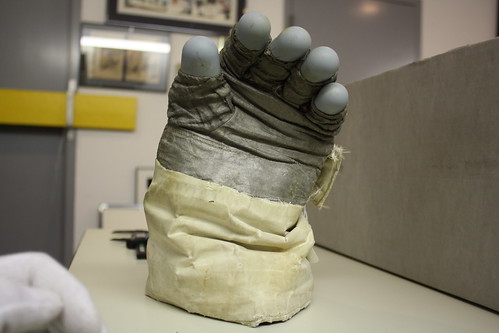
With the suits examined it was time to check out a few of the other pieces. Since the gloves were made of rubber, many did not survive the test of time. Luckily, they had a lunar glove in fairly good condition. One of the key measurements I see a lot of discussion about is how wide the locking ring is. I am happy to tell you that after measuring it myself, the inner diameter is approximately 3.125inchs. It was also interesting to see an adjustment strap on the back of the hand. While my replica uses ironing board fabric. The real grey fabric you see here is a finely woven mesh that was about $2000 per yard!
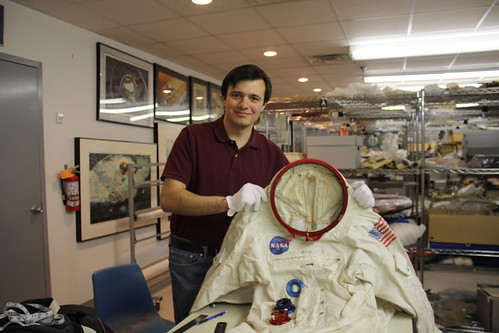
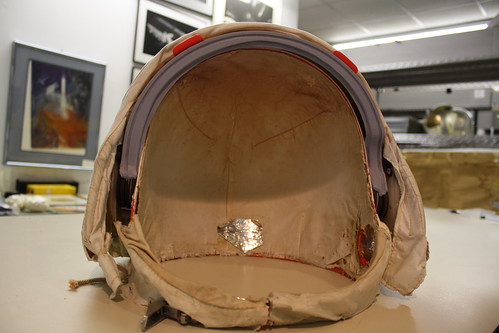
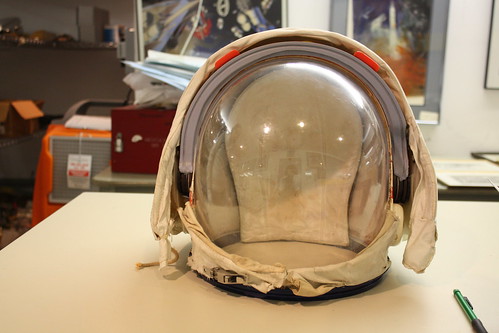
Finally, it was time to examine a helmet. Up to this point you may have noticed I have not mentioned anything about “trying on” parts of the suit. While there are strict rules that state the suits cannot be worn, the condition of the rubber makes it physically impossible. But I am not going to lie, it took every bit of will power I have to not put this helmet on.
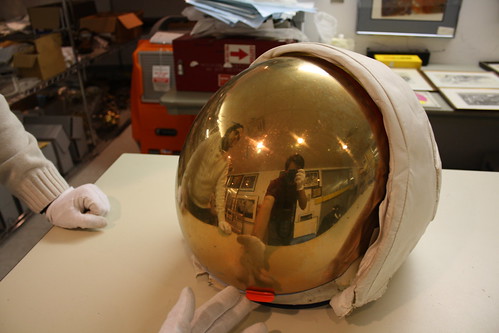
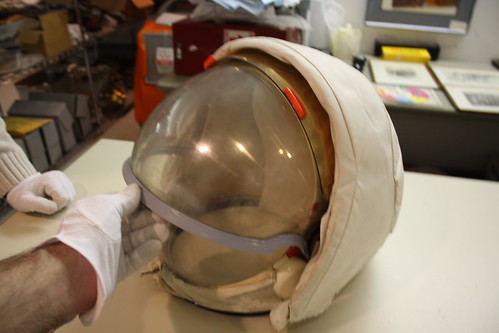
The real helmet consist of two parts. First, the astronaut puts on the bubble helmet, which is the part that looks like a fish bowl. He wears this alone during launch and inter-vehicular activities. When he goes outside the ship, an over-helmet is attached to the bubble helmet that has the flip up visors. The model I examined was likely an early training model and only had 2 visors inside. I was a little surprised how easy they moved, especially since you would want them to stay up when retracted. I was able to get measurements of the curve and width of similar, uninstalled visors so I can improve the bucks for the next helmet attempt.
When everything was said and done, I spend about 5 hours examining hardware. Since I had a better camera than my personal one I stuck around and took pictures of the regular display items. While not everyone can handle a moon suit like I did, there are plenty of artifacts on display and it is a great place to learn about our country’s voyage to the moon.
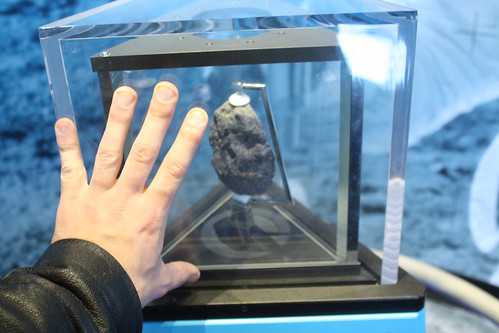
A REAL moon rock!
We would like to send a big thank you to the U.S. Space and Rocket Center for allowing us this unique opportunity. We learned just as much, if not more from this trip as we did from the past year researching test books and technical manuals. We are looking forward to bringing our moon suit to the center during the annual Yuri’s Night this April to celebrate manned spaceflight. As for when we’ll be starting the new moon suit, Dave and I are currently working on some new tools and a new mystery project, but we’re looking forward to starting the new build in the near future. Stay tuned!
U.S. Space and Rocket Center Home to Space Camp!More photos taken at the Space and Rocket Center