December 28, 2010

Tron Betrayal: Kevin Flynn, Part 1

While Daft Punk continues to shape up, I'm taking on a side project during the lull periods (while I wait for rubber, or while it's too cold to fiberglass, stuff like that). Prior to the release of Tron Legacy, Marvel Comics released a two-part comic prequel to the movie, highlighting the evolution of the Grid and Flynn's early days of "new management" in the system. It also serves to add to CLU's story of how he got to where he was at the beginning of the movie (though it doesn't complete the story; the video game Tron Evolution fills in more of the gaps). Throughout both issues (and the video game, and even in some of the flashback sequences of the movie), Kevin Flynn's Grid outfit consists of "Trony" pants (with raised details and glowy bits), a dark gray shirt, and a black jacket that has a single lighted band down the front as it's primary detail.

© Marvel Comics.
Flynn01

In one particular panel, he is wearing a helmet while riding his light cycle, and this same helmet is seen being worn by anonymous grid game combatants. Certain details in the comics, as well as the fact that Sam's helmet in the movie was the same as the other gladiators, we can assume that there are generic style helmets in the new Tron world, and that this is one of them.

© Marvel Comics.
Flynn08

© Marvel Comics.
Flynn07

I started my work by producing a quick sketch of the helmet as I perceived it from the details in the comic, and then I produced a set of blueprints in Adobe Illustrator. I'll state right now that the shape of the side profile was changed in the 3D model stage from what you see in these blueprints, so my final product will not exactly match the blueprints.

©2010-2011 David Reimer. Please do not redistribute without permission.
flynn_blueprint

From there I built a 3D model in Rhino 3D. When I built the 3D model, I originally built it according to the blueprints. However, I found that something was off about the overall shape of it, so I skewed it front to back to give it more of the look that the helmet in the side view in the comic has. It didn't need to be skewed much, but just breaking the overall rectangular shape really helped out. You can't really see it from this image, though.

flynn_3d

Continuing onward, I brought the 3D model into Pepakura and produced a foldable paper model. I didn't think about this by the time the model was ready to print, but I had to do a little math to scale the helmet because I have a molding rim modeled onto it that counts toward the overall height of the model (in Pepakura, you scale a model according to it's height). And that's where I'm at right now. I haven't printed it out yet, and what you see represents about 7 hours of work so far.

flynn_pep

Please note: I will not be distributing this Pepakura model. As I've stated before, I consider the Pepakura model to be like a "clay model" stage, and thus is not intended to be a final product. Please do not ask for the Pepakura file, as you will not receive it.

November 22, 2010

Daft Punk, Part 4: Helmet Updates and Fabric Discussion

There isn’t much to report as far as Thomas’ helmet goes since it’s already mostly sculpted, except for two minor things. The first thing is that I’m having the entire ear lathed by a friend in Tennessee. The entire ear is simply a profile revolved around an axis, so it can be lathed. I’d rather hand that detail off to an experienced lather than try to sculpt it freehand twice and expect above par results. The second thing is that I’ve recessed the visor area on the face. I wanted to have the visor sculpted into the helmet so that there would be no question as to where to cut for the visor hole. So I cut the visor out and replaced it with some “For Sale” sign plastic and smoothed it out.

S7000397

S7000407

Following in Volpin’s footsteps, I had a local trophy shop (Redstone Recognitions) laser engrave the details on Guy’s ear plates. It really is the best option for this if you want exact mirror images of the details. Not being able to find adequate visual references for that particular part of the helmet, I used Volpin’s ear plates as reference. I drew out the design in Adobe Illustrator and sent in the vector file. For $10 I had him laser engrave two copies of the file on a piece of MDF. The engraving is shallow, but super crisp – and more than enough depth for molding. However, some scaling issues arose between the file transfer. I was using Adobe Illustrator, and he was using Corel Draw. The file should have engraved at exact scale, but it ended up being about ¼” shorter, about 10% smaller overall. For $10, I could have him do another, larger copy of the file to compensate for the scaling issues, but I may be able to work with what I have. I won’t be able to tell until I cut out the existing detail-less ear panel and mock up the engraved pieces in place.

S7000412

I started sculpting Guy Manuel’s helmet this weekend. Beginning early Saturday morning, I started layering on thin layers of Bondo. I haven’t ever really used the bondo spatulas before, so I figured I’d give it a try. For simple shapes like this, it works wonders. For trickier areas I still prefer applying bondo with my finger. But with the spatula, I was able to apply an even coat over all the surfaces, and I haven’t really found any major shape issues that need to be addressed. Because I had about 4 layers of bondo on the visor, I was able to spend about an hour shaping it with my palm sander, and it was pretty much ready for smoothing.

The rest went super quickly. By the end of Sunday, I had all the surfaces with bondo on them, and I’ve even begun smoothing them out with glazing putty. As of right now, the frame has one good pass with glazing putty on it, and it only needs minor touchups. During the week I hope to start smoothing out the visor and back recessed areas, as well as starting to apply the seam line detail above the ears. Guy’s Tron helmet also has a cap over the normally exposed wired area, so I have to sculpt that detail in as well.

S7000418

S7000442

S7000447

In other Daft Punk project news, I recently picked up some fabric for the jackets and pants. I know I didn’t pick up enough to make both jackets and both pairs of pants, but I have enough for one full outfit and either another jacket or another pair of pants. Judging by the hi-res version of the Tron image in the previous post, I’ve determined that the best available material I can get locally is white fleece-backed vinyl. The fleece-backed stuff has more give to it than the marine-quality stuff (which is usually used for upholstery), and it folds just like the material in the photo. The material in the photo doesn’t appear to be very stiff leather at all, so I figure what I got is one of the best analogs I could find.

One problem I’ll have to face is the perforation in certain sections of the material. Certain panels on the jackets and pants have a fine grid of holes throughout. Those holes appear to be spaced by about a ¼”, so that means a LOT holes. I have two ideas of how to go about achieving the look. I intend to cut a 6” by 6” swatch of material and apply the grid of dots to it with a fine point sharpie. If the dots look like holes at close-enough of a distance, then I’ll have a feasible option. Another swatch will be cut and then I’ll probably apply the same grid with something that can punch the holes at that size. I haven’t figured this one out yet (as I don’t work with fabric often), so any ideas you can pitch will be considered. A third option that I might consider (and it would require outsourcing to someone with the equipment) would be to have the pattern screen printed onto the vinyl. It would have to pass the same test as the sharpie method, but it would go a LOT faster. I have several people in mind for this, so it definitely is a feasible option at this point.

No photos to show of the fabric part yet, as it's just a big lump of white vinyl right now. However, here are more photos of the helmets for your viewing pleasure:

http://www.flickr.com/photos/2storyprops/sets/72157624728828103/

November 14, 2010

Starkiller Armor and Gauntlet

While Dave has been making progress on the Daft Punk Helmets and Tainted Love Pack I have been on a bit of a hiatus due to work and the holidays coming. With the recent release of Star Wars: The Force Unleashed II I figure I’d share an older project I have been working that may get a revisit soon.

For those unfamiliar with the game, The Force Unleashed was released in 2008 and follows the story of Darth Vader’s secret apprentice, known as Starkiller, set between the events of episodes II and III. While there are several costume changes through the game as Starkiller hunts Jedi through different environments, the most recognizable costume for the character is the “Training Gear” seen in the promotional material and the first level of the game.

Starkiller’s Training Gear
SecretApprentice_tfu white

apprentice_turnaround1_copy

I’ve seen a few people attempt this costume with various results, but almost everybody has trouble with the shoulder armor, making it from pieces of sintra or cardboard. I wanted to make my set as accurate as possible, and this was a unique project for me as this was my first time working with fiberglass. To get things started I had my roommate at the time make a duct tape mannequin, of my upper torso so that I would have a copy of my shoulders to form the armor around. I then made a template for the armor from poster board, made two copies, and then taped them to the mannequin.

DSCN4891

The poster board was then layered with several layers of glass and resin to hold its shape. To form the collar, I built up a wall using balsa wood and epoxy. After reinforcing the wood with glass and resin, I used bondo shape the collar the appropriate slope. Then with some bondo, glazing putty, and lots of sanding, the armor started taking shape.

Wood Collar
DSCN4983

Bondoed
DSCN5004

For finishing, the armor was painted nickel and then weathered with engine black acrylic paint and 600 grit wet sandpaper. Before the restraining bolt was attached flat black spray paint was used to put the welding residue on.

Finished Armor and Gauntlet
DSCN5093

DSCN5094

The gauntlet was made in a similar fashion; I made a duck tape mannequin of my right arm, used poster board to make a cuff, and then used fiberglass and balsa to build up the shape. The display is made from Plexiglas with red brake light tape. In case you’re wondering, the text reads, “Order 67, Search, Destroy, Kota”

This technique worked very well and I am really happy with how the armor looks. The problem I found however was that the armor does not allow enough room for the connection straps or the tunic itself, which is due to an issue with the mannequin. If I attempt this again I will be using a freshly made mannequin as well as add padding to ensure the armor has room to breathe. Additionally, the armor will be hallow cast so it will be much lighter and allow some flexibility.

November 8, 2010

Daft Punk, Part 3: ReGuy and Disco Programs

So something had been bothering me about my Guy Manuel helmet, and I couldn’t figure out what. Last week I found out what, and it resulted in a quick rebuild of the entire helmet from the ground up. More on that in a moment.

The Daft Punk project (overall) has taken a new turn in light of new material. In addition to doing the entire score of the movie, Daft Punk is making a cameo in the upcoming movie Tron Legacy. Recently some imagery of their Tron Legacy costumes was revealed on the internet, and it got me hyped about Daft Punk in an all new way. I was a huge fan before, but this just adds way more “cool” to an already over-the-top coolness factor. Since we hadn’t invested any time or money into the costumes below the neck, and since the overall look is just a change of color, the decision to alter the project’s outcome doesn’t really cause us to skip a beat.

Photo is Copyright Disney.Daft_Punk

Back on topic. So I was looking at the new Daft Punk material from Tron Legacy, and I realized that my Generation 2 helmet (the fiberglassed Pepakura helmet from the previous posts) was way off proportion. The visor was too small, the ears were far too large, and the overall shape of the helmet was too rigid, too sharp. So I remodeled the helmet in Rhino with more emphasis on the visor, smaller ears, and a more organic shape to the metal parts; and I used references from the Daft Punk poster from Tron Legacy as reference since that is my new end goal.

There are some pretty major differences between Guy Manuel’s Tron Legacy and HAA-era helmet, which piqued my interest in it. First up, the major difference is that it is now silver (like Thomas’ helmet). The other major difference is that the exposed wiring on the back of the helmet is now capped off with a a dull gray plate (to contrast with the shiny chrome), and the open bottom part on the back of the helmet is also capped as well. The other difference is in the detailing in the ears – the LEDs and the switch are gone, and the ear blocks are now flush-mounted to the rest of the helmet instead of being slightly recessed with a bit of a gap showing. The overall changes are very appealing to me mainly because they are actually changes. The other very appealing aspect to the Tron Legacy helmet is the lighting scheme; rather, the fact that the lighting scheme goes against what you’d expect is very appealing to me. You’d expect the lighting to follow his Discovery-era lighting (following the shape of the rainbow patterns), but instead it just cuts right across the visor in a very unexpected way. Some people dislike it because they say it “copies Thomas’ helmet,” but I tend to be more open-minded and think it comes from a different motivation.

Anyways, enough talk. Let’s fight!

S7000380

S7000381

Click here to see the rest of the photos!

October 29, 2010

Appearances

We have finally updated our appearances page. It is currently up-to-date with our past events and upcoming events. We'll be super busy this weekend with three events planned out, so be sure to check the appearances page for our locations and come check us out!

We tend to make appearances mostly as the Rocket City Ghostbusters due to the scientific nature of our city (Huntsville, AL) and the child-friendly nature of the Ghostbusters. However, our other projects warrant different types of appearances, and some appearances aren't based on certain projects (such as conventions). If you would like for us to appear in costume at your next event, please send us an email at 2storyprops@gmail.com.

October 12, 2010

Ghostbusters: Tainted Love Proton Pack, Part 2

Well now! I didn't get much further on the Tainted Love proton pack before I chose to restart it entirely. Originally, I was basing it off a sketch I made of the pack after reading the comic. There were several details that I overlooked when making that sketch, and my lack of accuracy checking coupled with me thinking of how it should look made the build just wrong in all aspects.

I also ended up briefly chatting with the comic book's artist over Facebook, Salgood Sam, who referred me to his production sketches of the proton pack. The sketches provided details not seen in the comic, and were far more detailed in general. So I decided to start over completely, using only his production sketches to build the pack this time. I also felt like I was spiraling away from my roots as a prop builder with the previous build, so I got back to doing what I use to do in the beginning - sculpting out of MDF.

S7000124

So far the builder has been extremely simple. Getting back to the basics is an important lesson to any artist, and especially so in this case. Using very simple materials, I have been able to build most of the pack in only a weekend while maintaining attention to detail and accuracy to Salgood Sam's original production sketches. No overthinking, no overdoing, just straightforward prop building.

Construction so far has been with MDF, sintra, PVC, and a few washers.
S7000128

Right now I'm building this is two main sections: the cyclotron and the motherboard. My original plans were to mold it as two separate components, but I'm currently thinking that I can get them to be one single piece for a single mold. I have to reshape the top portion of the motherboard (the part that sits under the cyclotron), and in doing so I can probably make this into one single piece. If I can do it, it will make for a more simple molding process.

Here is where the proton pack is right now. I've added the little arms that hold on the ion arm. I was going to have the ion arm be a separate PVC piece that I add to the castings, but since I have a little recessed pocket for it to sit in, I might as well add it to the master copy to be molded in as well. The 1/2" PVC pipe brings the total length to 14.5" or so, which is a tad over my initial 14" estimate (Salgood Sam also estimates it to be 14"), but overall I don't think it will detract from the prop too much. I am considering chopping the motherboard in a certain spot to make it a bit shorter, but I haven't decided if it'd be worth it yet.

S7000149

I'm currently in the hustle to move, so I don't expect to make much more progress on this for a few weeks. I may try to chop the motherboard and shorten it and try to reshape the top of the motherboard before I have to clean out my current work area, but I probably won't get much more than that done before the weekend.

September 26, 2010

Video Game Proton Pack: Can You Hear Me Now?

While David is making a lightweight pack I went the complete opposite direction and put more weight on for a good cause; SOUND! With some tips from the Louisiana Ghostbusters I started the process of “turning my pack to 15” by installing sound. I’ll briefly explain the work involved in this post, but if you are a ghosthead looking to add sound to your equipment you need to check out this thread on GBFans.com:
http://www.gbfans.com/community/viewtopic.php?f=42&t=14730

Here you will find a break down and links for all the components you’ll need.
The first task for putting sound in my pack was adding a new battery and a speaker to the inside of the pack. Originally I had two 9.6 VDC batteries powering the lights, but the speaker required 12 VDC for proper activation. I purchased a rather large rechargeable battery and put it in the cyclotron area to minimize the loading effect on the pack. For the speaker I used a KFC-1662S Kenwood, which is about the largest speaker I can fit in my pack. The speaker was bolted on about an inch from the base of the motherboard. Two bolts were added as well to connect the motherboard to the frame to help support the extra weight.

DSCN6256

Since I have extra room in my thrower compared to movie packs I decided to locate the amp, sound chip, and sound chip power supply in the thrower. The sound chip is connected to a bread board that allows me to connect various switches to the sound chip. The sound is controlled by the two trigger switches on the thrower’s trigger box. Flipping the toggle switch will turn on the gun lights and trigger the pack start sound. Turning it off will shut the lights off and emit the shut down hum. The momentary switch will activate the lights in the thrower tip as well as emit a firing sound.

DSCN6253

The video below shows the current state of the pack. I still need to install a light kit in the thrower and a DPDT momentary switch for the thrower (this will allow the pack to make the power down noise after it fires). There is a bit more work to do but this clip should give you an idea how loud and impressive the sound kit can be.

September 23, 2010

Ghostbusters: Tainted Love Proton Pack, Part 1

One thing that Wayne and I have discussed at length is the prospect of having all the main "movie style" proton packs in our RCGB arsenal. By that, we mean we want the movie packs, the video game pack, and the arm-mounted miniaturized proton pack from the Tainted Love comic book. So while Wayne built the game pack, I'm taking on the arm-mounted pack.

In the Tainted Love comic book, our hero Winston seeks to hit it off with a potential client, and offers their services pro bono in order to help woo her over. He also gets Egon to create these smaller proton packs in order to cause less collateral damage than is typical of their other jobs. These smaller packs are less powerful, so the plan is that they all have to work together to wrangle a ghost into the trap, as opposed to one or two of them.

A scan from the Tainted Love comic book.
pack1

What is appealing about the design, for one, is the significant weight reduction. The big proton packs are mounted to Alice frames, which are specifically designed to reduce the effects of weight on your body. Of course, the weight sets in anyways and we're all sore when the packs come off at the end of the day. The other appealing aspect of the design (at least for me) is that it is a new design but still highly based on the regular proton pack. Plus, because it's small, molding it will be pretty easy and the final build should be rather quick.

Others have built this pack before, so it's not something new to the costuming community. However, in pretty much all instances that I've seen it made, the prop is built way too big. Indeed they are all significantly smaller that the regular proton pack, but once you measure out the proportions from the comic book, the end product should actually be pretty puny compared to its big brother. Remember, the top portion starts above the elbow, covers the upper arm, and just barely peaks above the shoulder. So when you sit down and actually draw it out, it ends up being a lot smaller than you would think.

My notes taken from the illustrations in the comic.
sketch01

For 2Story Props' version of the arm-mounted pack, I am starting with a 1-gallon Bondo can cap as the starting point. It's within tolerance of the specifications set in my original notes, being 6-3/4" in diameter as opposed to 7". It also has a slight bevel to it instead of straight sides (top diameter is 6-1/2"). But I think that will end up being a non-issue by the end of the project.

The miniaturized mother board, drawn to the specifications from my notes.
S7000095

The "mother board" here is a sheet of sintra that is exactly 14" long (perfect for my notes' specs) that has been cut to the dimensions from my notes. I've also temporarily mounted the Bondo cap to it so I can build out the rest. The base of this top portion of the pack will mostly be sintra, probably with wood or other sintra details on top. The final prop will be a fiberglass casting, though, as all of this stuff will end up being molded.

The Bondo cap taped is taped in place while I flesh out the rest.
S7000097

EDIT (8:50am, 09-24-10):

Last night I begun framing up the main body of the mini proton pack. Assembly so far has just been with sintra and hot glue. I've probably done about half of the major work right here. Aside from adding those missing panels and permanently fixing the Bondo cap in place, the rest of the work will just be clean up and detailing.

S7000106

September 22, 2010

Blog Updates

I'm building out some additional pages for the blog. Of the new pages, the big guns will be the Projects page and the Appearances page.

The Projects page is mostly complete. All I have left is to upload the teaser photos for one more project. The Projects page will be updated with each project we finish and each project we start. The works in progress will simply be listed instead of having a descriptive paragraph like the completed projects.

The Appearances page, much like the Projects page, will include past events and upcoming events. I should have our past events up shortly, and we are in the middle of hammering out details on some upcoming events, so those will be posted shortly.

Again, if there is anything you would like to see on the blog, please send us an email (2StoryProps@gmail.com) and we'll see what we can do.

September 12, 2010

Daft Punk, Part 2: Progress and Research

I’ve been making baby steps with the Daft Punk helmets. Really the only significant progress I’ve made is on Thomas’ helmet. I’ve added an initial layer of Bondo to the fiberglassed paper helmet to start the sculpting progress, and I’ve begun smoothing the face portion of the helmet. I’ve also added the mouth and nose details, though I haven’t backed them with anything yet for the eventual molding process. I found that, when the fiberglass was curing, the helmet slightly warped (the only notable effect was on the right side right above the visor portion), so I have to thicken that area with more Bondo to even it back out. Aside from that minor setback, these helmets should go rather quickly. The smooth, simple shapes and the rather low amount of fine details should lend themselves to making these helmets relatively quick projects, though the really time-consuming part will be going nuts getting them smooth enough for the plating process.

Thomas’ helmet in initial sculpting stages.
S7000067

Mouth and nose details added.
S7000069

There are two distinct eras for the Daft Punk costumes (though there are several sub-eras in between): Discovery and Human After All (HAA). During the Discovery era, the only reoccurring costume elements were the helmets, gloves, and backpacks. The rest of the costume changed among an assortment of eccentric 70’s outfits. The Discovery helmets sported the LED displays in their visors as well. The HAA costumes swapped out the changing outfits for black leather jackets and pants, and they dropped the backpacks because of a lack of helmet electronics. Although I would like to do the Discovery-era costumes, we’re probably going to be building HAA-era costumes.

The HAA outfits aren’t just any old black leather jackets or pants, so we can’t just be lazy here (as if!). They were custom designed by Dior Homme for the duo and are not available in retail stores. Below is a photo of the duo sporting their HAA jackets. I don’t know the source of the photo, so I can’t say what all those red dots are, of if it’s even them in the suits (it could be the suits on mannequins on some display, hence the reflected red lights, maybe).

Copyright Daft Punk.
daftpunk_23-1

I haven’t scoured the local stores yet (though they aren’t likely to have anything remotely close to what we need), but an initial online search revealed several choices. I was searching for jackets with a correct-ish style collar and with a simple enough design. Price wasn’t a concern at the time, but it happened that this one was the cheapest of my findings ($119).

Potential jacket choice.

My main concern for the jackets include having a vertical collar with enough room for an added snap closure and having a very simple, detail-free sign that would allow for easy modification. I’m primarily looking to modify whatever jacket I choose with a correct quad-snap neck closure, a three-snap closure down the front zipper, and shoulder epaulets. I’m also concerned with the correct zipper locations, but that’s something I can add to the jackets later (the jacket doesn’t have to have them at the time I buy). I’m not as concerned about the ribbing along the side, the elbows, and the back because the focus of the costume will obviously be the helmets. However, if I can find enough of the right material to do the zipper closure and epaulets, I might as well add the ribbed sections. The ribbing is an important detail, but I’d rather spend time tackling the easier details that I CAN do rather than not making progress at all because of a detail I can’t do much about.

The trick is finding the right black leather jacket for this project. Thomas and Guy are both pretty slim guys, and their jackets are very form-fitting. The jackets aren’t skin-tight, but they do fit very close to their bodies. A lot of motorcycle jackets that you find are bulky and don’t sit very tight around the body. They are often designed to be bulky so they’ll trap your body heat on colder drives. We’ll definitely have to be extremely discriminating when it comes to jacket fit, of course, so our best potential choice (above) may not even work out if it’s a bulky fit. Of course, if any of you readers know of any good potential jackets, please send us any info you have to 2storyprops@gmail.com.

EDIT:

Well now, I found this, which looks to be as close to an exact replica as you're probably going to find. The ribbing is different, but it's pretty dang close. It's a steep price point, so we're likely not even to consider it. However, given the amount of money we put into our work anyways, we might just end up considering it. Haha! And it seems that a lot of DP fans are getting this one despite the price.

http://www.magnoliclothiers.com/punk-leather-jacket-custom-made-jackets-by-magnoli-clothiers-p-346.html

September 9, 2010

Dragon Con Part 2: David's Story

This was the first year any of us here at 2Story Props had attended Dragon*Con. I personally have been intending to go for years (since about 2004), but never got the opportunity because it can be a pretty expensive trip even if you’re splitting a room with someone. Last year, shortly after Dragon*Con 2009 ended, we decided to go to D*C 2010 as a group. It was not long after that we started our ODST project.

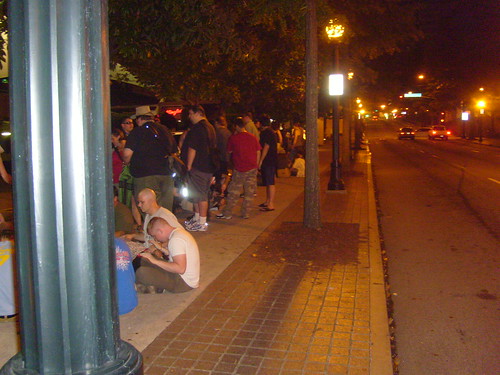
Wayne arrived in Atlanta earlier in the day on Thursday to secure the hotel room and to scout around a bit. Jecca and I had arrived later that night (around midnight Eastern Time). The rest of the crew arrived throughout the day on Friday. Early Friday morning (around 5:30) we hopped in line to get our passes. The doors wouldn’t open until 8 or 8:30, but getting in line as soon as possible is always a good thing with big conventions (I myself had attended other large cons before, but never D*C). Fortunately the line was relatively short at that time – about a third of a block long. So we were pretty close to the front.

Around 6am Eastern Time.
S7001492

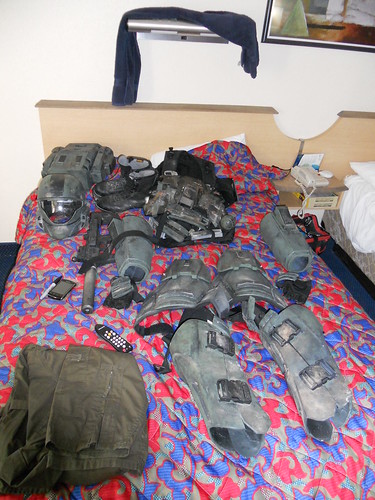
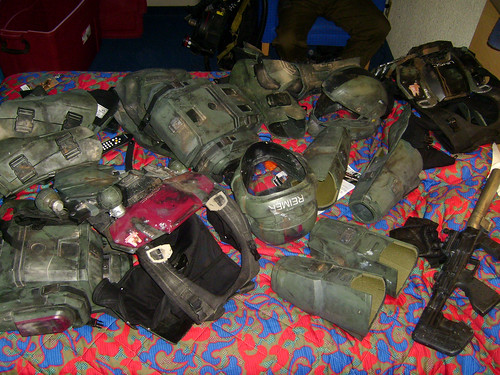
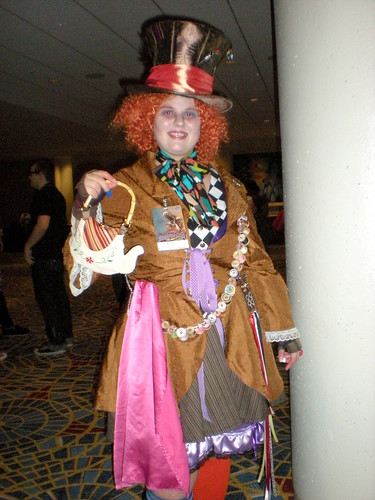
After we got our passes (and after having endured the Pac Man labyrinth), we returned to the room for a short rest and then to suit up in ODST. Jecca suited up in her female version of the new Mad Hatter costume as well.

The pile.
S7001500

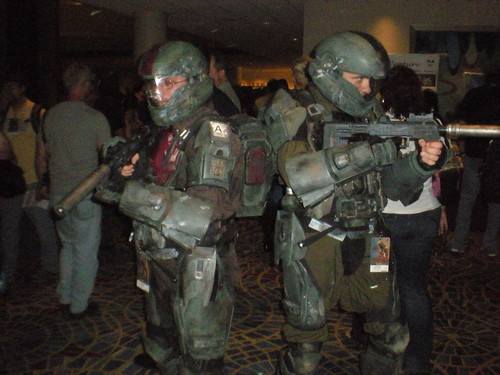
We would end up hitting the con floors at around 9:15am. I have been watching D*C photo albums on the internet for years, following my friends’ ventures throughout the convention. I was well aware that if you had a good costume, you were going to get photographed a LOT, but oddly I wasn’t prepared for it. The moment we hit the main part of the Marriott 2nd floor lobby we were bombarded with camera flashes. At that time we didn’t have a game plan as far as seeing anything in particular, but we did want to walk around and get a feel for the convention. Our efforts were thwarted, however, because we couldn’t move 10 feet without being stopped for photos. And every time we stopped, 10-15 more people would get in on the photo op, so we would be standing there for some time. What an amazing experience.

DSCN0989

Jecca's female Mad Hatter costume.
DSCN0990

We soon realized the one negative aspect of being photographed so much – we had a photo shoot with a friend to get to at 4pm, but getting there was troublesome as we kept getting stopped for photos. It was certainly welcomed and we gladly stopped, but it just seems that Dragon*Con is no place to make plans of any sort (if you are wearing a costume, that is!). I had experienced only a very small fraction of this kind of attention back when I was with the 501st, but at D*C I definitely felt that the hard work we put into the ODST paid off.

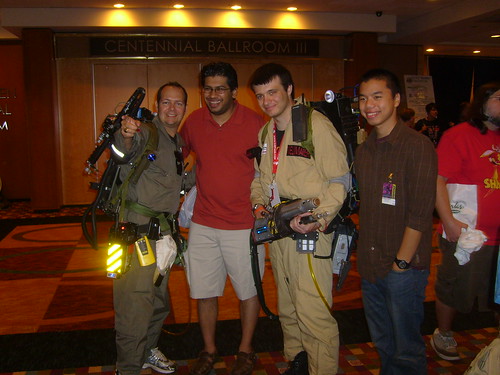
Ryan Jones, me, Jecca, and Wayne.
DSCN1015

At 4pm we had a small photo shoot with 2Story Props friend and professional photographer Chase Gustafson. We headed a few blocks away from the convention to a parking deck that had some neat backdrops. We don’t have the photos back from him yet, but they’ll end up in our Flickr album at some point. I’ll make an announcement regarding that when I get the photos.

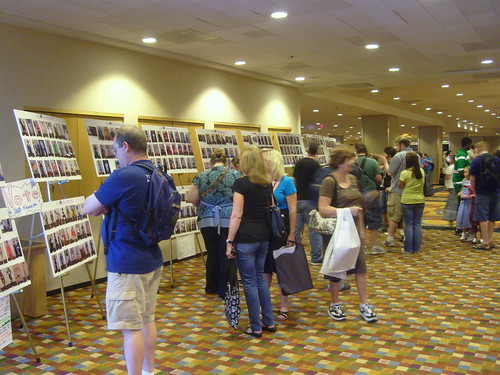
We initially wanted to enter one of the bigger costume contests, but due to the amount of stuff happening just on Friday, we decided that the Hallway Costume Contest would be the best choice, as it would free up the rest of our night for dinner with friends.

Photos of all the entrees.
S7000048

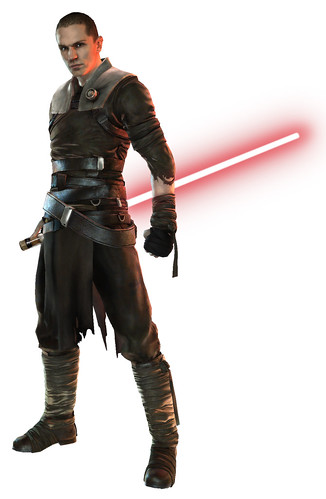
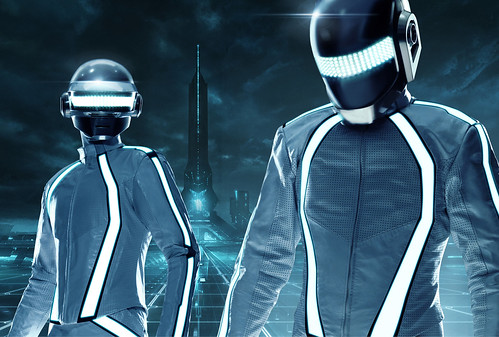
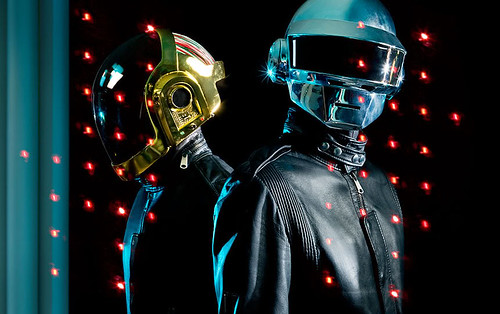
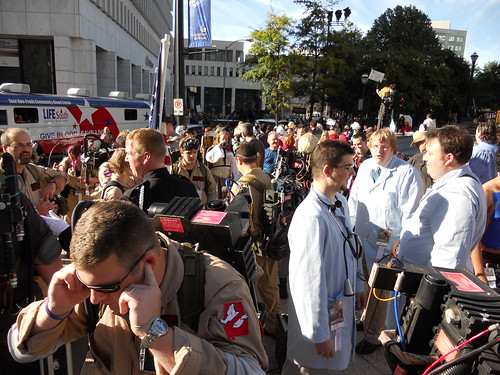
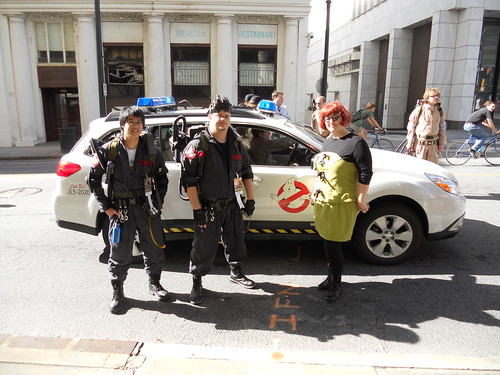
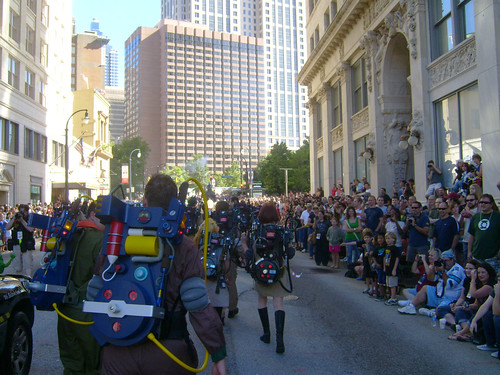
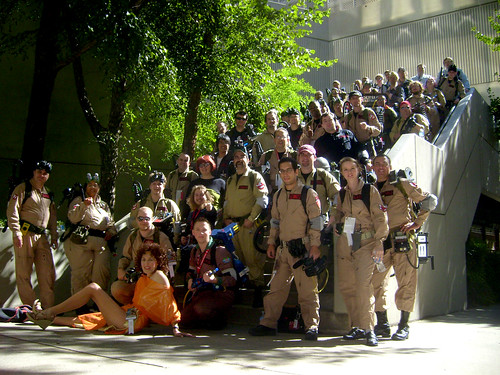
Saturday morning began by suiting up in our Rocket City Ghostbusters gear and heading to the parade gathering location. There we met up with the other franchises and joked around for a while before the parade began. The parade included 7 Ecto-mobiles, including the Denver guys’ awesome Lambo-doored Dodge Magnum Ecto-mobile. The parade was definitely one of the highlights of our first D*C experience, and we’re already gathering ideas for next year’s parade as far as our Daft Punk project goes.

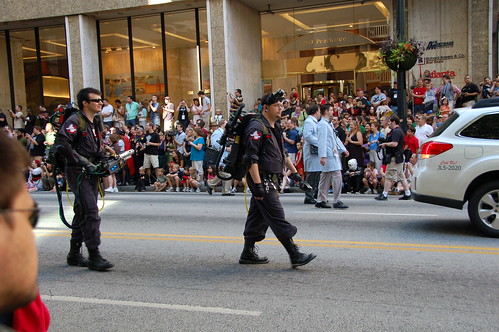
During the parade, my POV.
S7000008

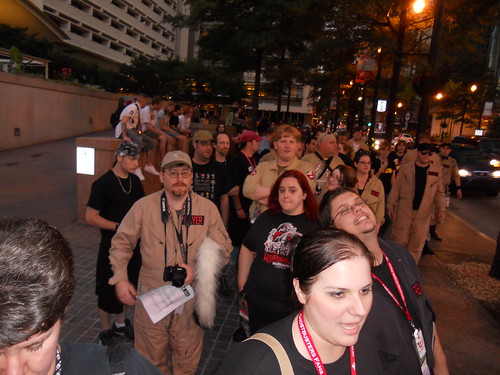
GBFans.com post-parade group photo.
S7000009

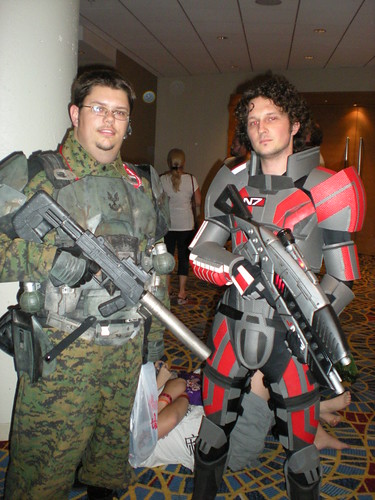
After the parade, I switched out into my Halo Reach live-action Marine gear. This was a quickie costume based on the live action “Patrol” commercial for Halo Reach, featuring three Marines in Legacy Effects-style ODST armor in a snowy field talking about a Spartan battle. I was excited about this costume because it was a simple variation of the gear we already had, so it would be a nice (and comfy!) third costume for D*C. And I’m excited to say that there is yet a third variation of the Legacy Effects ODST costume in the newest live-action Halo Reach commercial “Deliver Hope,” which will likely be worn at Dragon*Con 2011. While out on a patrol of my own, I happened upon Volpin in his amazing Mass Effect armor and had a short chat with him.

2Story Props meets Volpin Props.
DSCN1101

Halo Reach "Patrol" version of the LE ODST armor.
S7000022

Saturday afternoon, about half of our crew (including Jecca and I) went to the Star Trek: The Next Generation panel. I knew the crew of the USS Enterprise was way more laid back than their characters, but man, Family Guy had it spot on.

Saturday night we met up with the GBFans.com guys for dinner at the Mellow Mushroom in downtown ATL, a few blocks away from the convention hotels. Taking orders and serving such a large group all at once meant a long dinner, and then it took a while to gear up for the Crunch Bar Awards. But our wait was well worth it when 2Story Props co-founder Wayne was awarded with a golden PKE meter for “Best Representation of a Ghostbuster” among all the members of the GBFans forums. We here at 2Story Props are very proud of this accomplishment, and we’re all proud to say that the RCGB have added another award to their mantle.

By Sunday, I was hurting. A lot. Our ODST gear isn’t heavy when worn for a few hours, especially because the weight is distributed all over your body. But over 10 or so hours, the weight definitely starts causing soreness. The proton pack’s weight is helped by the alice frame that is specifically designed to diminish the effects of weight, but again, after so many hours in that, it definitely starts to get heavy. But you don’t feel it while you’re wearing it – you feel it once you take the costumes off. So on Sunday, Jecca and I went civilian, though Wayne suited up in his khaki RCGB jumpsuit and hit the floors again for more photo ops.

S7000050

We ended up leaving Sunday evening. Back when we first started planning our Dragon*Con stay, we both assumed that it would be best to leave Sunday so we could get back to work the next day or so (at least on my part), so we booked the hotel through Saturday night. It probably ended up being the better choice, though we did miss the Masquerade on Monday, because we are all very, very tired. We feel it was a spectacular first D*C experience, though, and our hotel is already booked for next year (all four days this time).

September 6, 2010

Dragon Con Part 1: Wayne's Story

After two had years of preparation we made our first ever appearance at Dragon*Con 2010 located in down town Atlanta Georgia. For three days we proudly showed off our creations and had some really interesting experiences. After getting back into Huntsville yesterday night we are all tired, but would like to share some of our experiences while the convention is still fresh in our heads, as well as mention some news about upcoming projects.

Friday:

ODST Suit Laid Out Before Suiting UP
DSCN6067

After waiting in line two hours Friday morning to get our D*Con badges David and I suited up in our ODST Hell jumper suits and hit the convention. For about the next four hours as we tried to make our way around the hotels we could barley move as wave after wave of people stopped us to take our picture. The general scenario played out something like us.

Patron: [Exact second we take our helmets off for air] “Excuse me, can I get a picture?”

Us: “Sure” [Put helmet back on]

Then a mob forms and cameras are flashing for about 5 min. When the flashing stops we look around to see if anybody is still taking our picture. We don’t see anybody and begin to take our helmets off…

Patron: [Exact second we take our helmets off for air] “Excuse me, can I get a picture?”

And repeat that about 5000 times ;-)

While we were wearing our ODST gear Jecca (David’s girlfriend) was also a big camera draw as she showed off her female version of the Tim Burton Mad Hatter. Dave will put some pictures up in his post but I have to say that Jecca’s costume was the best Mad Hatter costume I have seen. Period. She nailed the make up perfectly and everything about the outfit was just awesome.

After trooping for a few hours David and I met up with a friend of his and we found a parking garage for a professional ODST photo shoot. I haven’t seen the final pictures yet but based on the other work he showed us on his iPad (after we washed off Dave’s drool) we are going to have some really nice pictures of our gear.

Saturday:

Saturday brought on the Dragon*Con parade for which we broke out the Rocket City Ghostbusters. David, Ethan, and I suited up in our gear while Jecca went all out and pulled off an amazing Janine costume. We made our way down Peachtree and met up with an army of Ghostbusters from franchises across the country including Alabama, Louisiana, Georgia, Palm Beach, and Denver just to name a few. Not only were there enough “unlicensed nuclear accelerator” to power a small country, but there were SEVEN Ecto mobiles! Seeing this many Ghostbusters in one place was defiantly a sight to see.

Who you gonna call?
DSCN6075

The Rocket City Ghostbusters (I was taking the picture)
DSCN6084

Marching in the parade was defiantly one of those moments in life you never forget. For four blocks thousands of people were lined up on the streets taking pictures of the parade, yelling, “Who you gonna call” and chanting “Ghostbusters! Ghostbusters! Ghostbusters!” like in the movie. I won’t lie, I was crying a little bit under my sunglasses. Going from being a little kid 20 years ago playing with the toys and pretending to be a Ghostbuster to having parents and kids alike point to us and say, “There ARE the Ghostbusters!”. It was a very emotional experience for me.

Me and David in the Parade
4957512278_9a3212e4db_o

After the parade while the other guys were checking out some of the celebrities and panels I kept my gear on and made my way through the main three hotels stopping every few minutes to have my picture taken, and luckily get pictures of other people since I can wear a camera on the Ghostbuster gear. In addition to some really good costumes, I saw my first real life R2-D2! For a while I decided to hang out at the GBfans booth in the Hyatt to mingle with some of the other busters. I received a lot of complements about my game pack and Dan AKA was nice enough to make a video vouching that despite popular belief my proton pack is in fact wearable. Later that night the RCGB group headed out to the Ghostbusters awards dinner at the Mellow Mushroom for some excellent pizza and good conversation about busting.

Hungry Ghostbusters
DSCN6116

After dinner the awards were presented, and I was given the Golden Crunch Bar Award for Best Representation of a Ghostbuster thanks to my work on the video game version of the pack! Unfortunalty the gentlemen making the awards had some issues and couldn’t make the convention, but my award will be mailed here when it’s done: A golden PKE meter!

Sunday:

By Sunday most of us were pretty worn out and decided to spend our last day in civilian close, but I decided to put my bruised feet and aching back aside and take the game pack out for one last spin, this time with a khaki uniform. I spent a few hours traveling around the hotels and was stopped many times for pictures, and even an interview with CNN Student News! I saw a lot of great costumes that I have posted in the flicker account, but one of my favorite shots defiantly has to one where we found Gozer the Gozerian!

Aim for the Flat Top!
DSCN6165

All in all my first Dragon Con defiantly lived up to the hype I have been putting on it for the last 2 years (we did not have suits ready by D*Con 2009 and by the time David and I met all the hotels would have been booked anyway) and we have already booked our rooms for next year! As far as projects for D*Con 2011 go, David is working hard on the Daft Punk suits and we are going to see if we can maybe do something special in the parade with them like have a moving pyramid so we can “D.J.” the parade. The ODST and RCGB suits may make an appearance as well although they would not be worn for the full day again since we have to fit in the other suits as well. Personally, I had a secret project in mind that I was planning, but the abundance of Splicers and Little Sisters I saw and the total lack of Big Daddies is causing me to take another look at Subject Delta……

Dragon Con 2010 Pictures:

http://www.flickr.com/photos/2storyprops/sets/72157624893699774/