-Captain James A. Lovell
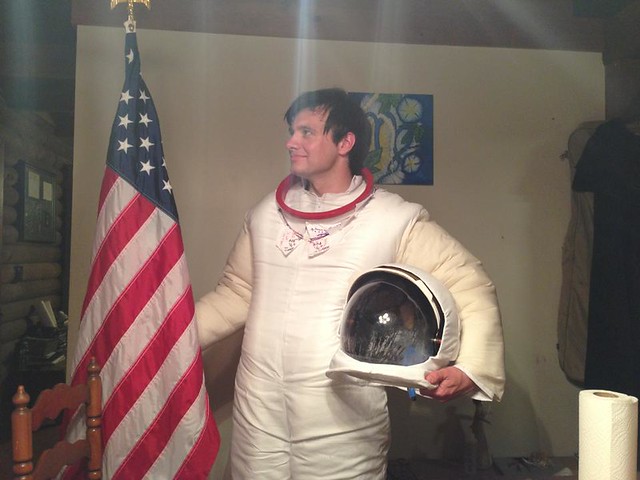
For those who missed part 0, late last year I began working on my very own Apollo moon suit for Dragon*Con. The original project was going to involve a working liquid cooling garment, metal connectors, and a real bubble helmet. By March reality sunk in that the suit would take years, so I decided to focus on making more of a costume than a “functional” replica.
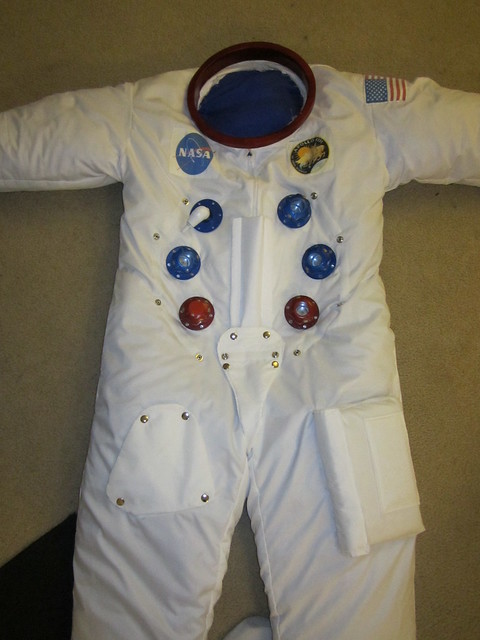
Before I dive into the build summary I want to provide some historical information about the design for those who wish to compare our work to the real thing. Between 1969 and 1972 there were 7 Apollo missions to the lunar surface. Six of them succeeded with landing, the exception being Apollo 13. On the first 4 missions (Apollo 11-14) the astronauts wore an A7L space suit. This suit had a single zipper going down the back and up the crotch with the hose connectors placed symmetrically on the chest. The last three missions (Apollo 15-17) used the A7LB, which is a side entry suit with the connectors moved up on the chest and arranged diagonally. The reason for this is it allowed better mobility particularly around the waist, which was necessary to sit in the lunar rover.
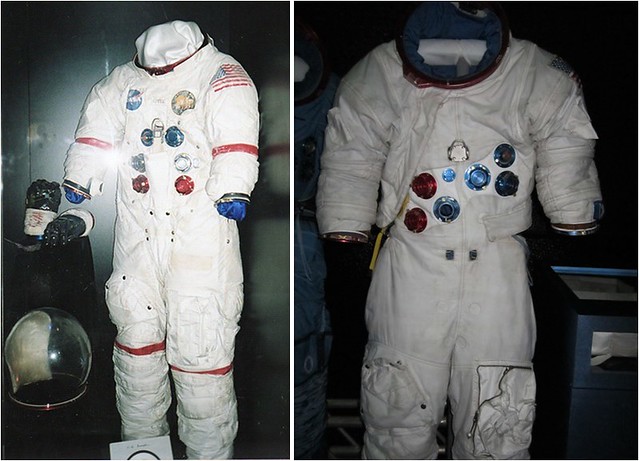 Lovell’s A7L (left) vs. A7LB
As for the red stripes, on Apollo 11 and 12 there were no stripes, thus the commander and lunar module pilot looked exactly the same in photographs. After complaints from the press, NASA decided the Commander’s suit would have red stripes. Had Apollo 13 landed, Jim Lovell would have been the first astronaut to have the commander stripes. Instead that honor went to Alan Shepard on Apollo 14.
And now to the build!
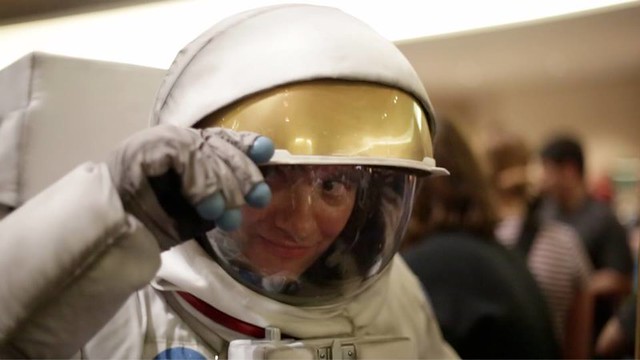
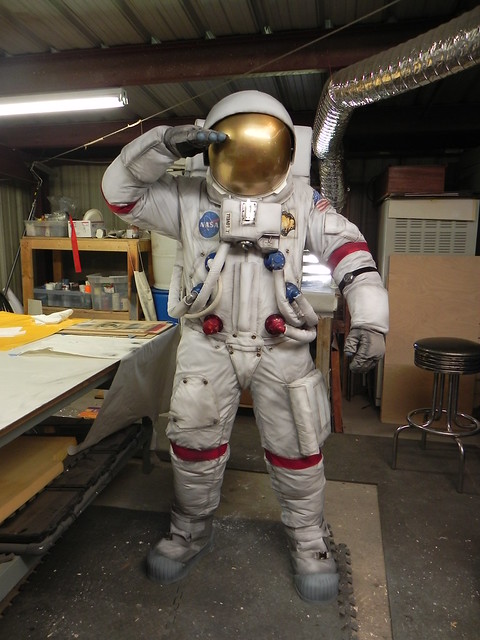
We’ll start with the helmet. For the purpose of this write-up the helmet consist of 3 components; the EVA over helmet (the part covered with fabric), the solar visor (the gold one that moves up and down), and the bubble helmet (aka the fish bowl). For Jim Lovell’s suit there should also be an external solar visor but I did not have time for it this year. I started by determining the size and curve of the solar visor using the refurbished bubble helmet and foam board. I needed it large enough to pivot around the helmet but not grossly too big either.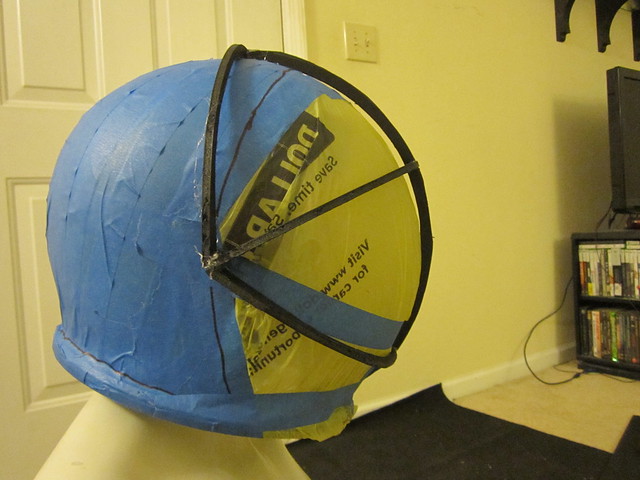

Once the solar visor dimensions were finalized I did the same thing for the over helmet. This part had to be large enough so the solar visor could slide into it and cover the pivot point.
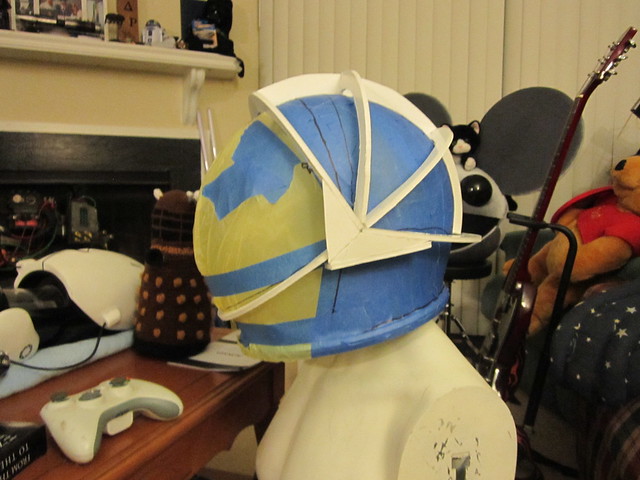
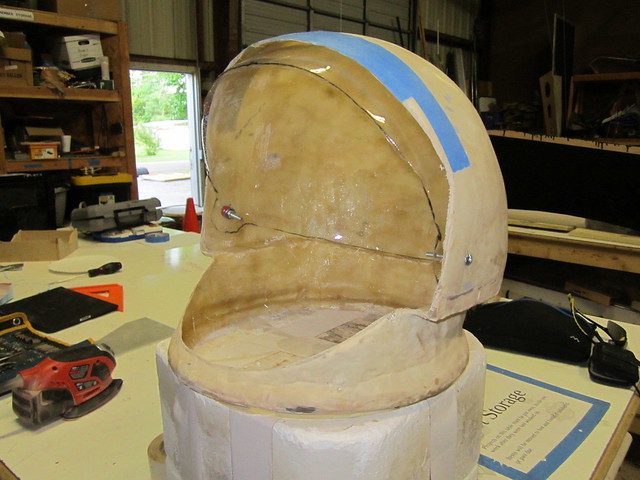
With both sets of dimensions finalized I started to form the bucks. The solar visor would be a vacuum formed piece so I made a buck using MDF and pink foam. The foam was then sealed with acrylic paint and smoothed with several layers of bondo. The over helmet on the other hand would be fiberglass so I built up my positive with expanding foam and clay. The finish did not need to be perfect as the entire thing would be covered in fabric. A two part mold was made and the fiberglass shell pulled.


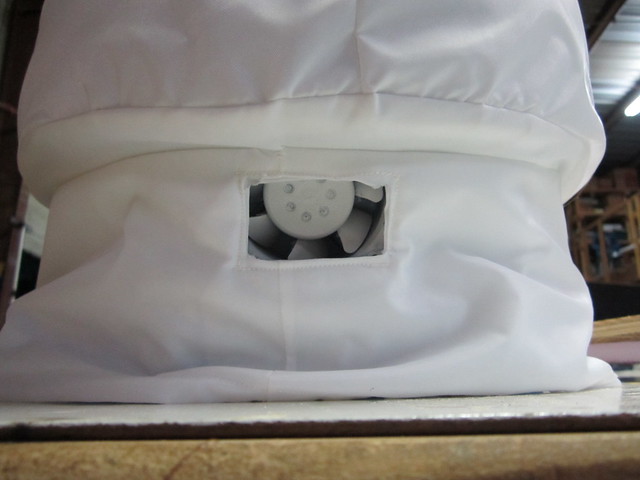
To help me breathe, the bubble helmet was made with a vented back. A 12 VDC fan on the back of the helmet pushes cool air in while the vents let the warm air out. This is why I can breath and the helmet does not fog up.

Using my experience from making mau5 heads, I pinned fabric around the helmet to determine the seams. The fabric used throughout the suit is white rip-stop nylon with a layer of white batting behind it to prevent discoloration from the material underneath. The edges are attached to the helmet with cold temp hot glue.

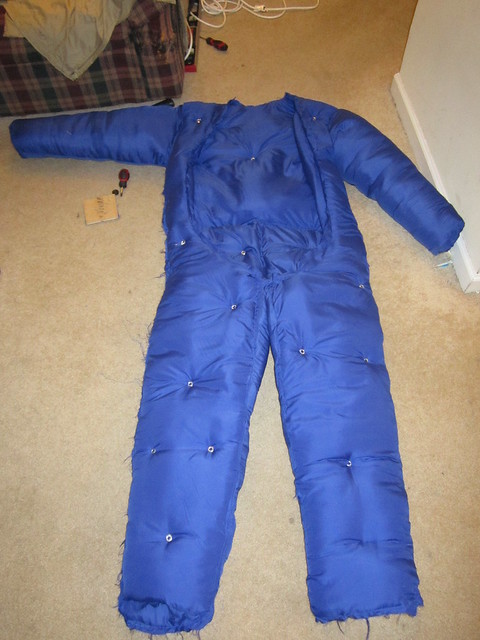
The jumpsuit was by far the hardest part to make look right as it not only needed to fit me but needed to be padded to mimic the bulk of the real thing. I experimented with several ideas before finally settling on a padded under suit and separate over suit. The padding was made using several layers of high loft batting sandwiched between two layers of blue lining fabric. The pattern was a 2XL Rothco I cut up and modified to account for a thinner waist. Rivets were added to keep the batting from shifting down overtime.
The same jumpsuit was then used for the over garment. Another local costumer, Pam, was kind enough to pin a collar template in place in the muslin stage. While the real A7L has the zipper in the back, I left mine in the front as it allows easier access when I’m putting it on myself. Because of this, the neck ring must come off to get in and out of the suit, so it attaches with Velcro .
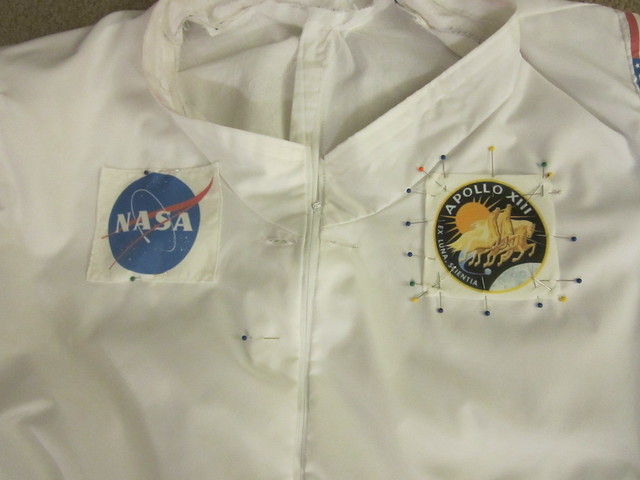
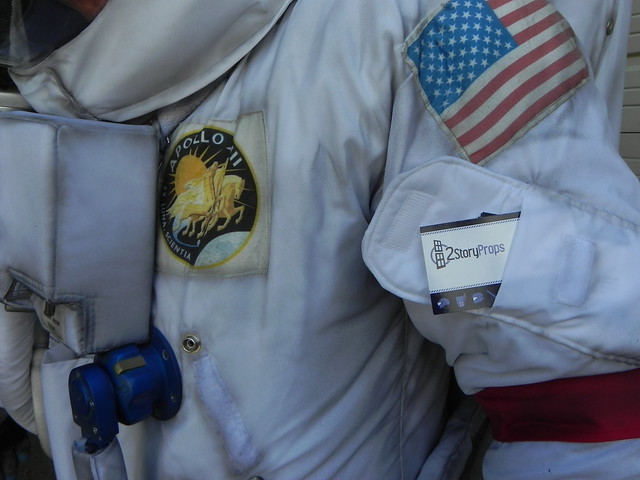
Once I had an over garment I was happy with I added details including pockets, snaps, Velcro, and patches. Everything that is not on the chest had to be hand stitched to the suit. The patches were made using PhotoFabric which you can find at your local fabric store. Unlike iron-on templates, this is fabric that you can print directly on.
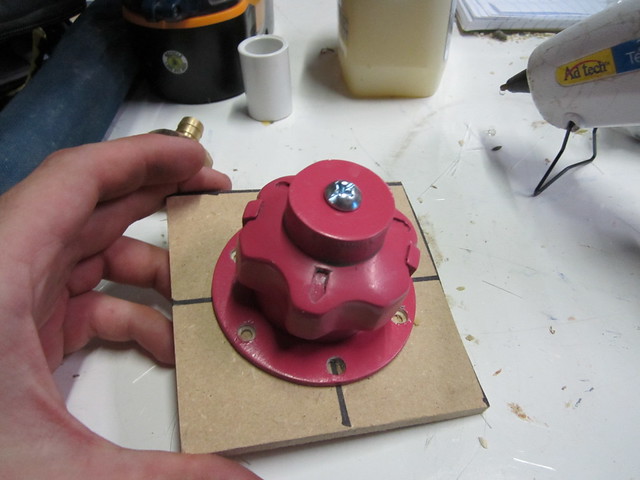
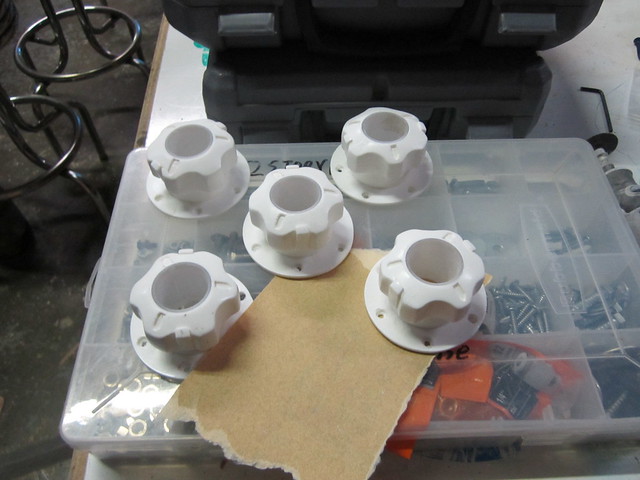
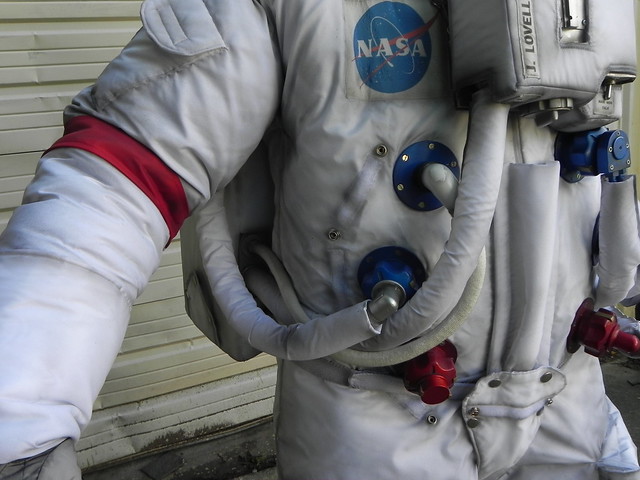
The chest connectors were sculpted from MDF, molded, and then cast with SmoothOn 300 with an acrylic tube inside. The finish is anodized paint from O’ Reilly’s. Each connector bolts to the suit with a backing plate that contains a rare-earth magnet. The hoses then slide into the tube and are secured in place via magnetic force. The hoses themselves are made of vinyl tubing covered in fabric.
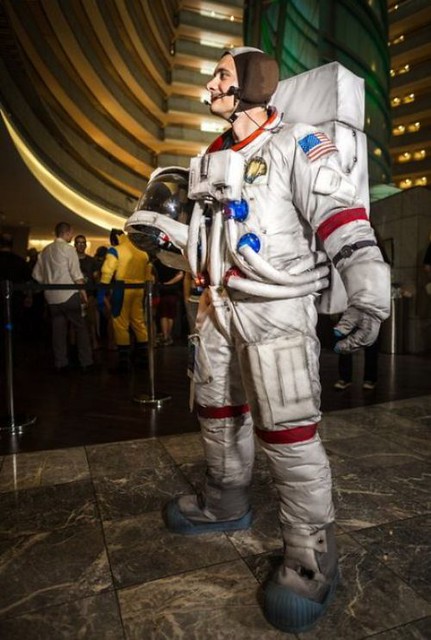
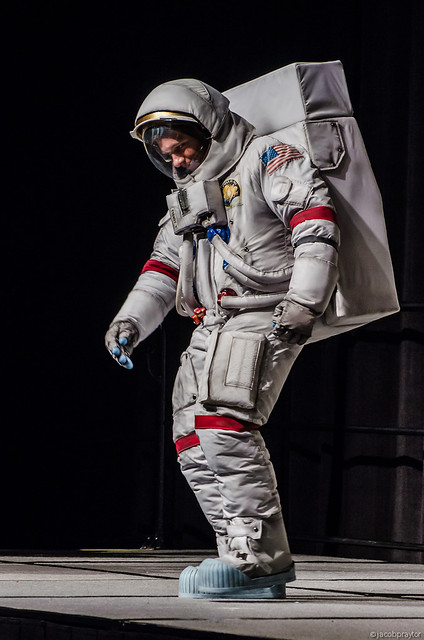
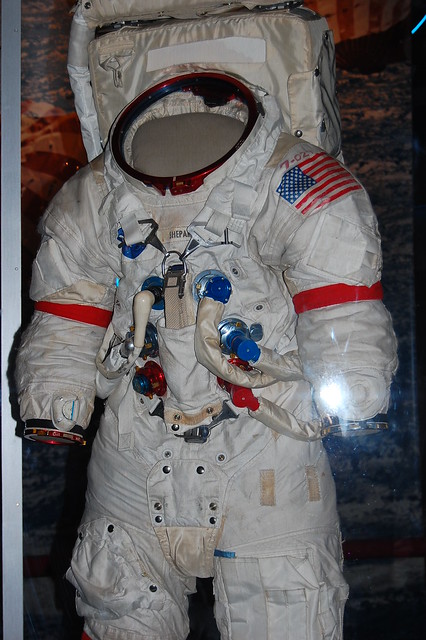
The Personal Life Support System (PLSS) attaches to the moon suit in a very unusual way. There are no shoulder straps like a traditional backpack. Instead, two straps come over the shoulder and attach to an anchor on the front of the suit while a thin waist strap keeps the bottom of the pack stable. It is very hard to see this because the helmet and hoses hide these straps, but you can see the harness system in this image of Alan Shepard’s suit:
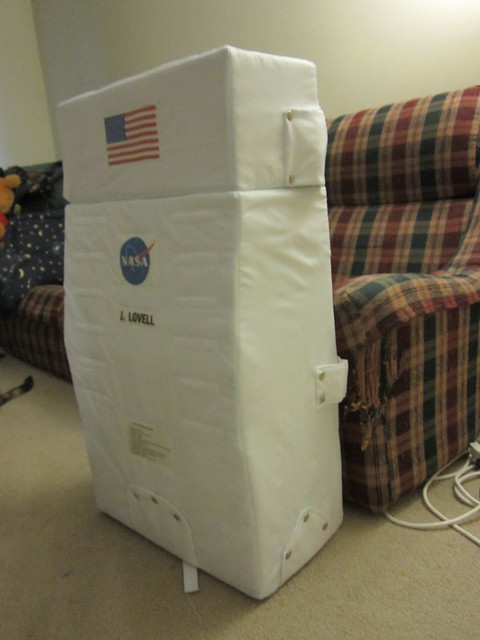
Because I could not put the weight on my waist, I needed to keep the pack as light as possible. Since it is not load bearding I built the pack out of cardboard and foam board. The structure was then covered in chrome duct tape to ensure an even color, the covered with a layer of batting and rip stop nylon. It attached to the suit by clipping onto two anchors bolted to the cold vest that stick out of the over garment.
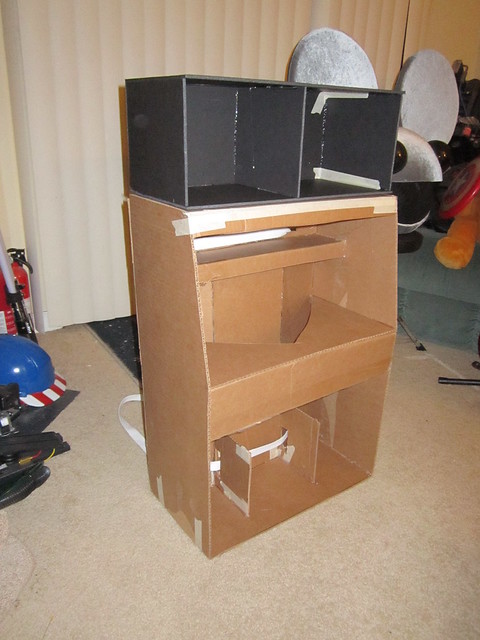

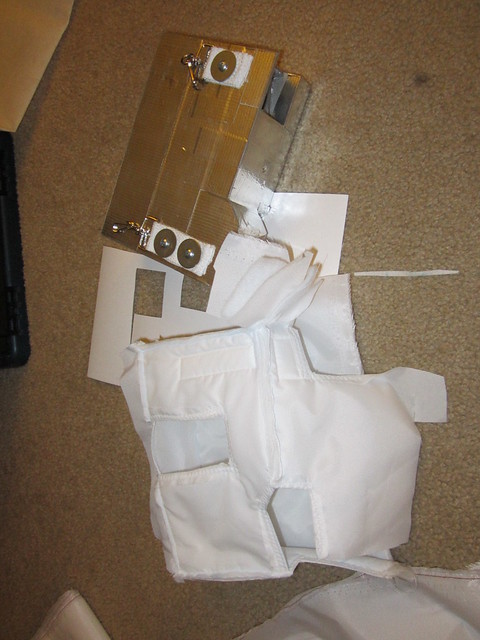
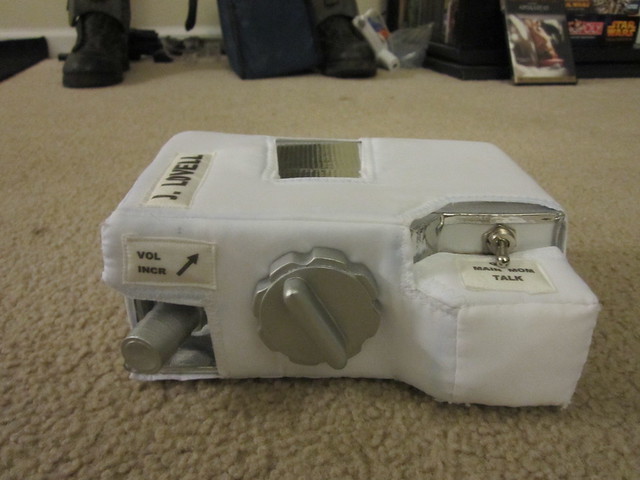
The control box on the front was made the same way, except it is made of plywood as it may support the weight of a camera in the future.
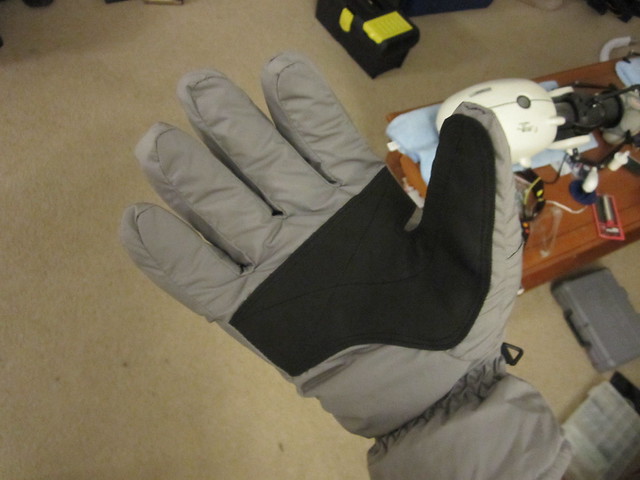
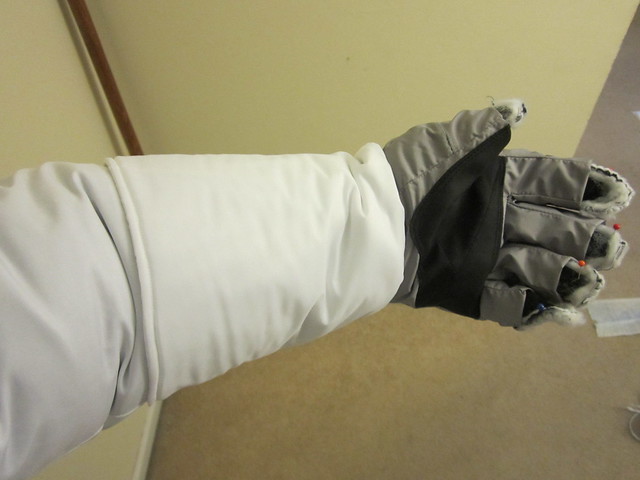
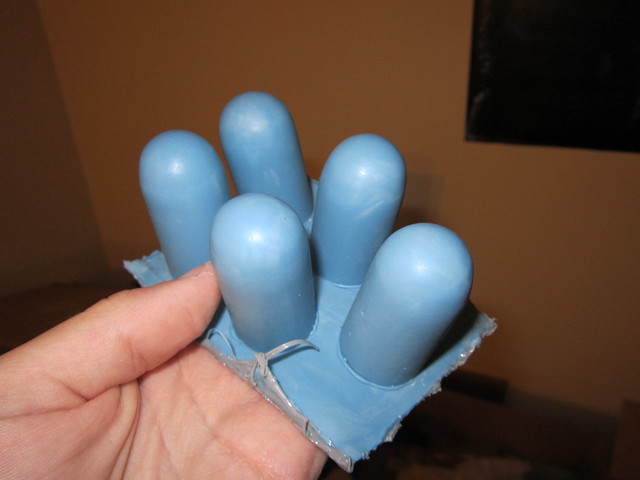
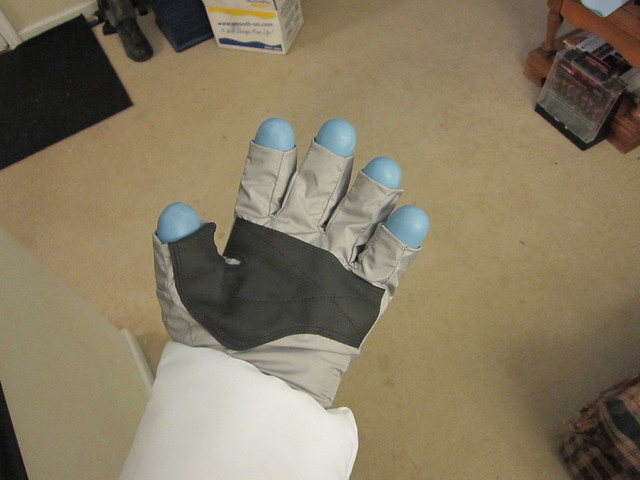
The gloves started off as grey snowboarders’ gloves. I added a new white cuff and cut the outer layer of the fingertips open and folded them back. To make the rubber fingertips, I made a positive using a wooden hemisphere and length of PVC pipe, then made 10 molds (2 blocks of 5). After applying two layers of mold release, I brushed in several layers of mold max stroke mixed with blue and black dye. Once I was happy with the thickness the finger tips were separated from the mold and glued to the glove’s with silicon glue.
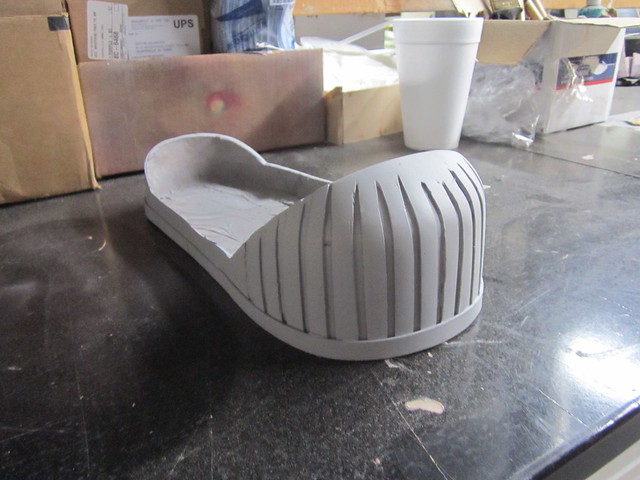
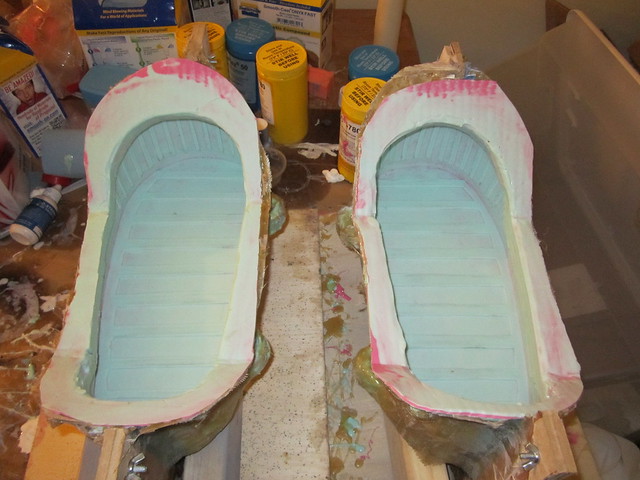
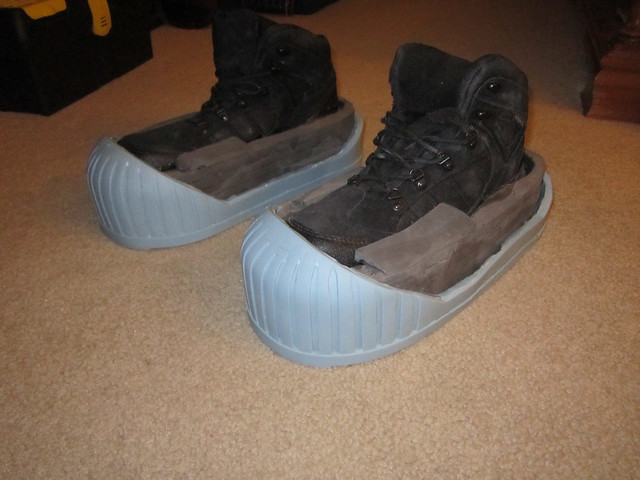
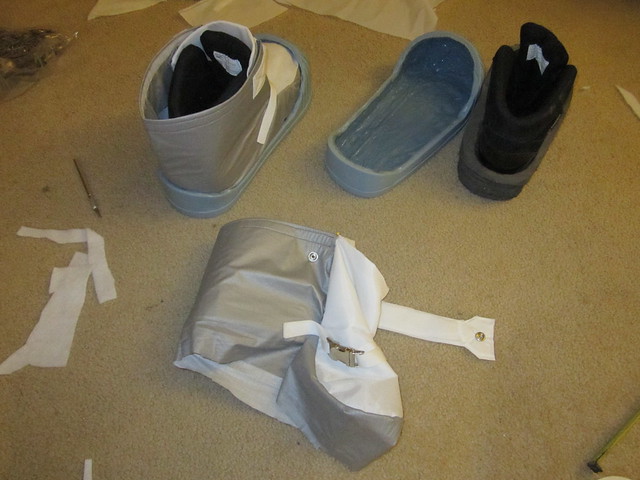
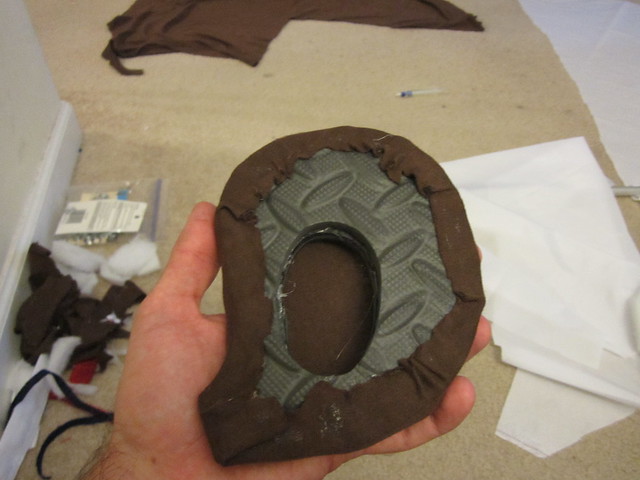
The boots are regular boots built up with EVA foam to acquire the proper shape. The foam is glued together with cold temp hot glue while the boot is attached with Goop.
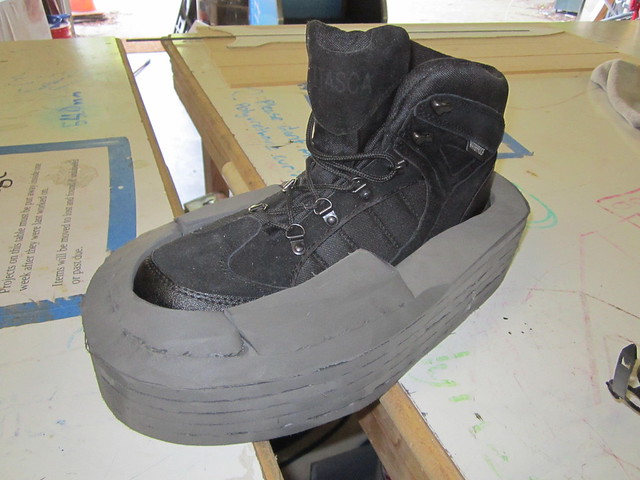
The soles were made by covering the eva with wax paper followed by several layers of fiberglass. The glass was then removed and served as a base to sculpt the sole design with bondo and plastic. Once happy with the design, the soles were molded in mold max stroke. Like the gloves, several layers of rubber were then painted into the mold to create the rubber sole for the boot. The boots were then covered with nylon and ironing board fabric. I’ll mention here that after three outings at dragon con I still have no wear damage to the soles of the boots, so they are holding up remarkably well.

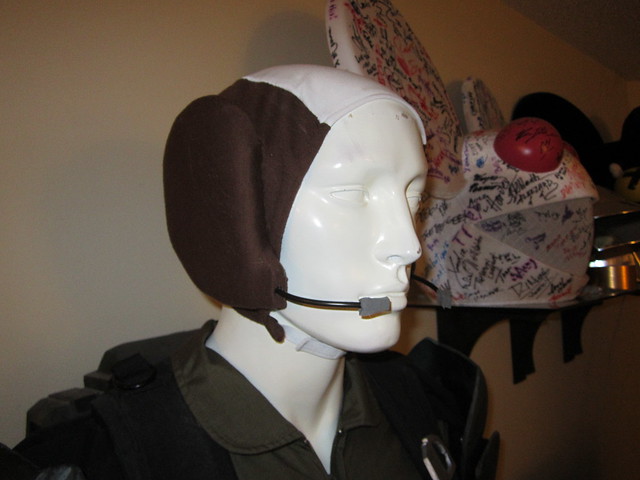
The base of the snoopy cap was made by a friend, then I added EVA foam earmuffs and stiff wire covered by automotive tubing for the microphones.
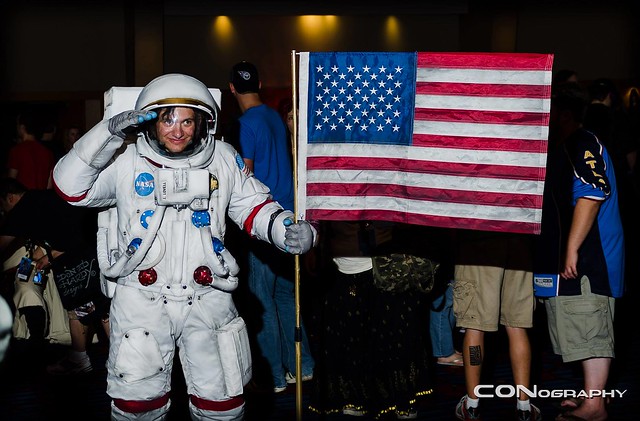
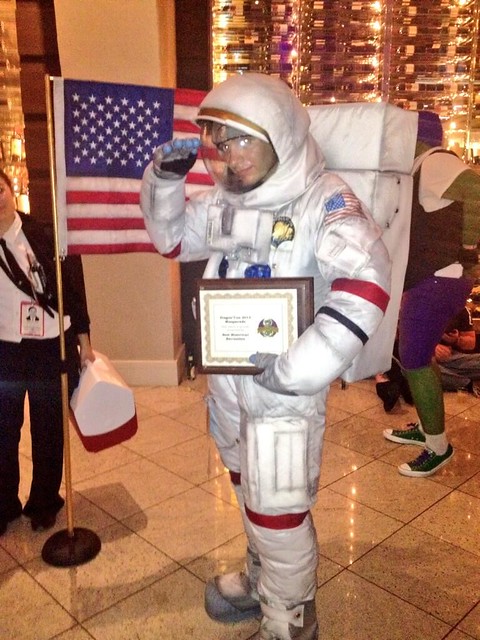
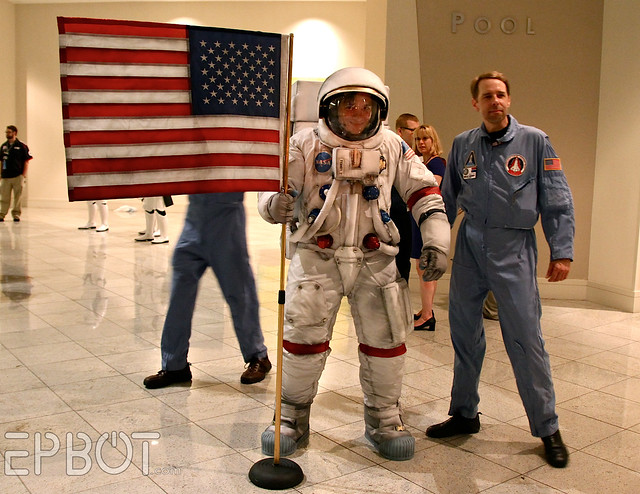
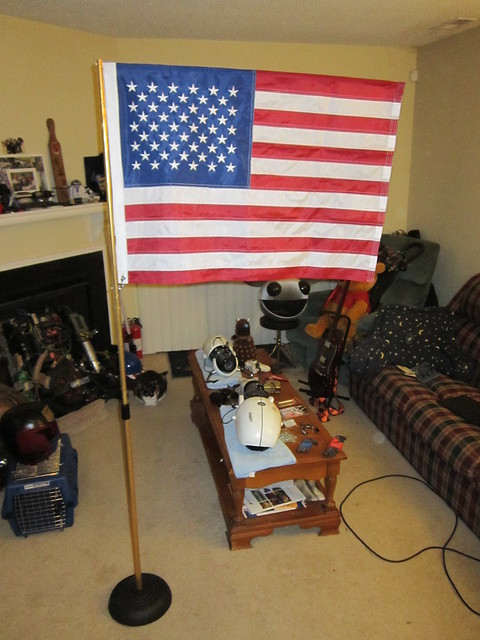
For the masquerade I wanted to have a flag. The real ones are 3 x 5 feet, but I decided to go with a more manageable 2 x3 foot flag. A rod was sewn into the top of the flag to keep it erect. The flag pole is itself is a microphone stand. I added a longer center rod and covered it with gold duct tape to give it a Mylar look.
Finally, Dave used his new airbrush and weathered the suit using acrylic paints mixed with alcohol to provide a fine mist of moon dust to the entire suit.
During Dragon*Con, I got a lot of comments about how hot the suit must be. While the suit does get warm (I do sweat in it) the fans and the cooling packs do their job and keep me from overheating even when walking. After 4 hours in the suit it isn’t the heat that bothers me, it’s the angle my head sits in the helmet due to the location of the neck ring, which prevents me from looking up. The reason I am calling this post part 1 is that I am far from done working on this project. Over the next year I intend to make the suit more comfortable with a more powerful fan and better helmet placement, as well as add some more details including the external sunshade, arm checklist, and chest mounted camera. By D*Con 2014 the suit will hopefully be near perfect.
This has been a very rewarding build for me as it combines my two passions in life, space travel and cosplay, and fulfilled a lifelong dream to wear a spacesuit. I’m planning to take it to as many cons as a can this year, and may even have a new space related project for Dragon*Con 2014.
Thanks for reading!