
I both love and hate building props from comic books. I love it because it's often times something not used in a primary media (if we're considering comic books to be a "secondary media" to movies, like in this case - Ghostbusters) and is unique to the comic book or series. I also love it because it's rare that you find people actually making things from comic book aside from all the super hero stuff, so the number of potential projects that haven't even been touched by other builders is exceptionally high, and I love having a seemingly "secret" or untouched pool of projects available if I get bored with all the other mainstream stuff.
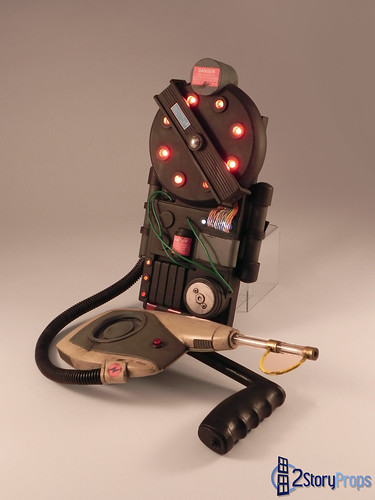
However, that doesn't necessarily mean it's a happy happy joy joy situation. The big (and probably only) reason why I hate building from comics is that comic book artists, while awesome at their craft, are rarely consistent panel to panel when it comes to details, shapes, and even proportions. They're under tight deadlines and pressure from the publishers, so it's understandable that they'll rush through a page without such considerations, but that doesn't seem to be the case with this particular project. Ghostbusters: Tainted Love was a fantastic little one-off comic book that introduced Ghostbusters fans to a new piece of equipment. It goes unnamed in the comic book, but it's essentially a miniaturized proton pack. It's worn on the arm, and it emits less power than it's backpack predecessors so it will do less collateral damage for house calls. The catch, though, is that it takes all four Busters to use them at the same time in order to wrangle a ghost instead of just one or two using the big packs. Anyways, what's wonderful about this comic book, from a prop building reference point of view, is that the artwork is incredibly consistent throughout the issue, and that made identifying all the parts and details fairly easy.
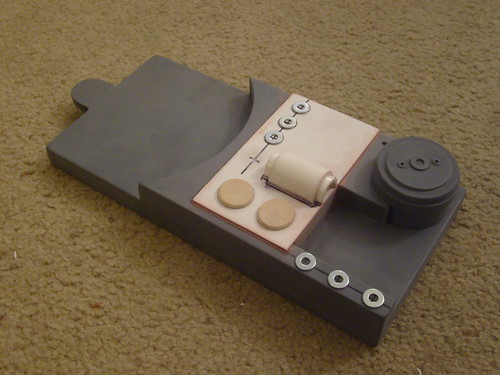
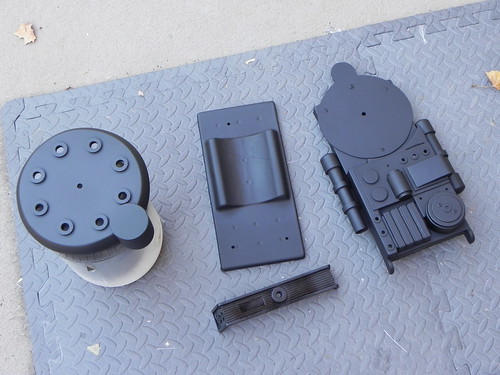
I began with an oddly-shaped assembly of plastic scraps and Bondo can lids, but quickly decided to scrap that version because it really wasn't looking right at all. Starting over, this build began life as several pieces of layered MDF and sintra. A few washers and sections of PVC pipe were thrown into the mix to finish off the detailing.

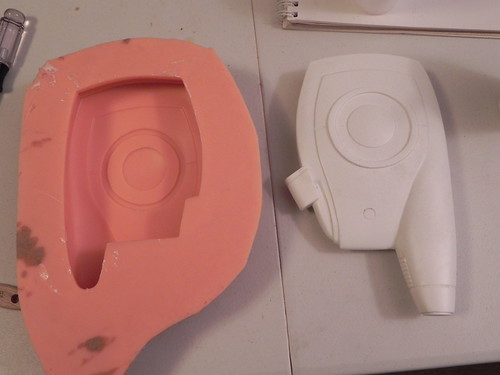
I'll go ahead and apologize again here and say that this project turned into one of those back-burner projects, so I ended up losing steam in taking photos. Among the non-existent photos are the the molds for this thing. I made a mold for the main body of the upper arm piece so that castings would have all the details already on them, and all I had to do was paint the cleaned up fiberglass casting. Nothing terribly flashy, and really, it's nothing new for the methods we've used before on previous projects. I also made a mold for the top drum section so that hollow castings could be produced from it as well. Since this was being worn on the arm, I wanted it to be as light-weight as possible. That's really all you should take away from it.
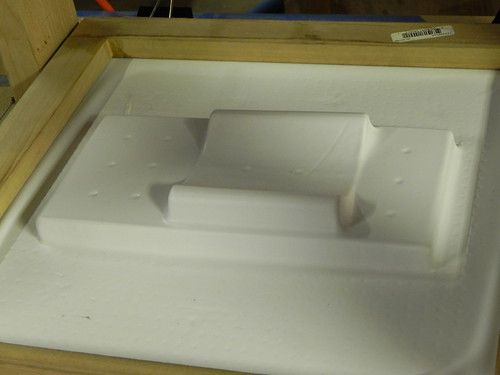
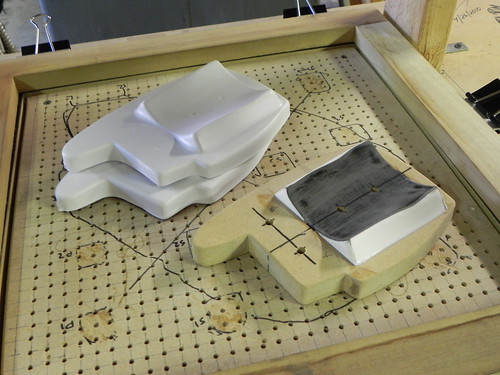
In order for the pack to be worn, a backer piece had to be made, and I decided to make a vacuum forming buck out of some MDF and a section of mailing tube. A sheet of styrene was pulled over it, and then that piece was trimmed and fitted to the inside of the main shell. The little humps you see on it form-fit to the upper arm, and later on a nylon webbing strap would be inserted through it to secure the assembly to the upper arm when worn.

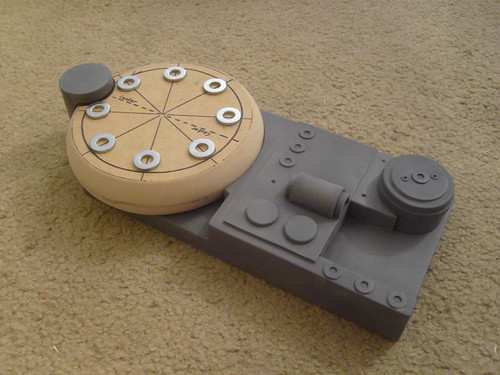
Additional detailing was fairly straightforward, as it consisted of sections of PVC pipe being fitted to the shell of the main body. Another casualty to my lack of photos was the progression of the bumper piece. Seen in the photo below, the bumper was made by layer several sheets of sintra together with super glue. The ribbing was particularly fun in that I used some ribbed cabinet liner vinyl as the texture. Additional detailing was made by using a few washers, and finally a mold was made for it so I could produce fiberglass copies.
The forearm unit actually went rather quickly, and again I didn't stop to take photos. It was sculpted out of MDF with a dremel, and then detailed with various bits of plastic, some washers, and that same cabinet liner vinyl from the bumper. This component also needed to be lightweight, so I made a mold of it and produced a hollow casting out of Smooth On Smooth Cast 300. This one had some severe undercuts on it, making casting the thing seem more like an acrobatic interpretive dance. Like the upper arm component, it needed a backer piece, so I used the same method and produced a vacuum formed styrene backer that was fitted to the inside of the forearm piece.
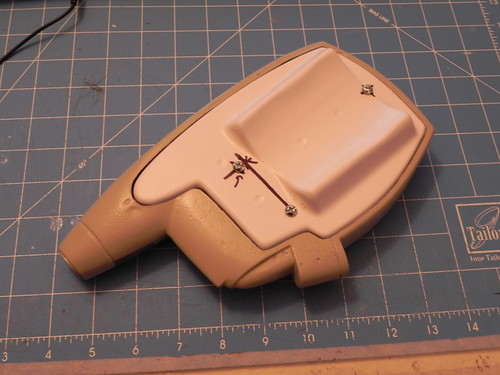
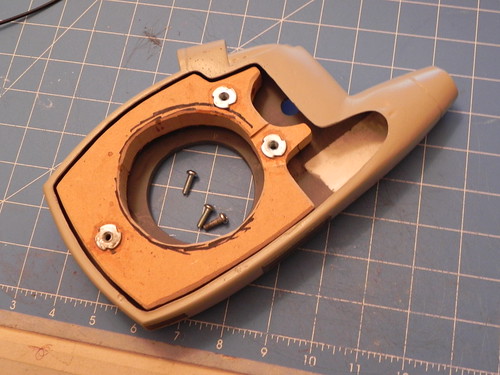
In the above photo, you can see an MDF framework that I installed with a little hot glue. This framework serves two purposes: 1) The back plate bolts to it, and 2) the hand grip would later be attached to it instead of the hollow plastic shell. The hand grip was carved out of some MDF, and was originally intended to be molded and cast out of resin, but time restrictions caused me to use the original MDF master on the current working copy of the proton pack.
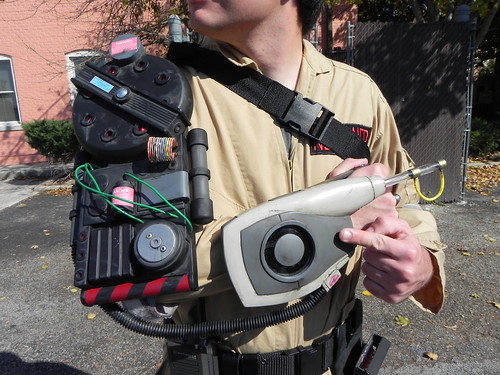
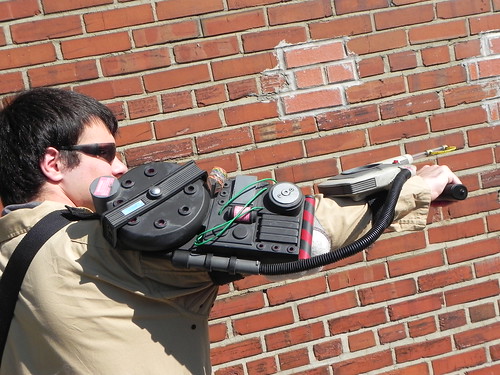
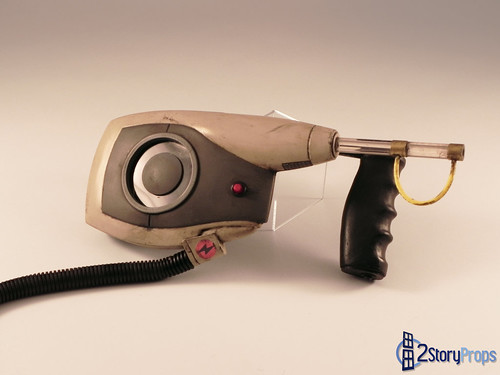
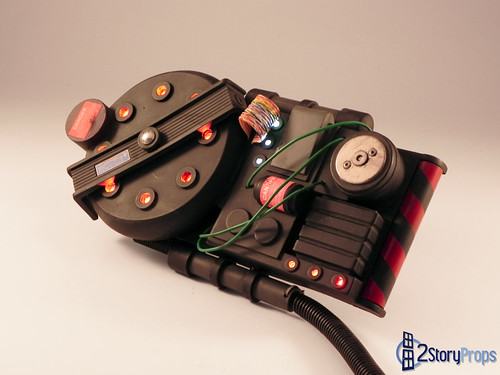
After all the components were built and cast, all that was left was to paint it, detail it, and assemble it. After it was painted, Wayne installed some LEDs in the top portion of the pack. We were rushed for time due to an upcoming photoshoot with Dim Horizon at Sloss Furnace, so the forearm unit went without electronics. One thing I wanted to make sure was in place was the correct style on/off button. As it is in the comic book, they turn on the proton packs by pushing a little button on the front of the forearm unit. It's a small detail, but it's fun in that there are no fancy hidden switches or anything to it. Just push it and the lights come on. Not terribly complex at all, but it's still a fun effect.
Check out the full gallery here:
Again, sorry for all the skips and lack of certain photos. This post really didn't flow like I had hoped, but I hope you can gleam some usable information from it. Four blog posts in a week really took a lot out of me, especially since I lost steam after that last one. But Wayne will take over for a bit with a Dragon*Con write-up and perhaps another build log here shortly, so stay tuned next week for more updates!
Awesome, You should make and sell these as this looks awesome!
ReplyDeleteNice work by the way, it was cool to see this build!
ReplyDelete