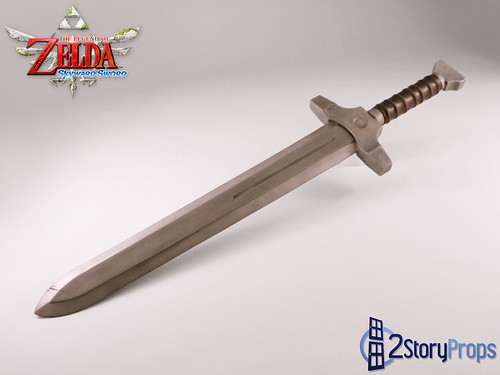
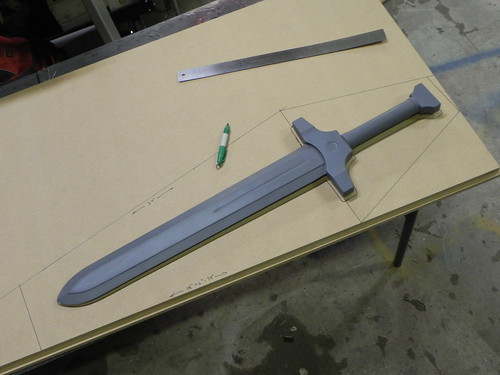
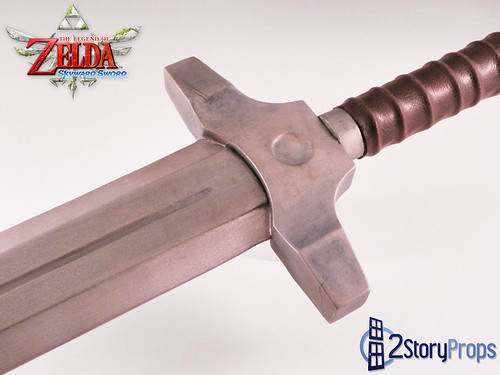
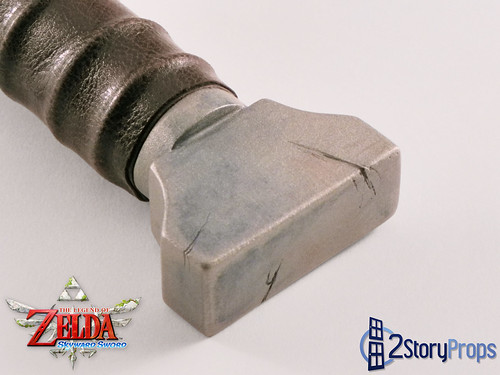
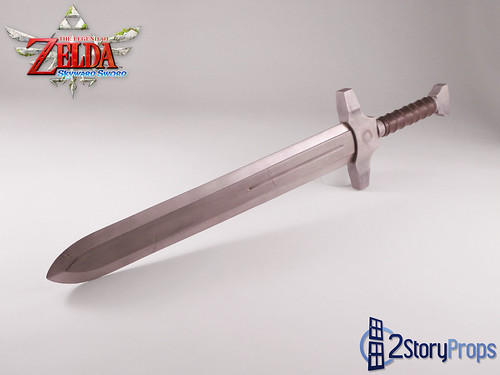
Technically, this is the “Standard-Issue” Skyloft Knight’s sword in Legend of Zelda: Skyward Sword, but to keep thing’s simple I’ll be referring to it as “Pipit’s Sword” since he’s the only character you can see up close using this specific sword. Knight Commander Eagus has a variation of this sword that has a longer, gold cross bar, but this build was the generic one so, again, I’ll just be calling it “Pipit’s Sword” for all intents and purposes.
So Skyward Sword is my favorite Zelda game ever, topping out Link to the Past because of the hands-on aspect of the game and the overall painterly quality on top of Nintendo’s current graphic style. While I was playing it, I knew I had to make some props from it. I decided on my three favorite weapons: Pipit’s Sword, the Goddess White Sword, and the Scattershot. Pipit’s sword would be my first bladed weapon prop ever. I’ve always stayed away from them because I’ve always heard of stressful scenarios regarding conventions and fake bladed weapons (though after having gone to several conventions since I became a prop builder, I can say I no longer see that as a problem), and because I’ve just never needed one for a costume I was working on. So making a bladed weapon was a learning experience for me.
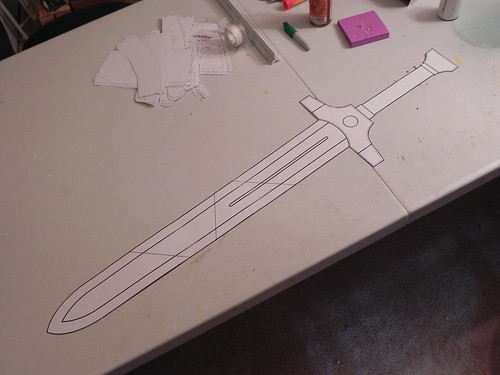
I began by making life-size blueprints in Adobe Illustrator. The blueprints for this specific prop were derived from several separate sources. I don’t have any sort of TV capture card, so I can’t take screen captures from my TV. In order to get the exact source materials I needed, I had to take photos of my TV screen – and believe me, trying to take photos while maintaining a certain view with the Wiimote is not an easy task! The sources came from Pipit walking around outside with the sword sheathed and slung over his shoulder (used for the hilt design and assumed proportions of the blade-to-hilt ratio), and Knight Commander Eagus’ sword for the blade design. This one had some guess work to it, but I’m fairly certain the final result of my work is what it would have looked like if we got to see Pipit in action.
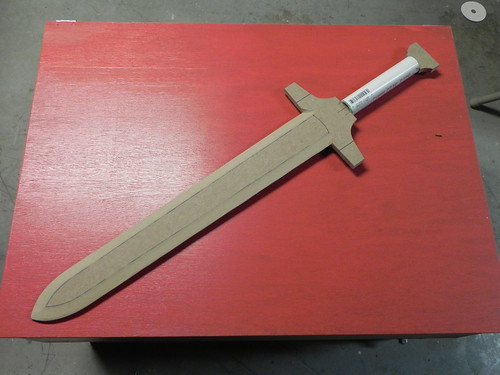
The blueprints were transferred to a sheet of MDF, which would serve as the base for the master. I was fortunate in my scaling in that a section of PVC tubing was able to be used for the base of the hilt, and that was added by cutting the MDF hilt apart and then permanently reassembled much farther down the line.
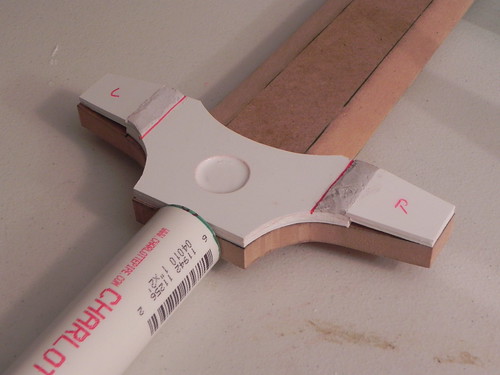
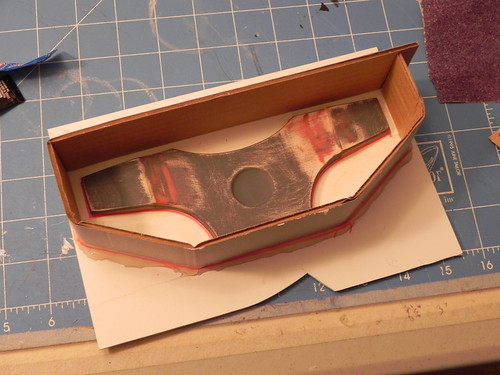
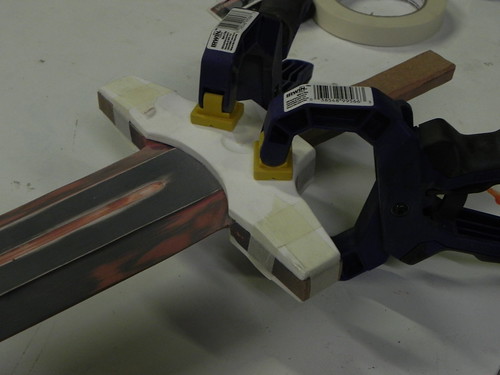
The cross bar (and I apologize if this is not the correct term – I’m not up to speed on my sword anatomy!) was made using the blueprints and layering several layers of sintra together. Gaps were filled in with clay, and then the piece was molded so I could cast two exact copies (one for each side) to be affixed to the MDF cross bar.
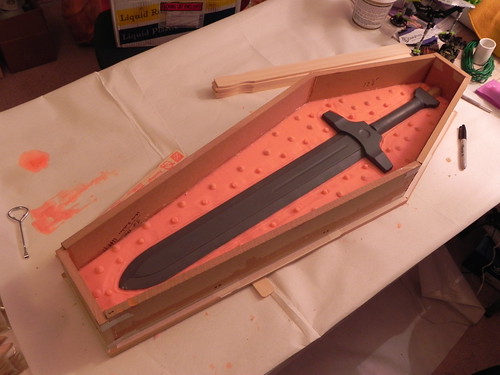
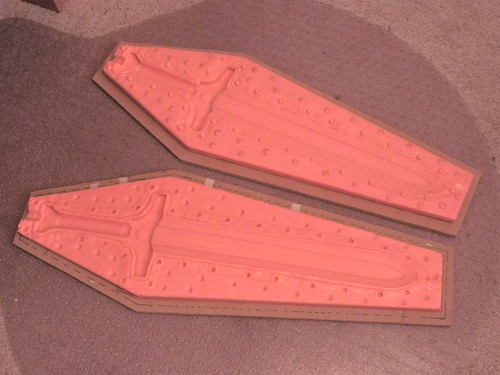
Other details, like the thickness of the pommel and the flat portion of the blade were added by attaching thin layers of ABS plastic (left over from past vacuum-forming projects) to the MDF core. I intended for this sword to be molded, so after the master was completed, I proceeded to build the mold out of Smooth-On’s Rebound 25.
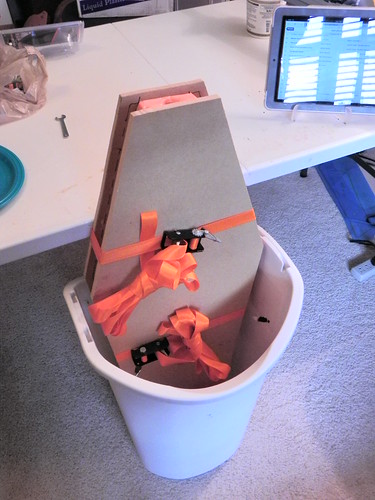
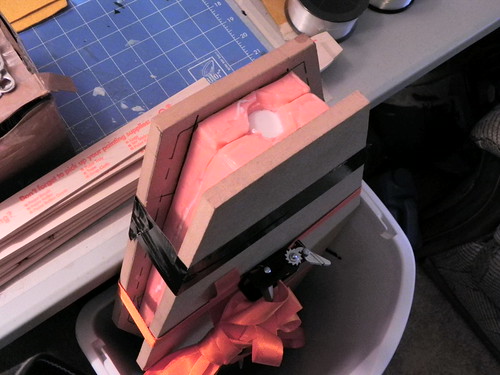
Once the sword was molded, I realized that there were several flat surfaces that could collect bubbles during the casting process. To deal with that, I emptied out my craft room trash can and used it to rock the mold around while casting the resin (it looked like I was ball room dancing with a heavy trash can when I was casting the swords). This also doubled as some extra protection from possible leaks during the casting process.
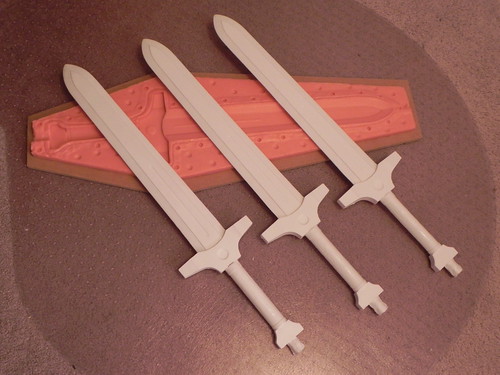
Castings were made out of Smooth-On’s Smooth Cast 300 resin. Though it’s not their lightest resin, the castings are still nice and light for their size, and really really fun to swing around like an idiot. Haha! I decided that I would donate a set of my Skyward Sword props to the Child’s Play charity auction dinner that will happen in December of 2012, so I needed to paint one up and get it out of the way for later prop builds. I went for a straight mix of realism and Skyward Sword water coloring influence. The grip is rather awkward, though. According to the game graphics, it's not a single wrap spiraling down the hilt - it's really just ribbed. So to achieve that look, I wrapped several short lengths of some thick gauge wire around the grip and then stretched some nice furniture vinyl over it. I'm rather happy with the result.
Hello out there! We've been bad. We haven't been updated out blog like good little prop builders. But alas, it's not for lack of want! We've been busy. Very busy. I suppose it's a good thing that we're too busy building stuff to write out some blog posts, it's just unfortunate that we don't have the time to keep this thing as up-to-date as we'd like. So for that, we humbly apologize.
But fear not! Dragon*Con 2012 is right around the corner. We have one major project that will be making an appearance at the convention, and possibly a few smaller ones, but otherwise it's been a quiet year as far as heavy costume builds go. We've got a few interesting prop builds down this year, though, and we'll definitely be making a few blog posts about that at some point in the near future, so stay tuned!
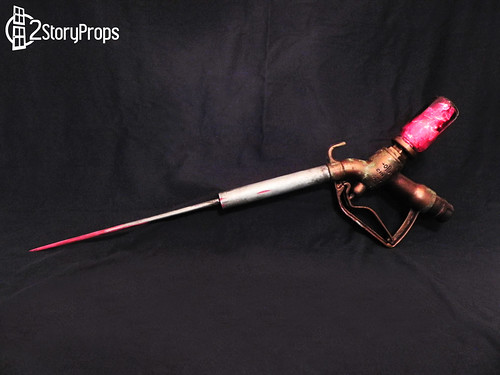
When I started work on subject Delta, I really wanted to have someone dress up as a Little Sister to go along with the suit, but I did not find anyone willing or able to take the role before the convention. However for an upcoming photo-shoot with Delta and the RCGB at the sloss furnace a friend of ours has volunteered to make the dress and be the Little Sister, so I finally have an excuse to build the Adam Syringe.
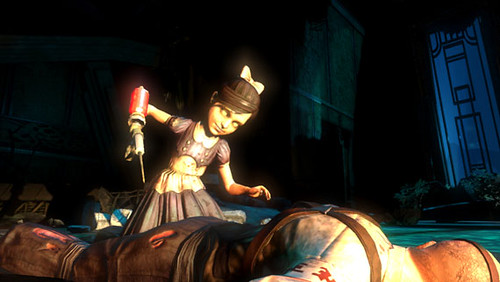
For those of you unfamiliar with the game, the syringe is used by the little sisters to remove Adam enriched blood from the corpses in Rapture where the game is set. The girls plunge the needle into a body, and then drink the blood so the sea slug that has been implanted in them can process the Adam into a pure compound. It’s the Adam in the Little Sisters that cause splicers to want to kill them, hence why the Big Daddies were created to guard them. In Bioshock 2 (Delta’s game) this becomes an important game mechanic as you have to protect your little sister while she is gathering Adam.
Little Sister Gathering Adam
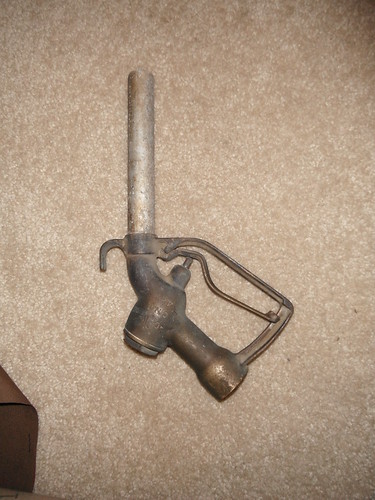
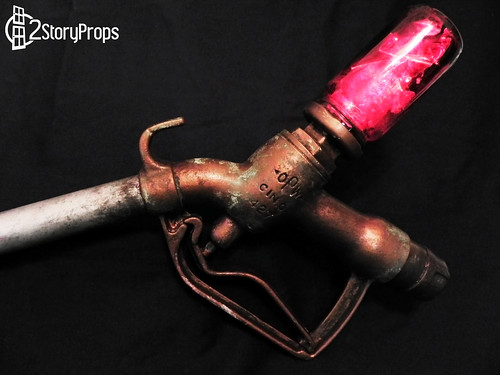
The syringe started off as an antique gas pump handle I found on eBay. Based on some research of similar models, I am fairly confident that this handle is somewhere between 60 and 80 years old. In case you really need to know, the handle moves, but it no longer functions as a water tight valve.
Old Gas Pump Handle, almost as old as my grandparents.
I apologize for the lack of development pictures as my camera broke and I am waiting for it to come back from the manufacturer. I will try to explain the process as best I can in case you are looking to make one too.
To prepare the handle for modification, I took it to the local car wash and pressure washed it to remove the several decades of grime that formed on it. After it was cleaned it was coated with primmer to prevent future corrosion.
The handle end that would have attached to a hose was plugged using a piece assembled from a ¾” pipe clamp and short nipple. Since the piece could not fully thread into the handle, a PVC sleeve was made to cover the exposed threaded area.
Base of the Syringe with Cap and Jar
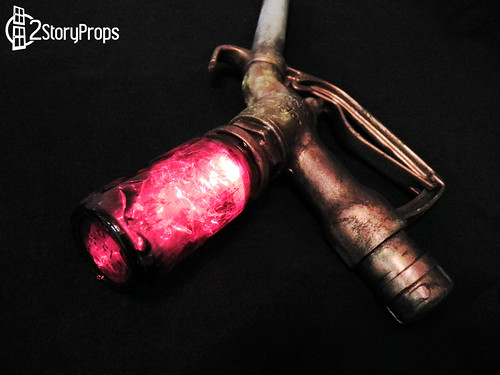
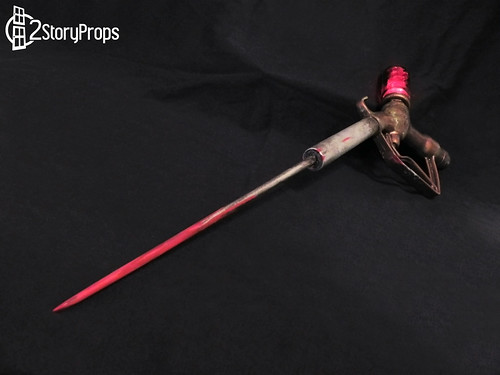
After searching high and low for a suitable jar, I found one that worked at the local grocery store. It is a 3.5 floz container of Mario Imported Cocktail Onions. The label was removed with mineral spirits. Many people who have made syringes typically use Gatorade for the Adam inside. I opted not to use a liquid as I did not want to worry about leaks. Instead, the inside of the jar is painted with red spray tint and several pieces of red film were crumpled and put inside. The cap of the jar was modified to accept a fitting from Home Depot, with the other end going into a hole drilled into the gas handle. The handle, fitting, and lid were epoxied in place. A single super bright LED was wired through the fitting and connects to a 3VDC battery in the handle.
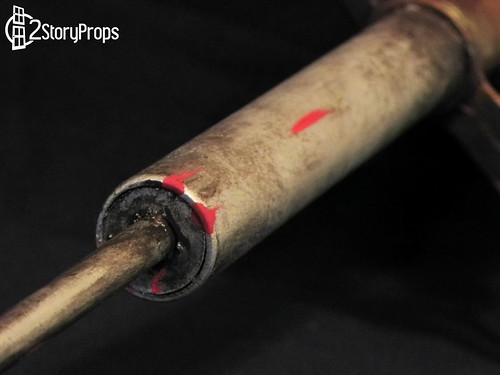
The needle started off as a 3/8” dowel. The taper was created by chucking the dowel into a hand drill and then spinning it while holding a piece of sandpaper around it, basically making the drill a lathe. The dowel was centered in the nozzle with ¼” balsa and capped with a washer.
Dowel and Washer
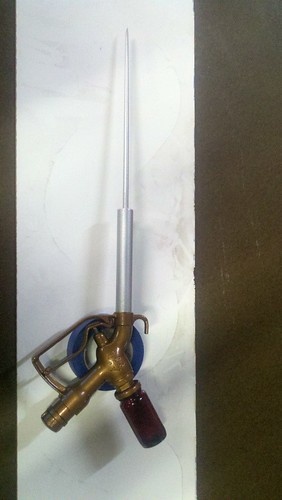
The entire assembly was painted with Krylon Hammer paints and then weathered with acrylics using the same method we used on Delta. Before people start to point this out, I am fully aware it is still missing the baby bottle top. This was left off due to weather and time constraints.
Fresh Paint
Final Product
Like I mentioned earlier, this was made for a photo shoot with Dim Horizon Studio this weekend with Subject Delta as well as the Rocket City Ghostbusters. We are looking forward to getting some awesome pictures and will be sure to post them once they are available.
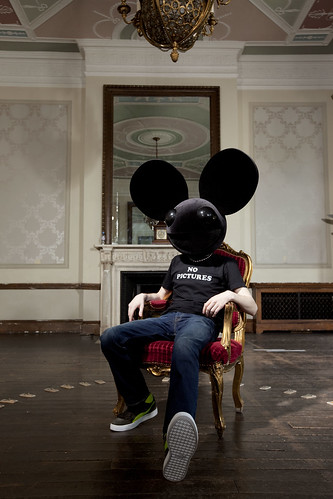
Even if you are not familiar with his music, you have probably seen one of his iconic heads somewhere. Deadmau5, pronounced “dead mouse”, is a Canadian house musician famous for his elaborate stage shows and unique electronic music. Instead of just summarizing his Wikipedia bio, the best way I can describe him is that he is the polar opposite of Daft Punk; instead of the mysterious, formal, and secluded image of Daft Punk, Deadmau5 makes his personal life widely available to the public with web cast, and regularly updates his facebook and twitter accounts.
Besides completing our 2SP masked musician collection, one of the aspects I like about the helmet is that it is worn very casually. Most of our other projects require a specific ensemble and require a second person to get them on. Even Daft Punk with the tuxes requires a second person to button and unbutton the sleeves. Deadmau5, on the other hand, can be worn with a tee shirt and taking the head off isn’t out of character. In other words, it is an impressive costume to have when you want to turn heads without being too elaborate.
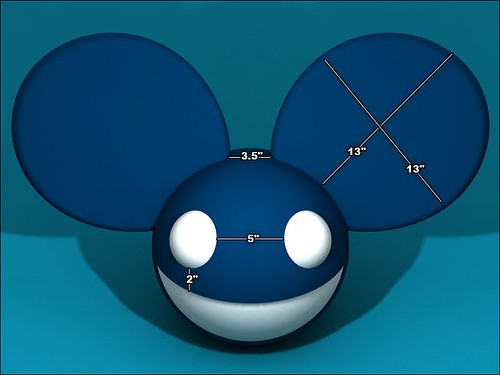
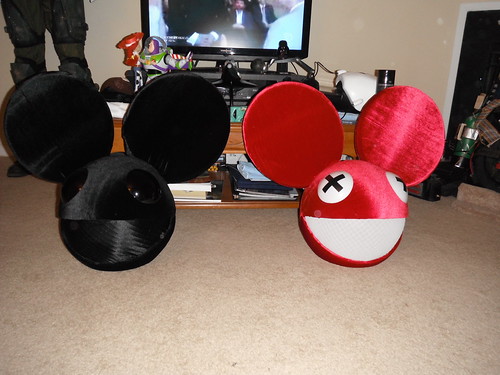
The project started off with research. A lot of people have attempted to make mau5 heads with various levels of success. One of the interesting things about the head is that there are pictures online showing how the original was made, and deadmau5 himself even put out some basic dimensions. I’ll warn you right now that some of the dimensions are not correct and I will point them out through the post. As of this post I have built 2 heads, a black one and a red one. The construction is almost identical so I will be going back and forth with construction pictures as needed.
One of the three dimensional drawings by deadmau5
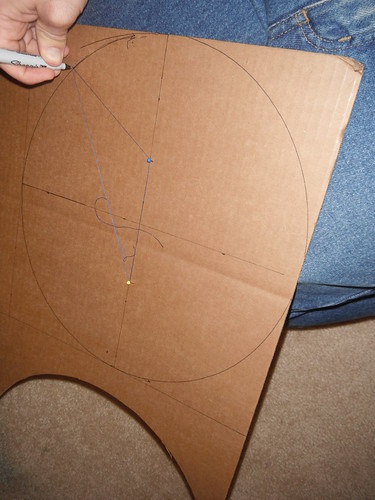
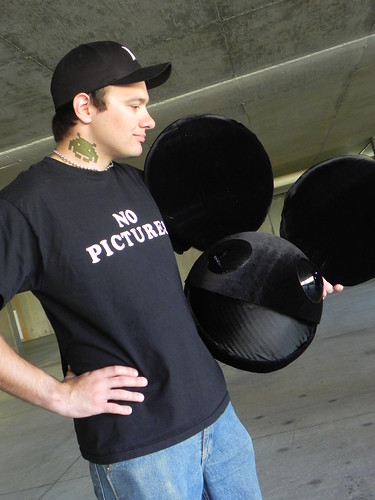
Our build started by creating a cardboard template for the ears. Based on the dimensions I decided to make the ears a 13” x14” oval. Using the tread and pin method the oval was inscribed on the cardboard and cut out. A 14” circle, the outer diameter of the head, was cut out and used as a guide for the curve on the bottom of the ear template. Note that the center of the ear’s base to the ear tip is 13” as stated in the dimensions.
Drawing the oval for the ear
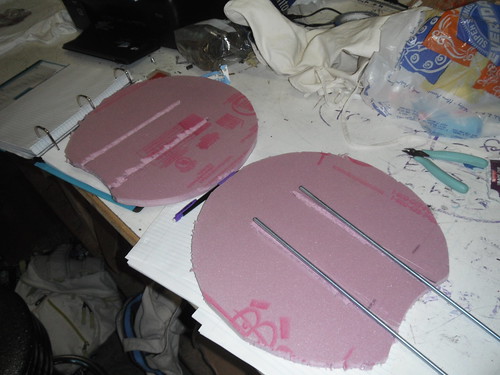
The ears were made using ½” thick pink insulation foam. This stuff is really light and does not leave particles like floral foam. Using the template, 4 pieces were cut out and grooves put on the inside for two ¼-20 threaded rods. Epoxy was laid in the grooves and then each half of ear was joined with spray adhesive. When the glue dried the outer edge was shaped with a rough sanding sponge.
Ear Halves and inner rods
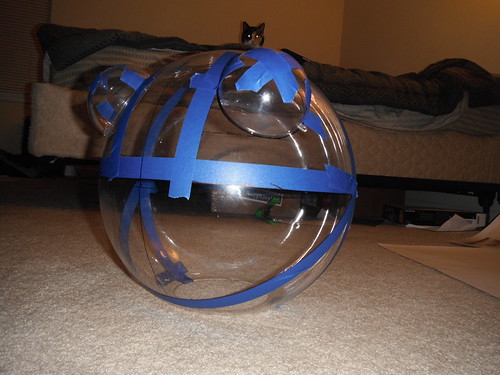
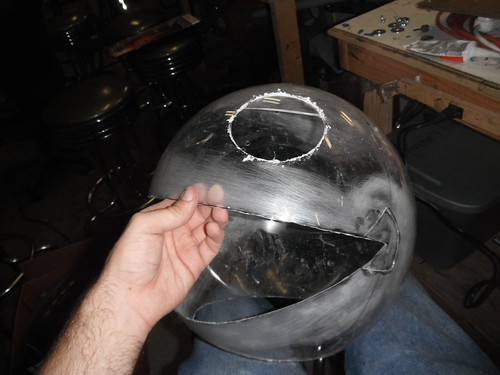
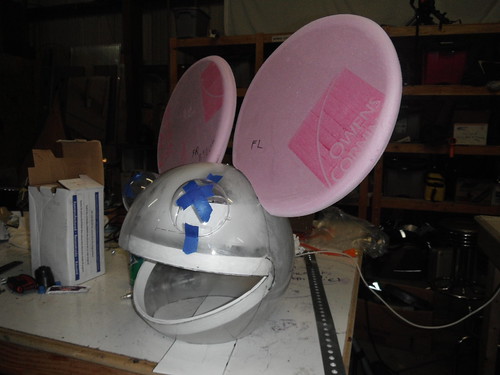
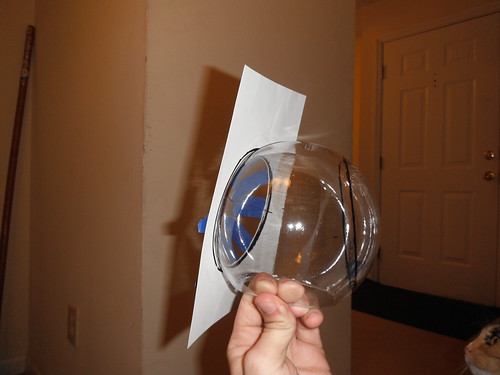
The head is made from a 14” acrylic globe. Using string, measuring tape, and masking tape, the lines for the mouth, eyes, and ears were drawn onto the globe. While the dimensions say the ears are 15 degrees back from the top lip, most heads have them at 90, which is what I did with mine. The neck hole is recommended to be 8” x 7”, but I had to make mine 9” x 8” in order to get my head in and out of the globe. With everything marked the globe was trimmed with a dremmel to the correct shape. Reinforcement was added to the corners of the mouth to prevent cracking at the newly created stress point. I strongly recommend using the excess acrylic cut from the neck hole for reinforcement as this is the thickest part of the globe.
Drawing the cut pattern on the head
Trimmed Globe
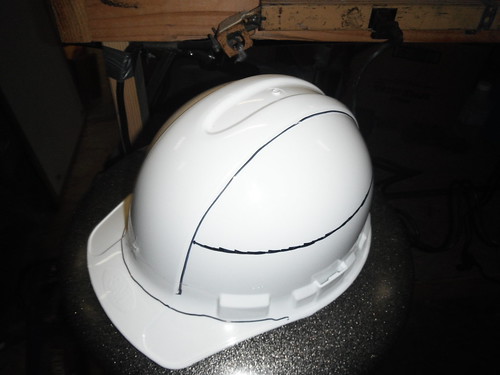
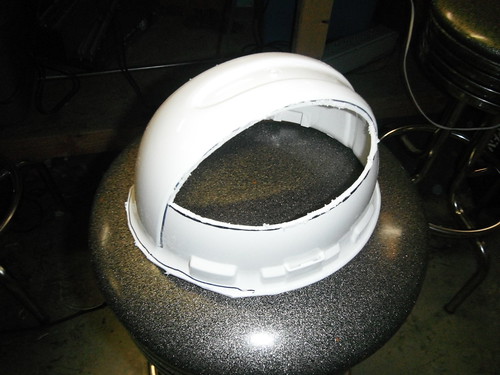
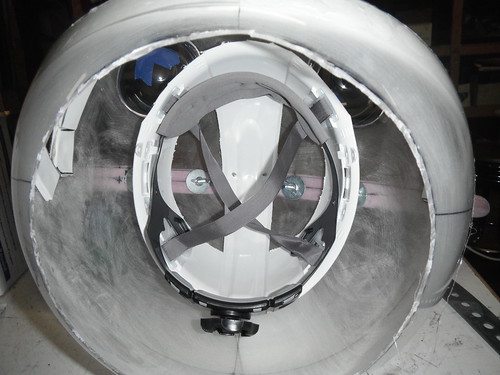
To allow the globe to sit on my head (and other people as well) I installed a hardhat inside. The sides are cut to allow access to the wing nuts on the ears so they can be taken on and off. The hard hat is attached to the globe using two #8 bolts going through the top of the globe and threading into the hard hat.
Original Hardhat
Trimmed Hardhat
Hardhat installed. Notice the wing nuts for the ears.
The lip was created using 2 layers of 3mm foam about a 1” wide and attached with hot glue.
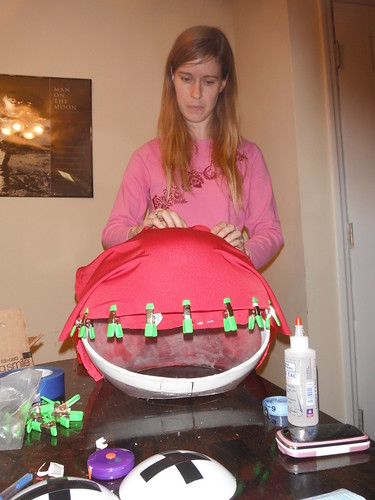
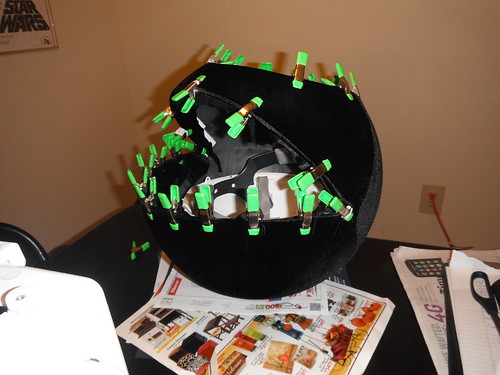
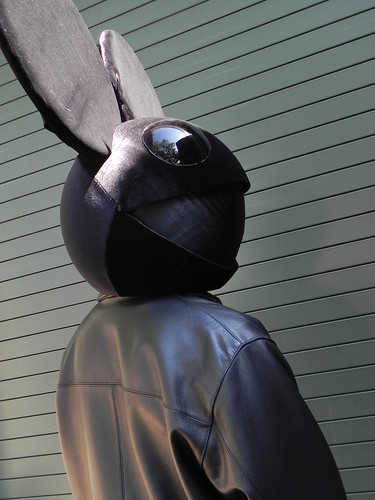
Covering the head is a bit tricky. The fabric used is called 4-way stretch velvet and you can find it (in limited colors at most fabric stores. For what it is worth, Hancock here in Huntsville had the best selection compared to the other local fabric stores. Even through the fabric stretches well, it is still a pain to work with to cover the head with the fewest seams and wrinkles. For the black head I sewed two 22” circles together halfway and stretched it over the head, cutting and stuffing fabric into the mouth until the cloth was smooth. Eventually I had to cut the fabric around the bottom jaw and add two seams. On the red one, with the help of a friend who knows how to sew, we used a 17” x 20” ellipse which wasted less fabric and gave better results, but still needed two seams. To hold the fabric in place I used a bunch of tiny clamps that you can pick up at home depot for a few cents apiece. The real mau5 head has only one seem, so I would recommend finding someone good with fabric to help you if you need total accuracy. The ears were covered by making “pillow cases” and slipping it over the foam.
Crystal putting skin on the red head
Black head with fabric clamped in place.
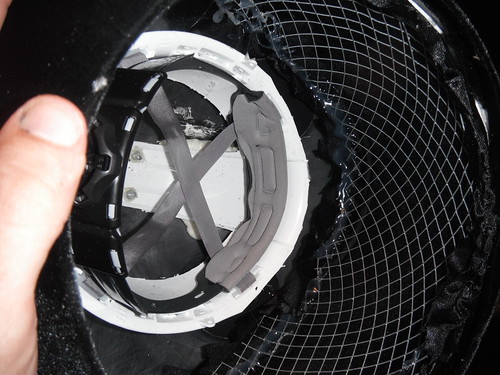
The visor is made with chicken wire from home depot. Basically, you cut an ellipse large enough to cover the foam lips and bend it to a spherical shape. The fabric for the visor is then glued to the wire and the whole assembly glued into the head. All adhesive on this project is hot glue.
Installation of the visor in the black head.
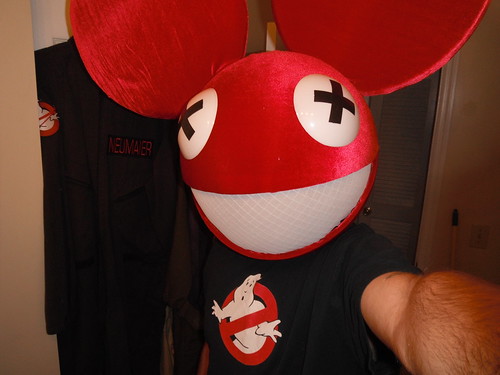
The eyes were made using 6” plastic globes and cutting a 4.5” circle from them. (Each globe will give you two eyes). For the black head, I used a clear globe and coated the back with VH nightshade. For the red head I used a white globe and then added the “X”s with electrical tape. The eyes were then hot glued to the head.
Cutting circles from the globe.
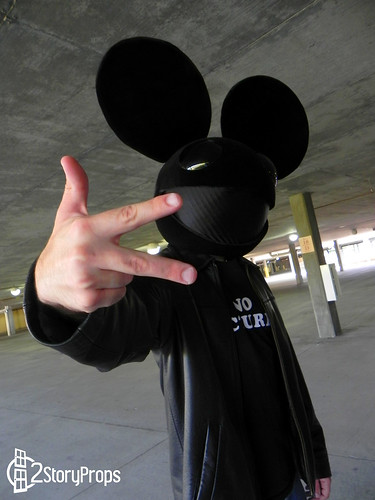
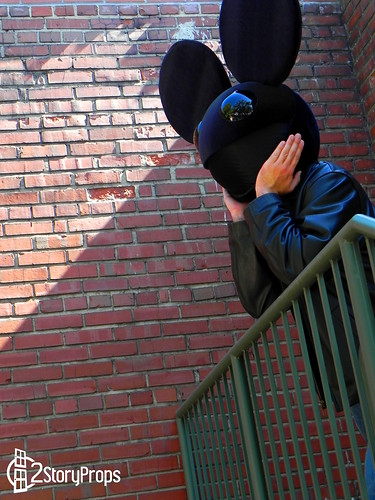
Final mau5 heads
Red
And Black
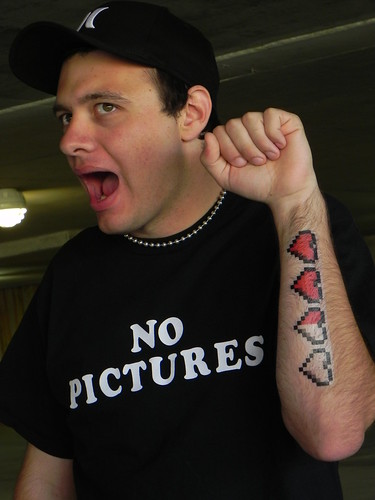
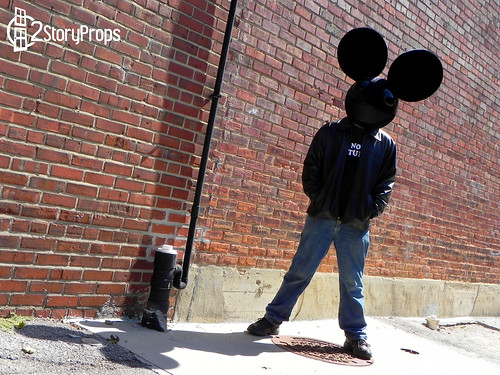
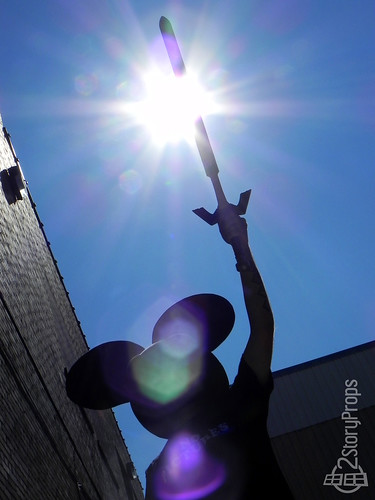
To complete the “Costume” I added temporary tattoos, a shirt with iron on letters, a ball chain necklace, and a Hurley cap when the head was off. Deadmau5 is also a huge Zelda fan, and we happened to have a master sword on hand for a few glamor shots with the black head. We will update when we have pictures from our Daft Punk/ Deadmau5 shoot using the red head.
This project is a really fun build and I am actually planning to make a few more of these. If you are trying to make your own I hope you found this thread somewhat helpful.
And no, I have no plans to make this version any time soon:
Warning: I like to type. Get your reading glasses out. This one's a doozy.
INTRODUCTION
So Dragon*Con 2011 has come and gone, Venturoos. Despite a year's worth of intense research and sculpting on my Daft Punk helmets, I was totally surprised (read: blown away) by the outrageously positive response my Monarch's Henchmen costumes received at the convention. I figured, you know, shiny shiny, Daft Punk, slick tuxedos. It's a sure bet, right? Nope! With near surgical precision and timing (and no small amount of devious...ness...), the Monarch stole the show, and it was his minions that did the dirty work.
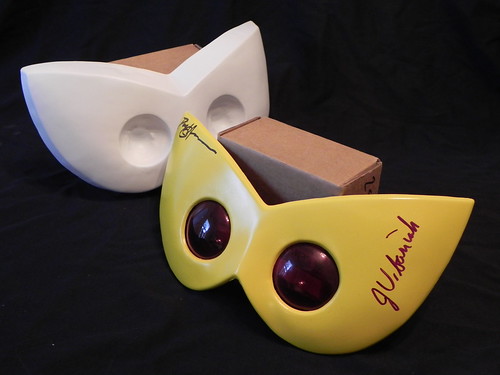
Wait, wait. Really? Secondary characters from a show that's a few years old now... surely these costumes must be overdone! Ah, but not done the 2StoryProps way! Ok that was exceptionally cheesy. In particular, it was my vacuum-formed masks that really got all the attention. You see, most people are happy with trimmed cardboard or bent plastic, and it certainly achieves the cartoony look. However, I set out to make the highest quality mediocre costume I could, and I wanted it to have some real-world depth to it. I'd like to think that the costume as a whole caught everyone's attention, but the fact that everyone kept complimenting the vacuum-formed masks really speaks volumes about the methods used here.
This tutorial will take you through the process, methods, and tools used to create your own vacuum-formed Henchmen mask. The powers-that-be have informed me that this is to be an expert-level tutorial, so basic knowledge and skills on power tool usage and safety are required. Also note: You will be using sharp things, so don't stab yourself on my account.
SUPPLY LIST
Tools:
Dremel or other rotary tool with interchangeable cutting/sanding bits
Power sander with 120 grit sandpaper
120-320 grit sand paper (for hand sanding)
Steak knife or bread knife (Really? You betcha.)
Vacuum-forming machine or access to one
Supplies:
HARD green floral foam blocks (the really hard stuff, not the softer powdery stuff)
Toothpicks
Gorilla glue
Bondo or body filler of choice
Your choice of glazing putty (for small pits)
Primer spray paint of your choice
Misc.:
Respirator or dust mask
Safety goggles
Latex or vinyl gloves
Clothes you don't mind getting dirty
SCULPTING THE MASK
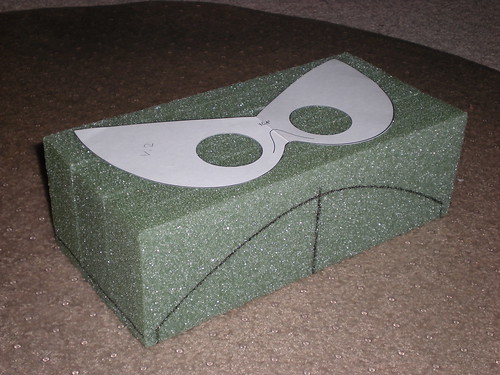
First thing's first - you have to know what you're sculpting. I drew out my design, which I based on several distinct views of the Henchmen mask from the show. I decided on a certain shapes and came up with a quick schematic in Adobe Illustrator. Nothing special about this part, you can just draw it out to scale on some printer paper if you'd like. The point here is that you have something to go by. Since you'll be drawing this directly onto the foam in a later step, go ahead and cut out your drawing (eye holes and everything).
Next you'll want to assemble your foam blocks. Decide how big of a block you need and then glue multiple blocks together with Gorilla Glue. It'd be a good idea to pin them together with toothpicks and bind the blocks up with some tape while the glue dries. Gorilla Glue expands while it cures, so anything you can do to keep those blocks together while the glue dries will be helpful. It'll take a few hours, so go watch some Venture Bros. while you wait. I don't have any photos of this part because it's gluing blocks of foam together. It's not rocket surgery science, people!
After that's done, go ahead and start tracing out your design on the block. Keep in mind, you'll be cutting away a lot of the foam, so keep your template handy so you can redraw it later as you remove material.
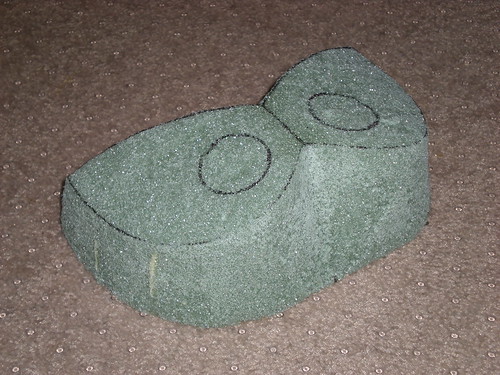
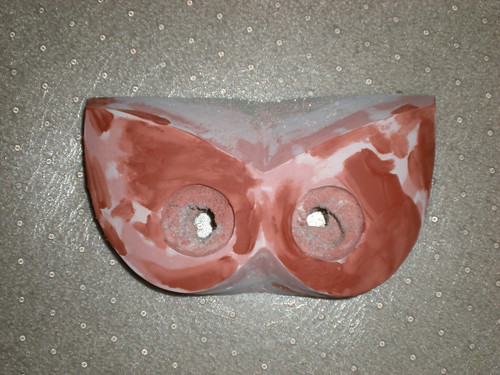
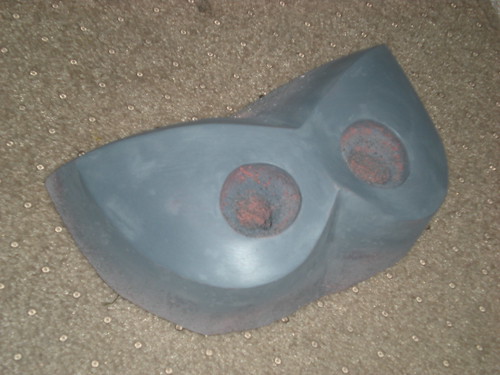
Remember how I wanted that real-world feel? I achieved that by sculpting in curves, giving it a 3D shape in addition to the curve around the face the mask would naturally have. Now this particular floral foam was chosen because it's rather rigid and I knew it would hold up enough under the pressure of a vacuum-forming machine. As such, it takes some elbow grease to sculpt it. So here's where the steak knife comes in handy. You don't have to use a steak knife, but as long as you have some kind of serrated blade that can slice into it you'll be fine. Do your sculpting by shaving off thin layers. Don't get overzealous and try to cut off large chunks. Your blade will only seize up in the foam. You can try power tools, but I've found that hand carving it produces far less debris and dust. At this point you're really only looking for basic shape. You can start to carve in some details (like the curve of the bridge of the nose or the goggle sockets, but if you carve a little too deep in an area, don't worry about that right now.
Next comes the smelly part. Be sure to wear your respirator here. To get the nice, smooth surface on the foam, cover it in Bondo (or any body filler of your choice). You'll want to be sure that it's really ground into the foam, so you'll do it in layers, gradually building up so that you don't see any foam left. While the Bondo cures, you can carve it with a box cutter to reduce any big peaks and smearing streaks. Doing so will help save the sandpaper on your power sander. Give the Bondo a few hours to get rock hard. Keep in mind, Bondo requires certain temperatures and cannot cure above a certain humidity, so be sure to read the package for ideal conditions.
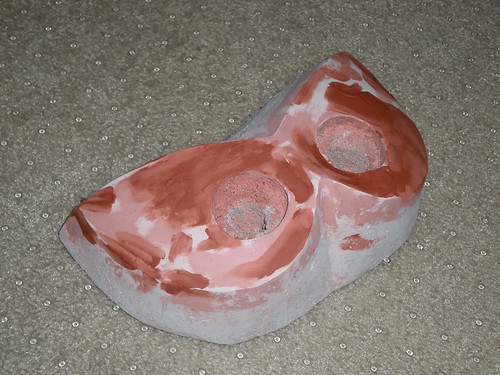
Use your power sander and dremel to smooth the Bondo out into the final shape. When you start getting to the point where all that's left to fill is smaller holes, use the glazing putty to fill in the gaps, and then sand it all smooth. In the photo below, the whitish areas are Bondo, the pink and red areas are glazing putty.
Knowing how vacuum-forming works its critical to the design of your vacuum-forming buck, so you'll need to bore a hole through each eye socket all the way through the foam. The reason behind this is because as the heated plastic is pulled over the buck, it will essentially seal up around the eye sockets. If there is no way for the vacuum to pull the plastic down into the eye sockets, the plastic will remain flat in those areas. So you have to provide a channel for the air to be sucked out the back of the buck. For this particular project, it doesn't have to be pretty since this area will be cut out later, but just be sure that it's there.
Continue sculpting and smoothing with the Bondo until you have your desired shape. It may take you some time depending on your abilities, but be sure you get it nice and smooth. In previous projects we learned that even a bit of dust can cause unwanted peaks in vacuum-formed plastic, so spend some time here and get it really smooth. Spraying it with primer between each smoothing session allows you to see the form in a neutral color, and it helps point out problem areas. You should be wrapping up your sculpt by the end of this stage.
VACUUM-FORMING
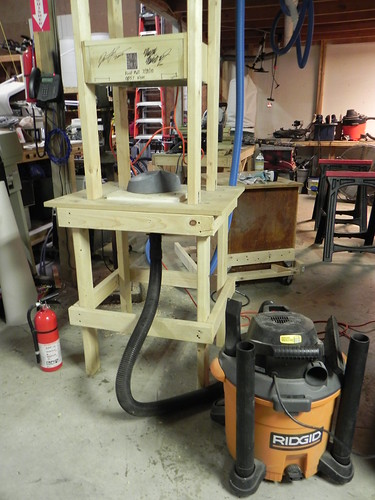
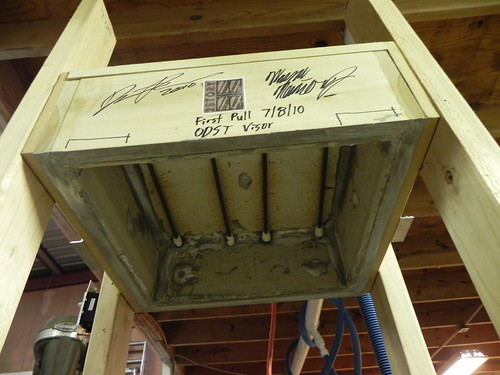
While we did build our own vacuum-forming machine, it was not based on our own design. We followed the build of a friend and fellow prop builder, Volpin Props, to learn how to build our own machine. Since building the machine itself is not within the scope of this tutorial, I will instead refer you to Harrison's blog post on how he built his.
Provided that you have your own vacuum-forming machine (or at least access to one), the next step is to select your plastic. There are lots of vacuum-formable plastics out there, but our projects tend to involve clear PET plastic and white styrene. Either will work for this particular project. For the rest of this tutorial, I will be using white styrene to pull the mask. However, my initial pulls were made in some left-over clear PET plastic from a previous project, and that worked just as well. The eye pieces were also pulled in clear PET plastic, FYI. For your reference, here are some links to the plastics I typically use:
Please note: When selecting plastics, you should always read up on its characteristics. You should always practice safe vacuum-forming. The process involves heating plastic, which releases toxic fumes, so PLEASE be in a well ventilated area and wear your respirator. Also, ALWAYS have a fire extinguisher on hand - if you heat the plastic too rapidly IT WILL IGNITE and make for a very bad day.
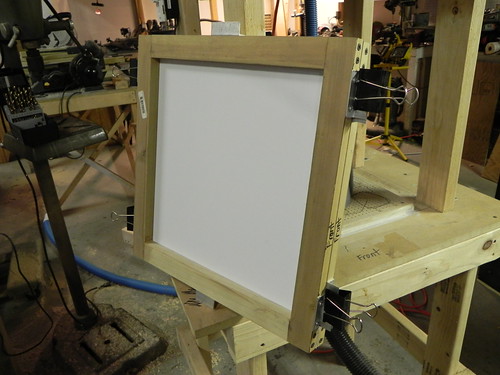
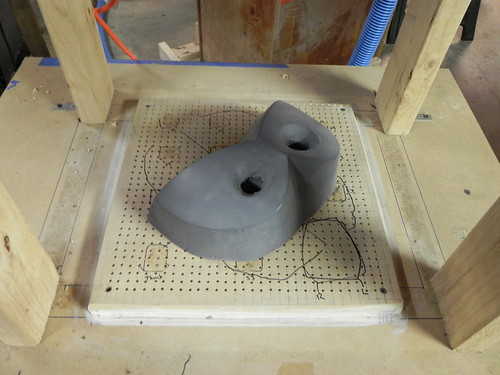
Vacuum-forming works on the basic principle that you are heating a sheet of plastic so that it becomes temporarily elastic enough to be formed over the outside of a 3D shape (a "buck"), pulled into that shape by a vacuum, and allowed to cool in that shape. The buck is removed and then the plastic is trimmed and built into your final piece. Our particular machine has a heating element in the top section that we are able to clamp a sheet of plastic into place underneath it (the plastic itself is held in with a wooden frame), and a vacuum base on the table top that allows us to simply lower the heated plastic down onto.
The heating element.
A plastic sheet clamped into the frame.
The vacuum base with the buck in place.
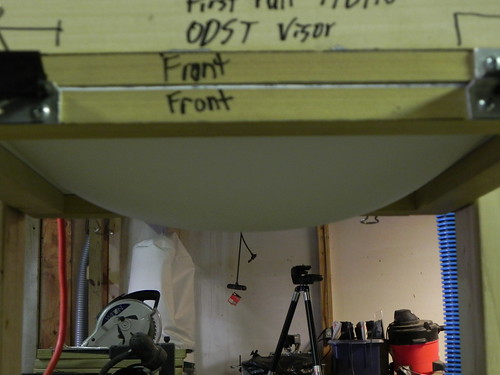
Now because each individual vacuum-forming machine will operate uniquely to itself, I cannot provide any heating times or ideal temperatures for you. That's something you're going to have to play around with on your own. However, I will tell you that it's best to heat the plastic slowly! As I said before, if you heat it too quickly, it can ignite. Aside from that, the important thing is to let the plastic droop. You'll want to let it droop as much as it can, and that allows it to form easily to your buck, and it can prevent a problem I'll refer to later as "webbing."
I've prepared a video of what vacuum-forming looks like. Due to the cluttered background, I chose to focus only on the vacuum base itself. Understand that by the time the video started recording, the plastic had been heating for about 20 minutes or so and the plastic was allowed to reach it's "maximum droopage."
When the plastic is pulled down, it's best to let it sit there under the pressure of the vacuum for several minutes while the plastic cools. Otherwise it may try to spring back a little, and you could lose some definition in the pulled plastic. Generally the plastic cools rather quickly, so once our heating element is warmed up, we can run through several pulls in an hour.
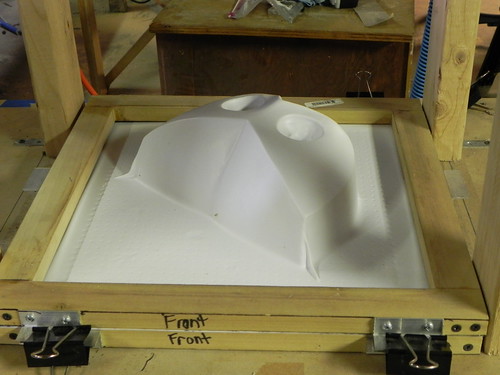
Earlier I referred to a problem I call "webbing." I'm not sure if it's the correct term, but it's what I've been referring to it as. Basically it's what happens when the plastic is pulled over a sharp enough shape in the buck that two sides of the plastic are pulled into each other before they are pulled into the vacuum base. You can't really correct it on the fly, but sometimes you're able to ignore it completely if the webbing doesn't touch the usable portion of the plastic you just pulled. Below is an example of that. You can see where the plastic is forming a fold at the tips of the buck. However, since I'll be trimming the mask quite close to the front face, the webbing on this particular pull doesn't affect the final product.
Unfortunately, at the time I took these photos and shot the video, I didn't have any clear PET plastic with me to pull a set of eye pieces. However, the process is the same. The only difference is that I made a quick mold of my original eye piece model so that I could cast several copies up and pull a whole sheet of eye pieces at once (instead of one at a time).
How you choose to finish your project is up to you. Thinner plastics can be trimmed with shop shears or an X-acto knife, and you can use a Dremel as well. Since my personal masks were thinner PET plastic, I used an X-acto blade to trim the outer edge, and then I used a Dremel with a sanding drum to cut the eye holes out. Wear eye protection when using a Dremel since PET and ABS tend to throw out little chunks of melted plastic when you use a power tool on them. Also be sure to wear your respirator since both PET and ABS are plastics and the fumes from cutting them with power tools are harmful. Top finish up the edges hand-sanding on these kinds of things makes for a nice, smooth edge. I would recommend against using any sort of power sander on these materials because you can end up removing a lot more material than desire really quickly.
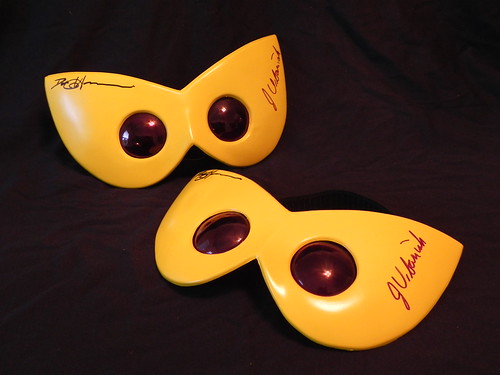
For final assembly, I chose to paint the mask and eye pieces, and then glue the eyes to the mask wit hot glue. The mask was painted with Krylon Fusion "Sunbeam Yellow" (which as close to the particular yellow of the masks in the show as I could find locally) and the lenses were painted with Krylon Stained Glass Red. A black elastic band was attached to the backside of the mask with some J B Weld, and then I lined the nose area with some thin black foam for comfort.
Well I hope this tutorial was informative and scientastic. I wrote it over the course of about 3 days, so I hope it's rather seamless.