
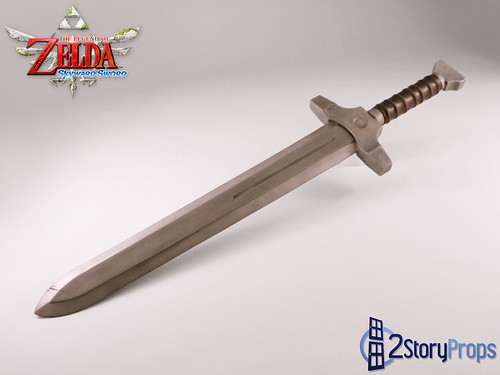
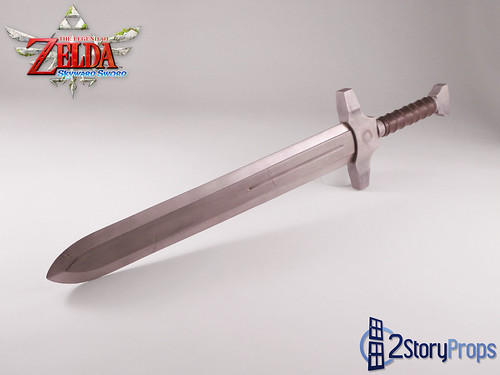
So Skyward Sword is my favorite Zelda game ever, topping out Link to the Past because of the hands-on aspect of the game and the overall painterly quality on top of Nintendo’s current graphic style. While I was playing it, I knew I had to make some props from it. I decided on my three favorite weapons: Pipit’s Sword, the Goddess White Sword, and the Scattershot. Pipit’s sword would be my first bladed weapon prop ever. I’ve always stayed away from them because I’ve always heard of stressful scenarios regarding conventions and fake bladed weapons (though after having gone to several conventions since I became a prop builder, I can say I no longer see that as a problem), and because I’ve just never needed one for a costume I was working on. So making a bladed weapon was a learning experience for me.
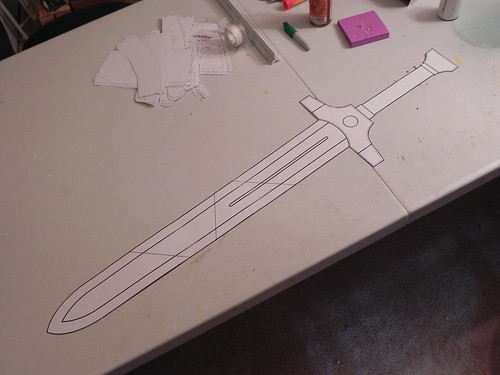
I began by making life-size blueprints in Adobe Illustrator. The blueprints for this specific prop were derived from several separate sources. I don’t have any sort of TV capture card, so I can’t take screen captures from my TV. In order to get the exact source materials I needed, I had to take photos of my TV screen – and believe me, trying to take photos while maintaining a certain view with the Wiimote is not an easy task! The sources came from Pipit walking around outside with the sword sheathed and slung over his shoulder (used for the hilt design and assumed proportions of the blade-to-hilt ratio), and Knight Commander Eagus’ sword for the blade design. This one had some guess work to it, but I’m fairly certain the final result of my work is what it would have looked like if we got to see Pipit in action.
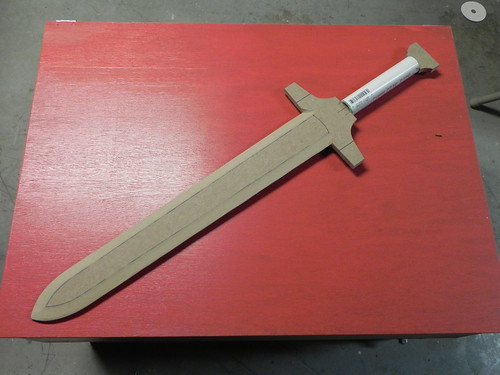
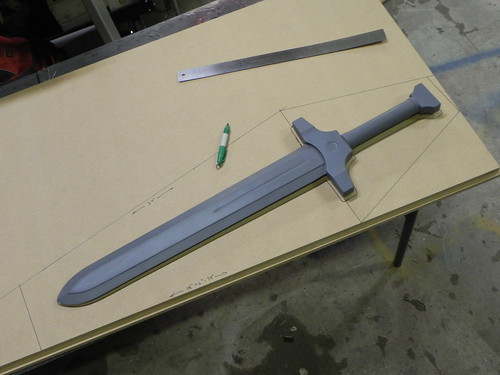
The blueprints were transferred to a sheet of MDF, which would serve as the base for the master. I was fortunate in my scaling in that a section of PVC tubing was able to be used for the base of the hilt, and that was added by cutting the MDF hilt apart and then permanently reassembled much farther down the line.
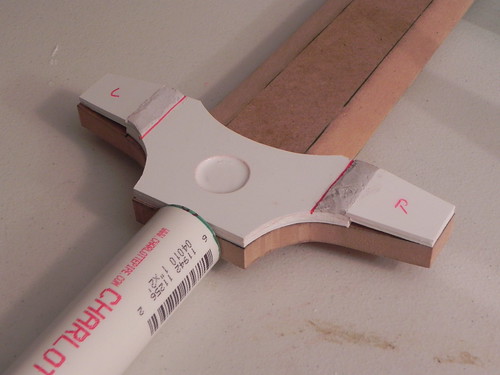
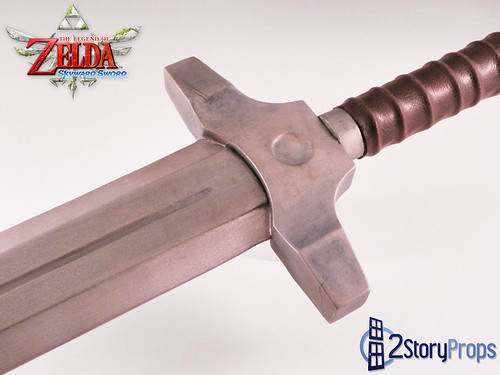
The cross bar (and I apologize if this is not the correct term – I’m not up to speed on my sword anatomy!) was made using the blueprints and layering several layers of sintra together. Gaps were filled in with clay, and then the piece was molded so I could cast two exact copies (one for each side) to be affixed to the MDF cross bar.
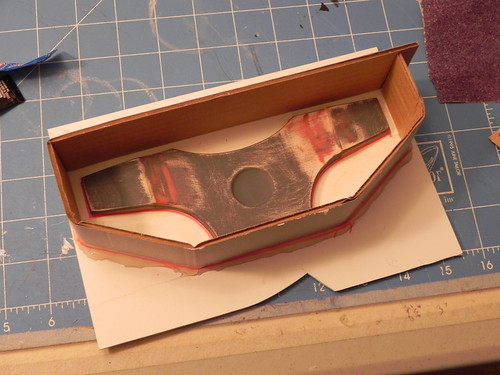
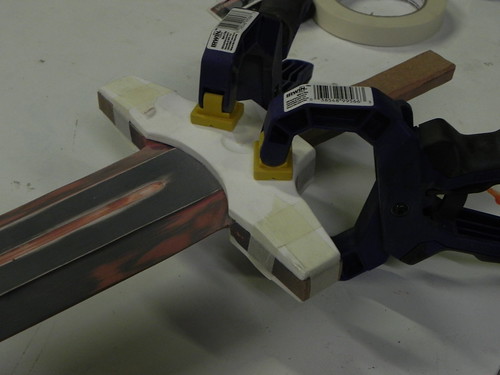
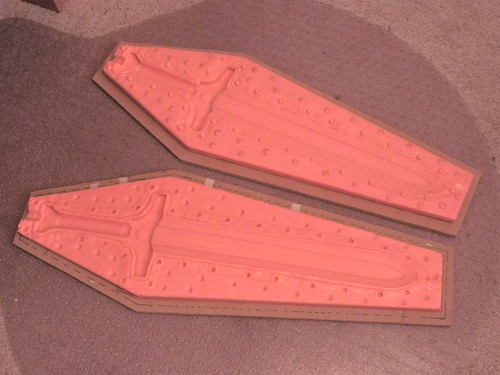
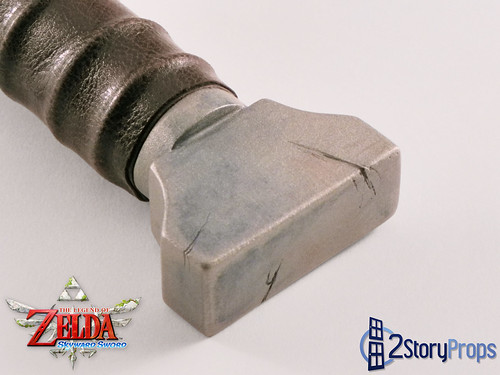
Other details, like the thickness of the pommel and the flat portion of the blade were added by attaching thin layers of ABS plastic (left over from past vacuum-forming projects) to the MDF core. I intended for this sword to be molded, so after the master was completed, I proceeded to build the mold out of Smooth-On’s Rebound 25.
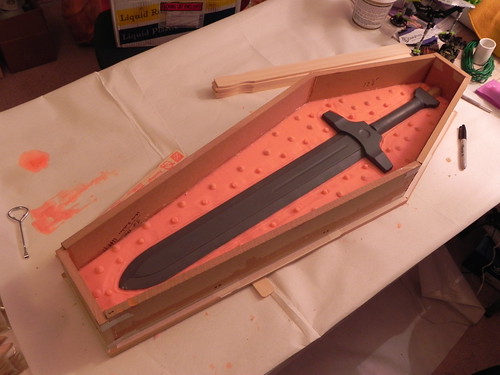
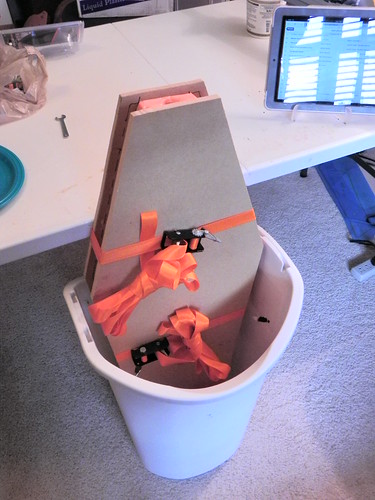
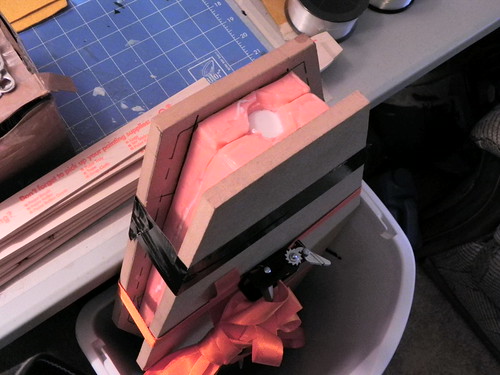
Once the sword was molded, I realized that there were several flat surfaces that could collect bubbles during the casting process. To deal with that, I emptied out my craft room trash can and used it to rock the mold around while casting the resin (it looked like I was ball room dancing with a heavy trash can when I was casting the swords). This also doubled as some extra protection from possible leaks during the casting process.
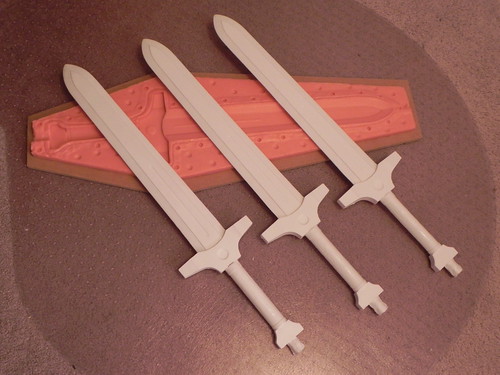
Castings were made out of Smooth-On’s Smooth Cast 300 resin. Though it’s not their lightest resin, the castings are still nice and light for their size, and really really fun to swing around like an idiot. Haha! I decided that I would donate a set of my Skyward Sword props to the Child’s Play charity auction dinner that will happen in December of 2012, so I needed to paint one up and get it out of the way for later prop builds. I went for a straight mix of realism and Skyward Sword water coloring influence. The grip is rather awkward, though. According to the game graphics, it's not a single wrap spiraling down the hilt - it's really just ribbed. So to achieve that look, I wrapped several short lengths of some thick gauge wire around the grip and then stretched some nice furniture vinyl over it. I'm rather happy with the result.
Check out the full album here:
http://www.flickr.com/photos/2storyprops/sets/72157628896444349/
This prop will be available for auction at the Child’s Play charity auction dinner in December of 2012, along with my two other Skyward Sword props.
I can't believe this is the first comment. Absolutely amazing work. If I had a hat, this is where I would take it off ;)
ReplyDeleteHow do I know what to do there are no captions under pictures...
ReplyDelete